
In This Article
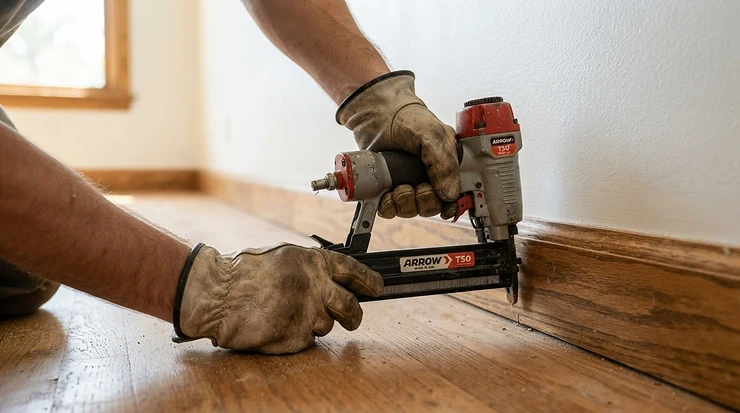
A finish nailer is a pneumatic or battery-powered tool that drives thin, collated nails through trim, molding, and cabinetry, leaving a small, easily fillable hole instead of a visible hammer dent. The whole debate around 15 gauge vs 16 gauge finish nailer setups comes down to one trade-off: thickness versus discretion. That’s it. That’s the entire argument that’s been fought out in comment sections and job-site trucks for the last twenty years.

Here’s the thing nobody tells you at the tool counter: there’s no universally “correct” answer, only a correct answer for your specific baseboards, your specific cabinets, and your specific tolerance for wood filler. A 15 gauge nail is roughly 30% thicker than its 16 gauge cousin, which sounds like a rounding error until you’re trying to pin a warped piece of crown molding to a stud that’s fighting you the entire way. Thicker wire means more holding power and a nailer that can often swing at a wider angle for tighter corners. The thinner 16 gauge nail, on the other hand, leaves a smaller, less noticeable hole and tends to be gentler on delicate stock.
This guide walks through seven real, currently available nailers that represent both camps — pneumatic and cordless, budget and professional-grade — with honest analysis of where each one earns its keep. We’ll also dig into nail holding strength, splitting risk, head visibility, and which gauge actually makes sense for baseboards versus cabinets, because a lot of buying guides gloss over that distinction and it’s arguably the whole point. According to the Wikipedia entry on American Wire Gauge, gauge numbering is inversely proportional to diameter — a detail that trips up more first-time buyers than anything else on the spec sheet.
Quick Comparison Table
| Nailer | Gauge | Power Source | Price Range | Best For |
|---|---|---|---|---|
| NuMax SFN64 | 16 GA | Pneumatic | Around $60-$90 | Budget DIYers |
| Craftsman CMCN616C1 | 16 GA | Cordless (V20) | $150-$180 range | Cordless on a budget |
| Bostitch Smart Point 16GA | 16 GA | Pneumatic | Around $180 | Tight corners & visibility |
| DEWALT DCN660B | 16 GA | Cordless (20V MAX) | $180-$220 range (bare tool) | Cordless value for pros |
| Metabo HPT NT65MA4 | 15 GA | Pneumatic | $150-$190 range | Lightweight all-day use |
| Makita AF635 | 15 GA | Pneumatic | $220-$260 range | Premium build quality |
| Milwaukee M18 FUEL 2743-20 | 15 GA | Cordless (M18) | $300-$330 range (bare tool) | Maximum cordless power |
Looking at this lineup, the split is almost even between the two gauges, and that’s intentional — it mirrors how the pro trim-carpentry world actually shops. Budget-conscious DIYers gravitate toward the NuMax SFN64 or Craftsman CMCN616C1 because entry cost matters more than the last 10% of holding power. Meanwhile, remodelers who need serious bite for exterior-grade trim or thick stair components lean toward 15 gauge options like the Makita AF635 or Milwaukee M18 FUEL 2743-20, accepting the trade-off of a slightly larger nail hole in exchange for a fastener that isn’t going anywhere.
💬 Just one click — help others make better buying decisions too!😊
Top 7 Finish Nailers: Expert Analysis
Before diving into individual reviews, here’s the detailed spec breakdown that separates these seven nailers on paper — because raw specs mean nothing until you translate them into “will this survive my Tuesday.”
| Nailer | Nail Length Range | Weight | Magazine Angle | Actuation Modes |
|---|---|---|---|---|
| NuMax SFN64 | 1″-2.5″ | Approx. 4.5 lbs | Straight | Sequential |
| Craftsman CMCN616C1 | 1″-2.5″ | Approx. 9.6 lbs (w/ battery) | Straight | Sequential |
| Bostitch Smart Point 16GA | 1″-2.5″ | Approx. 4.6 lbs | Straight | Selectable (sequential/contact) |
| DEWALT DCN660B | 1.25″-2.5″ | Approx. 6 lbs | 20° angled | Selectable (sequential/bump) |
| Metabo HPT NT65MA4 | 1.25″-2.5″ | Approx. 4.2 lbs | 34° angled | Selective actuation |
| Makita AF635 | 1.25″-2.5″ | Approx. 4 lbs | 34° angled | 2-mode selector |
| Milwaukee M18 FUEL 2743-20 | 1.25″-2.5″ | Approx. 6.3-7.5 lbs | 34° angled | Selectable |
That weight column tells its own story: the pneumatic 15 gauge nailers — Metabo HPT NT65MA4 and Makita AF635 — are lighter than most of the cordless tools on this list because they don’t have to lug a battery around. If you’re doing overhead crown molding for six hours straight, that half-pound difference on your wrist adds up fast, and it’s the kind of detail a spec sheet lists but never actually explains.
1. NuMax SFN64 — best budget pneumatic for first-time DIYers
The NuMax SFN64 opens the lineup as the nailer most people buy without realizing they’ve just bought their first finish nailer, ever. It drives 16 gauge nails from 1 inch to 2.5 inches using a die-cast aluminum body that keeps the tool light enough for a beginner to control on the first strip of nails. At a 70-110 PSI operating range, it plays nicely with the small pancake compressors that most homeowners already own, which matters more than the spec sheet lets on — a nailer that needs 120 PSI minimum is a nailer that needs a bigger compressor, and that’s a hidden cost nobody budgets for.
Based on the spec comparison, this is a nailer built for baseboards, shoe molding, and light cabinet trim rather than dense hardwood stair components — the thinner 16 gauge nail simply isn’t engineered for heavy structural work. Reviewers consistently note that it handles crown molding and window casing well right out of the box, with several DIYers reporting they installed 40-60 feet of trim on their first attempt with zero prior nail gun experience. A common complaint in user reviews is occasional jamming under sustained use and a flimsy included oil bottle, though the tool-free jam release makes clearing those jams a non-event.
Pros:
- ✅ Very approachable price point for first-time buyers
- ✅ Lightweight aluminum body reduces fatigue
- ✅ Works with small home-shop compressors
Cons:
- ❌ Occasional jamming reported under heavy use
- ❌ Not rated for dense hardwood or structural trim
At around $60-$90, the NuMax SFN64 is hard to argue with if this is your first nailer and your projects are mostly baseboard and casing — it’s a genuinely solid entry point, not a compromise dressed up as one.
2. Craftsman CMCN616C1 — most affordable cordless kit
The Craftsman CMCN616C1 answers a specific question: what if you want cordless freedom without cordless pricing? It runs on the Craftsman V20 battery platform and drives 16 gauge finish nails from 1 to 2.5 inches, arriving as a full kit with battery, charger, and a starter pack of nails included — no separate purchases required before your first project.
What most buyers overlook about this model is that going cordless means no compressor, no hose, and no dragging equipment up a ladder, which genuinely changes the experience of installing crown molding solo. The trade-off is weight: at roughly 9.6 pounds with the battery attached, it’s noticeably heavier than the pneumatic options on this list, and that mass becomes obvious during overhead work. Reviewers consistently report that the tool-free depth and jam settings work as advertised, though a subset of users note the nailer occasionally stops firing mid-project and requires a battery pull-and-reseat to reset — an annoyance rather than a dealbreaker, but worth knowing before you’re thirty feet up a scaffold.
Pros:
- ✅ Full kit — battery, charger, and nails included
- ✅ No compressor or hose required on the jobsite
- ✅ Consistent firing power across weather conditions
Cons:
- ❌ Heavier than pneumatic alternatives at nearly 10 lbs
- ❌ Occasional firing resets reported by users
In the $150-$180 range as a complete kit, the Craftsman CMCN616C1 delivers legitimate cordless convenience for homeowners who don’t want to own a compressor at all.
3. Bostitch Smart Point 16GA Finish Nailer — best visibility for tight corners
Bostitch built its reputation on the Smart Point nose design, and the 16 gauge finish nailer in this lineup carries that DNA forward with a nose roughly 80% smaller than older-style nailers. What this means in practice is you can actually see where the nail is about to land, instead of guessing based on where the bulky nose is roughly pointed — a genuinely underrated feature when you’re working corner blocks or narrow casing returns.
The spec sheet won’t tell you this, but user reports suggest the selectable trigger system (sequential for precision, contact for speed) is where this tool earns its price. Drive 16 gauge nails from 1 to 2.5 inches with a tool-free jam release and dial-a-depth control, and you’ve got a nailer built specifically for finish carpenters who bounce between detail work and production runs on the same day. Reviewers consistently praise the oil-free operation, since nobody wants surprise oil spots on freshly painted trim, and the tool’s comfortable grip gets called out repeatedly in long-term owner feedback. A common complaint is that the compact contact-trip mechanism can be fussy to actuate at awkward angles, which matters if you’re working a lot of overhead crown.
Pros:
- ✅ Smart Point nose dramatically improves nail placement visibility
- ✅ Oil-free design avoids stains on finished wood
- ✅ Selectable trigger for sequential or contact firing
Cons:
- ❌ Small contact trip can be awkward at odd angles
- ❌ Requires an air compressor and hose setup
At around $180, the Bostitch Smart Point 16GA Finish Nailer is the pick for anyone whose projects involve a lot of tight, visible corner work where precision placement outweighs raw power.
4. DEWALT DCN660B — best cordless value for pros
The DEWALT DCN660B takes the 16 gauge cordless argument and adds the one thing serious trim carpenters actually want: a brushless motor built for durability under daily production use, not just occasional weekend projects. It drives 16 gauge angled finish nails from 1.25 to 2.5 inches, and DEWALT rates it for up to 800 nails on a single charge with a compact 2.0Ah battery — climbing well past 2,000 nails with a larger 5.0Ah pack.
Here’s what the spec comparison won’t spell out directly: the 20-degree angled magazine on this model makes it noticeably easier to nail into corners than the straight-magazine competitors on this list, which is a real advantage for crown molding and cabinet installs where a straight nailer simply can’t get the angle it needs. Reviewers consistently note the tool feels lighter and better balanced than DEWALT’s older pneumatic-to-cordless conversions, and the integrated LED lighting is a small but genuinely useful touch in dim closets and cabinet interiors. One recurring complaint involves an internal spring component that some users report failing after heavy use, requiring the front latch to be manually reset — a fixable annoyance, but one worth a quick check during your warranty period.
Pros:
- ✅ Brushless motor built for daily production work
- ✅ Angled magazine reaches tight corners pneumatic guns miss
- ✅ Up to 2,200 nails per charge with a 5.0Ah battery
Cons:
- ❌ Some users report an internal spring failure over time
- ❌ Battery and charger sold separately as a bare tool
Priced in the $180-$220 range as a bare tool, the DEWALT DCN660B is the strongest argument on this list for going cordless if you already own 20V MAX batteries and want a tool that can keep pace with contractor-grade workloads.
5. Metabo HPT NT65MA4 — lightest 15 gauge on the list
If you want the strength benefits of 15 gauge without the arm fatigue that usually comes with it, the Metabo HPT NT65MA4 is the answer, weighing in at just 4.2 pounds — genuinely lighter than several 16 gauge cordless tools on this list. It drives 15-gauge DA-style angled finish nails from 1.25 to 2.5 inches through a 34-degree magazine, and it’s been recognized by Builder and Developer Magazine as a “Pro Preferred” nailer for nine consecutive years, which is the kind of longevity endorsement that’s hard to fake.
Based on the spec comparison, the thicker 15 gauge nail this tool drives gives it a genuine edge for heavier trim — thicker window casing, staircase components, and exterior-grade molding where a 16 gauge nail might not provide enough shear resistance over time. Reviewers consistently describe it as well-balanced with minimal recoil, and multiple long-term owners report shooting well over a thousand nails without a single jam across mixed wood species. The one recurring frustration in aggregated feedback involves the exhaust port being louder than expected, though the fully adjustable 360-degree exhaust does let you redirect that air (and the noise) away from your face.
Pros:
- ✅ Exceptionally lightweight at just 4.2 lbs
- ✅ Nine-time “Pro Preferred” award winner
- ✅ Integrated air duster clears debris automatically
Cons:
- ❌ Exhaust noise is louder than some competitors
- ❌ Requires a compressor rated for 70-120 PSI
In the $150-$190 range, the Metabo HPT NT65MA4 delivers 15 gauge holding power in a body that won’t wreck your shoulder by lunchtime — arguably the best pound-for-pound value on this entire list.
6. Makita AF635 — best build quality for all-day use
The Makita AF635 is the nailer trim carpenters mention when they’re asked what they’d buy again without hesitation. Built with a magnesium body and aluminum magazine and cylinder, it drives 15 gauge DA-style angled nails from 1.25 to 2.5 inches at just 4 pounds — an unusual combination of durability and lightness that typically requires choosing one over the other.
What most buyers overlook about this model is the narrow nose design, which — much like the Bostitch Smart Point above — dramatically improves sightlines into corners, cabinet interiors, and tight jamb areas. Reviewers consistently highlight how well-balanced the tool feels in hand, with several longtime pneumatic-tool owners specifically calling out the AF635 as the first finish nailer that felt “right” after years of using competitor models. On paper this means less operator fatigue across an eight-hour install day, and the aggregated review sentiment backs that up almost unanimously — this is one of the rare tools with virtually no consistent negative theme in its feedback beyond the expected trade-offs of pneumatic operation (needing a compressor and hose).
Pros:
- ✅ Magnesium body balances durability with low weight
- ✅ Narrow nose improves visibility in corners and cabinets
- ✅ Backed by a three-year manufacturer warranty
Cons:
- ❌ Premium price relative to other pneumatic options
- ❌ No cordless version eliminates hose-free flexibility
At around $220-$260, the Makita AF635 justifies its premium position through build quality alone — this is the nailer for someone who plans to still be using it a decade from now.
7. Milwaukee M18 FUEL 2743-20 — most powerful cordless 15 gauge
Closing out the list, the Milwaukee M18 FUEL 2743-20 is what happens when a manufacturer decides cordless tools shouldn’t have to apologize for being cordless. It drives 15 gauge angled finish nails from 1.25 to 2.5 inches using a nitrogen air spring mechanism paired with Milwaukee’s POWERSTATE brushless motor, and Milwaukee specifically states it can fully sink a 2.5-inch nail into solid oak with zero ramp-up time — a claim that matters because plenty of cordless nailers need a beat to “spool up” before they hit full power.
The spec sheet won’t tell you this, but user reports suggest the nitrogen-spring design genuinely does replicate pneumatic-style consistency, which has historically been the biggest complaint against cordless finish nailers. Reviewers consistently praise the tool’s ability to run all day on a single 5.0Ah battery, with several contractors specifically noting they no longer bring a backup pack for standard trim days. What most buyers overlook here is the weight — at roughly 6.3 to 7.5 pounds depending on battery size, it’s the heaviest tool on this list, and that mass is noticeable during extended overhead work even with Milwaukee’s ergonomic grip design.
Pros:
- ✅ Nitrogen air spring delivers pneumatic-like power
- ✅ Fully sinks 2.5-inch nails into solid oak
- ✅ Five-year manufacturer warranty
Cons:
- ❌ Heaviest nailer on this list at up to 7.5 lbs
- ❌ Premium price puts it out of reach for casual DIYers
As a bare tool in the $300-$330 range (or $380-$420 range as a full kit), the Milwaukee M18 FUEL 2743-20 is the choice for professionals who need maximum cordless power and have already bought into Milwaukee’s M18 battery ecosystem.
Setting Up and Getting the Most From Your New Finish Nailer
Unboxing a new nailer and immediately firing it into your baseboard is how first-time users end up with a blown-out corner and a Google search titled “why did my trim split.” Before your first nail, run a few test shots into scrap lumber that matches your actual project material — pine behaves completely differently than poplar or oak under the same PSI setting, and dialing in depth on scrap costs nothing compared to dialing it in on your finished casing.
For pneumatic nailers like the Metabo HPT NT65MA4 or Makita AF635, start your compressor at the low end of the recommended PSI range (usually around 70-80 PSI) and increase gradually until the nail sinks flush without overdriving. Cordless models like the DEWALT DCN660B and Milwaukee M18 FUEL 2743-20 don’t give you a PSI dial, but most offer a depth-of-drive adjustment wheel that does the same job — turn it a quarter-turn at a time between test shots. During the first 30 days, the most common mistake is skipping the no-mar tip inspection; a missing or worn tip is the single biggest cause of surface dents on freshly painted trim. Maintenance is minimal but not optional: pneumatic tools need a drop of pneumatic tool oil in the air inlet before each use (unless the model is explicitly oil-free, like the Bostitch), and every nailer benefits from a quick nose-and-magazine blowout with compressed air at the end of a dusty job to prevent sawdust buildup from jamming the driver blade.
Real-World Scenarios: Which Nailer Fits Your Project
Picture three different people standing in the same big-box aisle, all holding a finish nailer box, all with completely different needs. First: a weekend DIYer replacing baseboard in two bedrooms, working with a small pancake compressor already sitting in the garage, and a budget capped around $100. That person should walk out with the NuMax SFN64 — it’s proportioned exactly for this job and there’s no reason to spend triple the money on features that won’t get used.
Second: a serious hobbyist building built-in bookshelves and cabinet face frames on weekends, who values precision placement over raw speed and doesn’t want visible nail holes on painted surfaces. The Bostitch Smart Point 16GA or Metabo HPT NT65MA4 both fit this profile well, with the Bostitch winning out if corner visibility is the priority and the Metabo winning if the cabinets involve slightly heavier face-frame stock. Third: a remodeling contractor doing whole-house trim packages across multiple job sites per week, where setup time and battery ecosystem compatibility matter as much as raw performance. That contractor is best served by the DEWALT DCN660B if they’re already on 20V MAX batteries, or the Milwaukee M18 FUEL 2743-20 if maximum driving power into dense hardwood is the daily reality and the M18 platform is already in the truck.
Problem → Solution: Fixing Common Finish Nailer Headaches
Even a great nailer runs into predictable trouble, and most of it has a five-minute fix. Problem one: nails aren’t sinking flush even at max depth setting. Solution: check your compressor PSI first (aim for the tool’s rated maximum) before assuming the tool itself is underpowered — this is the single most misdiagnosed “broken nailer” complaint online. Problem two: visible nail heads sticking proud of the surface on hardwood trim. Solution: this usually means you’re using a 16 gauge nailer on stock that really calls for 15 gauge holding power, since thinner nails can deflect slightly in dense grain instead of driving straight.
Problem three: the trim is splitting near the edges. Solution: move your nailing line at least 3/4 inch from the edge of narrow trim, and consider pre-drilling extremely thin or brittle stock like MDF corners before nailing. Problem four: frequent jams mid-strip. Solution: verify you’re using the exact gauge and length range specified for your tool — mixing collated nail brands or slightly mismatched lengths is the top cause of jamming across every nailer on this list. Problem five: a cordless nailer that randomly stops firing. Solution: remove and reseat the battery to reset the tool’s internal safety lockout, and if it recurs consistently, check the manufacturer’s warranty before assuming it’s user error.
How to Choose Between a 15 Gauge and 16 Gauge Finish Nailer
Choosing between the two gauges gets much easier with a structured checklist instead of gut instinct. Here’s the process pros actually use:
- Identify your material thickness. Trim under 1/2 inch thick generally does fine with 16 gauge; anything thicker, denser, or load-bearing benefits from 15 gauge’s extra shear strength.
- Consider the wood species. Softwoods like pine and poplar tolerate either gauge well; dense hardwoods like oak or maple favor 15 gauge for better holding power without excessive force.
- Weigh visibility against strength. If the trim will be stained (not painted), the smaller 16 gauge hole is easier to disguise with color-matched filler.
- Check your existing nail inventory. If you already own a stockpile of one gauge’s nails, that alone can justify sticking with a matching nailer to avoid waste.
- Factor in the application angle. Many 15 gauge nailers use a 34-degree angled magazine that reaches tighter corners than straight 16 gauge magazines — a real consideration for crown molding.
- Account for your compressor or battery setup. Pneumatic 15 gauge tools often demand higher PSI; cordless options sidestep that but weigh more.
- Budget for both, if possible. Many professional trim carpenters eventually own one of each gauge, using 16 gauge for delicate finish work and 15 gauge for structural-adjacent trim.
Finish Nail Holding Strength by Gauge
The physics here are straightforward even if the marketing copy tries to make it complicated: a 15 gauge nail has a larger cross-sectional diameter than a 16 gauge nail, and more metal in the shank means more resistance to shear and withdrawal forces. According to nail wire gauge diameter references, gauge numbers map directly to measurable wire diameters — the lower the number, the thicker the wire, which is exactly why 15 gauge consistently outperforms 16 gauge in raw pull-out resistance tests.
In practical terms, this means a 15 gauge finish nailer holds heavier trim components — thick window and door casing, staircase skirt boards, or exterior fascia — more reliably over years of seasonal wood movement. A common complaint in aggregated review sentiment for 16 gauge tools used on heavier stock is trim that loosens slightly at the edges after a year or two of humidity swings, something rarely reported with 15 gauge installs on comparable material. That said, for lightweight interior trim under normal indoor conditions, 16 gauge holding strength is more than adequate — the “upgrade to 15 gauge for everything” advice you’ll see in some forums is overkill for baseboard and casing that isn’t under any real structural stress.
Nail Head Visibility by Gauge
Here’s where 16 gauge earns back ground it loses on raw strength: nail head visibility. A 16 gauge nail head is noticeably smaller than a 15 gauge head, which translates directly into a smaller puncture that’s faster to fill and easier to disguise, particularly on stained wood where filler color-matching is unforgiving. The spec sheet won’t tell you this, but user reports suggest that on natural-finish oak or walnut trim, even a well-matched 15 gauge hole can catch light differently than the surrounding grain — a subtle flaw that becomes obvious under raking sunlight.
For painted trim, this distinction matters far less, since two coats of paint and a dab of spackle erase the difference between gauges almost entirely. Reviewers consistently note that the visibility gap is the deciding factor for finish carpenters working on high-end stained millwork, where a smaller footprint is worth sacrificing some holding strength — which is exactly why many professionals keep a 16 gauge nailer in the truck specifically for stain-grade work, even if their primary nailer is a 15 gauge model.
Finish Nailer Wood Splitting Risk
Splitting risk correlates directly with nail diameter, but it’s not quite as simple as “thicker nail equals more splitting.” A 15 gauge nail displaces more wood fiber on entry, which does raise splitting risk near edges and on brittle materials — but modern 15 gauge nailers largely offset this with blunt-point nail designs specifically engineered to push fibers aside rather than wedge through them like a chisel.
Based on the spec comparison, the real splitting risk factor isn’t gauge alone, it’s proximity to the edge combined with wood species. Reviewers consistently report that 15 gauge nailers like the Makita AF635 and Metabo HPT NT65MA4 cause minimal splitting on standard pine and poplar trim when nails are placed at least 3/4 inch from any edge, while thin strips of oak or brittle MDF corner returns are genuinely more split-prone regardless of which gauge drives the nail. What most buyers overlook is that a dull or worn no-mar tip actually increases splitting risk more than gauge selection does, since a worn tip transfers driving force unevenly into the wood surface — regular tip inspection matters more than most buying guides ever mention.
Finish Nailer for Baseboards
Baseboard installation is arguably the single most common use case that sends people shopping for either gauge, and the good news is baseboards are forgiving territory for both. Standard interior baseboard, typically 3/4 inch MDF or pine ranging from 3 to 8 inches tall, holds up fine with 16 gauge nails in the vast majority of homes, which is why budget-friendly options like the NuMax SFN64 and Craftsman CMCN616C1 consistently rank as go-to baseboard tools among first-time buyers.
Where 15 gauge earns its place in baseboard work is with taller, heavier baseboard profiles (think 7-inch-plus colonial or craftsman-style base) installed directly into hardwood studs or over uneven plaster walls that require more holding force to pull flush. According to Fine Homebuilding’s finish carpentry resources, proper baseboard installation relies heavily on consistent, well-anchored fastening at stud locations rather than sheer nail volume — meaning a well-placed 16 gauge nail into a stud beats a poorly placed 15 gauge nail into drywall alone, every time. The bottom line: for typical residential baseboard, 16 gauge tools like the Bostitch Smart Point 16GA cover 90% of scenarios comfortably.
Finish Nailer for Cabinets
Cabinet work splits the gauge decision differently than baseboards do, because cabinets combine face-frame assembly (thinner, more delicate material) with heavier structural attachment points (securing the cabinet box to wall studs). For face-frame assembly and attaching light trim pieces like scribe molding or filler strips, a 16 gauge nailer, or even an 18 gauge brad nailer, is often the gentler and more appropriate choice — less risk of blowing through thin plywood edges.
However, when it comes to securing heavier cabinet components, attaching crown molding above upper cabinets, or fastening thick face-frame stock to a carcass, the extra holding power of a 15 gauge nailer like the Metabo HPT NT65MA4 genuinely earns its keep. What most buyers overlook about cabinet installation specifically is that mixing gauges within a single project isn’t a compromise — it’s standard professional practice. A cabinet installer commonly runs a 16 gauge or 18 gauge tool for delicate face-frame details and switches to 15 gauge for structural crown and heavier trim on the same job, which is a strong argument for eventually owning one nailer from each camp rather than forcing a single tool to do both jobs perfectly.
Finish Nailer Nails Buying Guide
Buying the right nailer is only half the equation — buying the right nails for it is where a surprising number of projects go sideways. Nails are sold by gauge, length, collation type (glue-collated strips versus plastic-collated), and coating (galvanized for exterior or humid environments, electro-galvanized or bright finish for interior work). Always match the exact gauge your nailer is rated for; a 16 gauge nailer will not safely or reliably fire 15 gauge nails, and vice versa, regardless of how similar the packaging looks on a store shelf.
Length selection should account for material thickness plus at least an inch of penetration into the underlying stud or substrate for adequate holding power — a 2-inch nail through 3/4-inch trim only penetrates 1.25 inches into the wall framing, which is often the practical minimum rather than a generous margin. For exterior trim or anywhere moisture is a factor, always choose galvanized nails regardless of gauge, since interior-rated bright nails will rust and stain painted surfaces within a season or two outdoors. Buying in bulk from the same manufacturer as your nailer (or a verified compatible brand) also meaningfully reduces jamming, since collation glue formulations and strip dimensions vary slightly between brands even within the same nominal gauge.
✨ Don’t Miss These Exclusive Deals!
🔍 Take your trim carpentry projects to the next level with these carefully selected nailers.Click on any highlighted item to check current pricing and availability. These tools will help you create authentic, professional-grade results your family will love!
Common Mistakes When Buying a Finish Nailer
The single most common mistake is buying based on gauge alone without considering power source. Someone who needs to work in a detached garage without compressor access but buys a pneumatic nailer like the Makita AF635 ends up needing a compressor purchase they didn’t budget for — always confirm your power infrastructure before falling in love with a specific nailer’s spec sheet. A close second mistake is underestimating weight fatigue; a cordless tool that feels fine held for thirty seconds in a store aisle can feel very different after two hours of overhead crown molding work.
Another frequent error is assuming higher price always means better fit for the job — the premium Milwaukee M18 FUEL 2743-20 is genuinely overkill for someone installing two rooms of baseboard once a year, while the budget NuMax SFN64 would be genuinely under-equipped for a contractor running trim packages five days a week. Finally, plenty of buyers skip checking nail availability and pricing for their chosen gauge and brand before purchasing, only to discover their local hardware store stocks one gauge abundantly and the other only by special order.
Long-Term Cost & Maintenance
Total cost of ownership extends well beyond the sticker price on the nailer itself. Pneumatic tools like the Bostitch Smart Point 16GA or Metabo HPT NT65MA4 require an air compressor (if you don’t already own one), periodic oiling for non-oil-free models, and occasional O-ring replacement as seals wear — typically a $10-$20 part every few years of moderate use. Cordless tools like the DEWALT DCN660B and Milwaukee M18 FUEL 2743-20 avoid compressor costs entirely but carry battery replacement costs down the line, with individual replacement battery packs typically running $50-$100 depending on capacity.
Nail cost itself is a genuinely underrated long-term factor: 15 gauge nails typically cost slightly more per box than 16 gauge nails due to the additional material, though the difference is marginal enough (often just a few dollars per thousand-count box) that it rarely swings a buying decision on its own. For a homeowner doing occasional projects, a pneumatic nailer paired with an existing or inexpensive compressor generally represents the lowest total cost of ownership over five years. For a contractor running nails daily across multiple job sites, the reduced setup and teardown time of a cordless tool like the DEWALT DCN660B often justifies its higher upfront and battery-replacement costs through pure labor-hour savings.
Safety, Regulations & Compliance Guide
Finish nailers are far less dangerous than framing nailers, but they’re not toys, and injury statistics back that up. Per OSHA’s nail gun safety guidance, the risk of a nail gun injury is roughly twice as high when using a contact-trigger (bump-fire) setting compared to a single-shot sequential trigger, which is exactly why models like the Bostitch Smart Point 16GA and DEWALT DCN660B that offer a selectable trigger are worth choosing sequential mode on for detail work, reserving contact mode only for repetitive, low-risk production runs.
Always wear ANSI Z87.1-rated eye protection when operating any nailer, pneumatic or cordless — nail guns can occasionally ricochet fasteners off dense or knotted wood, and that risk exists regardless of gauge. Hearing protection is worth considering for extended pneumatic tool use, since air exhaust and firing noise from tools in this category can reach uncomfortable levels over a full workday. For pneumatic nailers specifically, always confirm hose fittings are securely connected before pressurizing the line, and never disconnect a hose while the line is still under pressure. These aren’t bureaucratic suggestions; they’re the difference between a normal Tuesday and an emergency room visit.

Frequently Asked Questions
❓ Is a 15 gauge or 16 gauge finish nailer better for baseboards?
❓ Can a 16 gauge finish nailer replace a 15 gauge nailer?
❓ What size finish nailer do I need for cabinets?
❓ Do 15 gauge nails split trim more than 16 gauge?
❓ Is a cordless finish nailer worth it over a pneumatic one?
Conclusion
At the end of the day, the 15 gauge vs 16 gauge finish nailer decision isn’t about finding the objectively “better” gauge — it’s about matching the tool to the trim in front of you. If you’re installing standard interior baseboard, casing, or doing detail cabinet work where a small, disguisable nail hole matters most, a 16 gauge nailer like the NuMax SFN64 or Bostitch Smart Point 16GA will serve you well without any real compromise. If your projects lean toward heavier trim, hardwood species, or anything approaching structural attachment, the added holding strength of a 15 gauge tool like the Metabo HPT NT65MA4 or Makita AF635 earns back its slightly larger nail hole many times over in long-term durability.
For anyone doing serious volume across both categories, the honest answer is that most professional trim carpenters eventually own one nailer from each gauge, reaching for whichever one fits the material in front of them rather than forcing a single tool to compromise on every job. Whichever direction you land on, prioritize matching power source to your actual working conditions, respect the safety basics outlined above, and remember that a slightly more expensive nailer that fits your specific projects beats a cheaper one that fights you every step of the way.
Recommended for You
- Best Finish Nailer Overall: 7 Top Picks Tested for 2026
- Pneumatic vs Cordless Nail Gun: 7 Best Picks for 2026
- 7 Types of Nail Guns Explained (2026): The No-Guesswork Guide
Disclaimer: This article contains affiliate links. As an Amazon Associate, I earn from qualifying purchases. If you purchase products through these links, we may earn a small commission at no additional cost to you.
✨ Found this helpful? Share it with your friends! 💬🤗
