

In This Article
Trim carpentry is unforgiving. A framing crew can hide a quarter-inch of sloppiness behind drywall mud, but baseboard and crown molding sit right at eye level, and every gap screams at you every time you walk past it. So the best miter saw for trim work isn’t just “a saw that cuts wood” — it’s a machine that holds its calibration through a full day of cuts, handles tall crown stock without you wrestling it into position, and leaves an edge clean enough to skip a second pass with sandpaper. What is the best miter saw for trim work? In short, it’s a compound or sliding compound miter saw with a tall, rigid fence, reliable positive stops at common trim angles, and enough crosscut capacity to handle wide baseboard and nested crown molding without flipping the workpiece mid-cut.

I’ve spent a good chunk of my woodworking life chasing that last sixteenth of an inch on an inside corner, and I can tell you the saw matters almost as much as the technique. A tool with sloppy detents or a fence that isn’t square out of the box will fight you on every single cut, and no amount of skill fully compensates for a machine that won’t hold an angle. That’s why this guide leans hard on real specs, real aggregated review sentiment, and honest analysis rather than marketing copy. Below you’ll find seven genuinely different miter saws spanning budget, mid-range, and premium territory, a full breakdown of what actually matters when trim work is on the line, and practical setup guidance — fence upgrades, dust control, stop blocks, and crown molding angle math — that most product listings never bother to mention.
Quick Comparison Table
| Saw | Blade Size | Bevel Type | Best For |
|---|---|---|---|
| DEWALT DWS715 | 12″ | Single bevel | Best all-around value for trim carpenters |
| Metabo HPT C10FCGS | 10″ | Single bevel | Best for beginners and light-duty use |
| SKIL MS6305-00 | 10″ | Dual bevel, sliding | Best budget dual-bevel sliding saw |
| Makita LS1019L | 10″ | Dual bevel, sliding | Best compact saw for crown molding |
| DEWALT DWS779 | 12″ | Dual bevel, sliding | Best for wide baseboard and crosscuts |
| Bosch GCM12SD | 12″ | Dual bevel, sliding | Best space-saving glide design |
| Festool Kapex KS 120 REB | 10-1/4″ | Dual bevel, sliding | Best precision for professional finish work |
Looking at the table, the split between single-bevel and dual-bevel designs is the first fork in the road: single-bevel saws like the DEWALT DWS715 and Metabo HPT C10FCGS cost less but force you to flip stock for opposite-angle cuts, while dual-bevel sliders like the Makita LS1019L and Festool Kapex KS 120 REB let you cut both directions without repositioning the workpiece. Sliding capability also matters more than blade size once you’re cutting wide baseboard or nested crown, which is why a 10-inch slider like the Makita LS1019L can out-cut some non-sliding 12-inch saws on tall stock. Budget-conscious buyers should note that skipping the slide mechanism saves real money, but it’s the first feature you’ll wish you had the first time you’re chasing a 7-inch crown profile.
💬 Ready to see which one fits your shop? Scroll down for the full breakdown — one click could save you a return trip to the store.
Top 7 Miter Saws for Trim Work: Expert Analysis
1. DEWALT DWS715 — best all-around value for trim carpenters
The DEWALT DWS715 earns its reputation less through flashy features and more through sheer consistency, which is exactly what trim work demands. This 15-amp, 12-inch single-bevel saw pairs a tall fence with 14 positive miter stops, so common trim angles click into place instead of requiring you to eyeball a protractor scale.
Based on the spec comparison, its 2×8 crosscut capacity at 90 degrees and 2×6 at 45 degrees covers the overwhelming majority of baseboard, casing, and dimensional lumber a residential trim carpenter will run into on a given day. What most buyers overlook about a single-bevel saw at this price is that it forces a small workflow change — you flip the board for opposite bevel cuts rather than tilting the head both ways — but in exchange you get a simpler, more rigid head assembly with one less thing to drift out of calibration.
Reviewers consistently report that this saw holds its factory settings well past the return window, and the tool has accumulated an outsized number of five-star ratings relative to competitors in its price class, which is a meaningful signal given how many contractors run this exact model daily. On the downside, the lack of a sliding rail limits it on very wide crown stock, and the stock dust port needs a shop vac attached to perform respectably. Pros and cons below reflect the honest trade-offs of choosing a non-sliding saw for finish carpentry, and the price sits solidly in the budget-to-mid tier, making this the safe default pick if you only want to own one saw for years of trim work.
Pros:
- ✅ Tall fence and 14 detents speed up repeat trim angles
- ✅ Lightweight enough for one-person jobsite transport
- ✅ Exceptionally strong track record of holding calibration
Cons:
- ❌ Single bevel means flipping stock for opposite angles
- ❌ No sliding rail limits capacity on very wide crown
Expect this saw in the $200-$250 range, and given the volume of positive long-term ownership reports, it represents strong value at that price point.
2. Metabo HPT C10FCGS — best for beginners and light-duty use
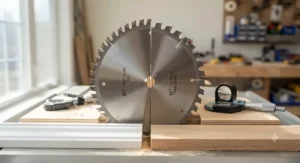
If your trim projects are occasional rather than daily, the Metabo HPT C10FCGS solves a different problem than the saws above it: weight. At roughly 24 pounds, it’s one of the lightest 10-inch compound miter saws on the market, which matters more than spec sheets usually admit when you’re the one hauling a saw up and down stairs or in and out of a car trunk.
The 15-amp motor spins to a 5,000 RPM no-load speed, and the thumb-actuated positive stops make dialing in 22.5-degree and 45-degree cuts fast even for someone who has never owned a miter saw before. Here’s what to weigh: this is a single-bevel, non-sliding saw with a smaller table than the 12-inch options on this list, so it’s genuinely better suited to baseboard, shoe molding, and door casing than to large crown profiles or wide dimensional lumber.
Aggregated buyer sentiment around this model consistently praises how approachable it is for a first-time saw owner — the controls are intuitive, and the learning curve is short compared to sliding compound models with more adjustment points. The extended flip fence rising to 4 inches is a nice touch for a saw at this price, giving it a bit more vertical capacity than its class average. Where it falls short is dust collection, which relies entirely on the bundled bag rather than any real vacuum-ready port, and the smaller table means longer boards need extra support.
Pros:
- ✅ Among the lightest 10-inch compound saws available
- ✅ Beginner-friendly controls with a short learning curve
- ✅ Extended flip fence adds useful vertical capacity
Cons:
- ❌ Single bevel with no sliding rail limits big crown cuts
- ❌ Basic dust bag underperforms without a shop vac
Pricing typically lands around $180-$220, making it one of the most approachable entry points into compound miter saws for anyone dabbling in trim work for the first time.
3. SKIL MS6305-00 — best budget dual-bevel sliding saw
The SKIL MS6305-00 occupies a genuinely useful gap in the market: dual-bevel sliding capability at a price that undercuts nearly every comparable saw from the major brands. Its 15-amp motor drives the blade at 4,800 RPM, and the sliding rail system uses linear bearings that keep the head tracking smoothly rather than wobbling as it extends.
Based on the spec comparison, its tall fence supports 4-1/2 inches of base molding vertically and 6-1/4 inches of crown molding nested, which is respectable capacity for a saw in this price bracket and enough to handle the vast majority of residential trim profiles. What most buyers overlook here is the LED shadow line feature, which Skil positions as more reliable than a laser guide because it doesn’t require recalibration if the saw gets bumped — a small detail that matters more than it sounds once you’re a few hundred cuts into a project.
Reviewers who expected a compromise-heavy budget tool have consistently been surprised by the build quality, with more than one independent reviewer noting they overestimated the price before checking the tag. The trade-off is a smaller pool of long-term durability reports compared to DEWALT or Makita, simply because it hasn’t been on job sites as long, and the 9-detent miter plate offers fewer stop positions than pricier competitors.
Pros:
- ✅ Dual-bevel sliding design at a genuinely budget price
- ✅ LED shadow line avoids laser recalibration issues
- ✅ Tall fence handles nested crown up to 6-1/4 inches
Cons:
- ❌ Smaller body of long-term durability reviews
- ❌ Fewer positive stop positions than premium rivals
You’ll typically find it in the $250-$300 range, which puts genuine dual-bevel sliding functionality within reach of DIYers who’d otherwise be priced out of that feature set entirely.
4. Makita LS1019L — best compact saw for crown molding
The Makita LS1019L solves the classic trim carpenter’s dilemma — you want 12-inch saw capacity without hauling a 12-inch saw around — by packing an unusually large cutting envelope into a 10-inch footprint. Its 2-steel-rail sliding system lets the saw run flush against a wall, and the direct-drive motor with soft start avoids the belt degradation that eventually affects belt-driven competitors.
Based on the spec comparison, the vertical capacity of 5-1/4 inches for baseboard and 6-5/8 inches for nested crown molding is the largest in its class, meaning it can chew through crown profiles that would force a smaller saw into an awkward flat-cut workaround. What the spec sheet won’t tell you, but reviewers note, is how much the reduced footprint matters in occupied homes and tight hallways, where a full-size 12-inch slider simply doesn’t fit against the wall the way this saw does.
The dual-bevel design lets you cut both directions without flipping stock, and positive stops at 0, 15, 22.5, 31.6, 45, and 60 degrees cover essentially every angle a trim carpenter needs on a regular basis, including the crown-specific 31.6-degree setting. On the downside, this saw runs lighter-duty than the 12-inch options on this list for raw dimensional lumber, and the premium direct-drive engineering shows up in the price.
Pros:
- ✅ Largest crown and baseboard vertical capacity in its class
- ✅ Direct-drive motor avoids belt wear over time
- ✅ Compact footprint fits flush against walls
Cons:
- ❌ Costs more than comparable belt-driven 10-inch saws
- ❌ Less raw crosscut capacity than a full 12-inch slider
Expect a $700-$900 range for this model, positioning it as a mid-to-premium purchase that specifically rewards trim and finish carpenters over framers.
5. DEWALT DWS779 — best for wide baseboard and crosscuts
Step up from the DWS715 to the DEWALT DWS779 and you gain the one feature its single-bevel sibling lacks: a sliding rail system, paired with dual-bevel capability. That combination pushes the tall fence’s vertical capacity to 7-1/2 inches of nested crown molding and 6-3/4 inches of base molding, while the dual horizontal steel rails and linear ball bearings keep the extended head from wobbling mid-cut.
Based on the spec comparison, a 2×14 crosscut capacity at 90 degrees and 2×10 at 45 degrees gives this saw real headroom for wide baseboard, window and door casing, and dimensional lumber in the same afternoon. The cam-lock miter handle with detent override is a small but meaningful upgrade over basic detent systems, letting you snap to a common angle or dial in a fine adjustment without fighting the mechanism.
Reviewers consistently point to the dust collection system, rated to capture more than 75 percent of debris at the source, as noticeably better than entry-level saws, though it still benefits from a shop vac hookup on dusty materials like MDF. What most buyers overlook is that the added sliding hardware means more moving parts to keep clean and lubricated over years of use, a maintenance cost that’s easy to ignore until the rails start to drag.
Pros:
- ✅ Sliding rails add major vertical crown and base capacity
- ✅ Cam-lock miter handle speeds up angle changes
- ✅ Dust collection captures a majority of debris at the source
Cons:
- ❌ Heavier and bulkier than non-sliding alternatives
- ❌ Sliding rails add a maintenance step over time
Pricing generally sits in the $450-$550 range, positioning it as the natural upgrade path for anyone who has outgrown a basic single-bevel saw but isn’t ready for premium pricing.
6. Bosch GCM12SD — best space-saving glide design
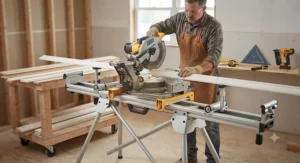
The Bosch GCM12SD takes a genuinely different engineering approach to the sliding-saw problem: instead of rails that extend out the back of the machine, its Axial-Glide system pivots on an internal arm, which means the saw doesn’t need extra clearance behind it against a wall. That’s a real advantage in a cramped basement shop or a small garage where a traditional rail saw’s footprint becomes the limiting factor.
The 15-amp motor spins up to roughly 3,800-4,000 RPM depending on the specific unit, and the pre-aligned SquareLock fence system is designed to stay square through the life of the tool rather than requiring the periodic recalibration some sliding saws need. Based on the spec comparison, the expanding base extensions offer notably more left-to-right material support than many competitors, which matters when you’re supporting long baseboard runs without an assistant.
Reviewers highlight the smoothness of the glide action as a standout, and the all-metal bevel lock and range selector positioned up front make bevel adjustments genuinely easier to reach than on saws with rear-mounted controls. The honest trade-off is weight — this is one of the heaviest 12-inch saws in its category — and some reviewers note minor blade wobble at extreme 45-degree bevel settings, worth checking for on your specific unit before committing to a big crown molding run.
Pros:
- ✅ Axial-Glide system needs no rail clearance behind the saw
- ✅ SquareLock fence stays aligned with minimal recalibration
- ✅ Expanding base extensions support long workpieces well
Cons:
- ❌ One of the heaviest saws in the 12-inch class
- ❌ Some reports of minor wobble at extreme bevel angles
Retail pricing generally runs in the $600-$750 range, making it a premium space-saving choice best suited to shops where clearance behind the saw is genuinely at a premium.
7. Festool Kapex KS 120 REB — best precision for professional finish work
At the top of this list sits the Festool Kapex KS 120 REB, a saw that professional finish carpenters and cabinetmakers frequently describe as the standard against which every other miter saw gets measured. Its twin-column guide rail system and 1,600-watt direct-drive motor deliver a documented dust extraction efficiency up to 99.97 percent when paired with a Festool HEPA extractor, a figure that matters enormously if you’re cutting crown molding inside an occupied, furnished home.
Based on the spec comparison, its 6-5/8-inch nested crown capacity matches the larger Makita on this list despite using a smaller 10-1/4-inch blade, a result of exceptionally tight engineering tolerances throughout the head and rail assembly. What most buyers overlook about the Kapex is the dual-laser kerf indicator, which shows the cut line from either side of the blade, reducing the guesswork and test cuts that eat into a finish carpenter’s day rate.
Reviewers who’ve owned the saw for years consistently describe it as an investment rather than a purchase, often amortizing the upfront cost across a decade or more of daily professional use, which meaningfully changes the value calculation compared to a homeowner buying one saw for a single renovation. The honest downside is unavoidable: this is by far the most expensive saw on this list, and its precision-first engineering isn’t necessary if your projects are occasional rather than production-paced.
Pros:
- ✅ Near-total dust extraction when paired with a HEPA unit
- ✅ Dual lasers show the kerf from both sides of the cut
- ✅ Twin-column rail system delivers exceptional long-term precision
Cons:
- ❌ Priced well above every other saw on this list
- ❌ Precision-focused design is overkill for occasional DIY use
Pricing generally lands in the $1,400-$1,800 range, which puts it firmly in professional-investment territory rather than a typical homeowner purchase.
Practical Usage Guide: Setup, Upgrades, and Getting the Most From Your Saw
Getting a new miter saw out of the box and making your first clean trim cut involves more setup than most manuals let on. Start by checking the saw square to the table with a reliable square, not just trusting the factory calibration — even a well-built saw can shift slightly in shipping. Run a test cut on scrap of the same material you’ll actually be installing, since MDF, poplar, and oak all behave differently under the blade and a setting that’s perfect for one can leave slight burning or tear-out on another. In the first 30 days, the most common mistake beginners make is skipping the test-cut step entirely and going straight to the real workpiece, which turns a five-minute calibration check into an expensive re-order of molding.
Miter Saw Fence Upgrade: Worth the Investment?
A miter saw fence upgrade is one of the highest-value modifications you can make for finish carpentry, and it’s rarely mentioned on the product page. Stock fences on many mid-range saws are functional but short, which becomes a real limitation the moment you’re standing a piece of tall crown molding on end. An aftermarket auxiliary fence — typically a length of straight hardwood or MDF clamped or bolted to the factory fence — adds height and a fresh, perfectly flat reference surface, since factory fences accumulate nicks and sawdust buildup over years of use that can throw off tight joints. If you’re cutting a lot of crown molding in the nested position, a taller fence isn’t a luxury; it’s what keeps the molding from tipping mid-cut.
Miter Saw Stop Block System: The Secret to Repeatable Cuts
A miter saw stop block system solves a different problem: cutting dozens of identical lengths without measuring and marking each one individually. Clamp or screw a block to an extended fence or auxiliary support at the exact distance you need, and every subsequent cut registers against that same point, eliminating the cumulative measuring error that creeps in over a long run of casing or baseboard. For trim work specifically, a stop block system pays for itself the first time you’re cutting matching returns or repeated door casing legs, since it guarantees every piece is identical without relying on a tape measure and a pencil mark for each one.
Maintenance-wise, keep the blade clean of pitch buildup, check the lower blade guard moves freely every session, and re-square the fence periodically, since repeated bevel adjustments can gradually introduce drift even on well-built saws.
✨ Don’t Miss These Exclusive Deals!
🔍 Take your trim carpentry setup to the next level with these carefully selected saws and accessories. Click on any highlighted pick to check current pricing and availability, so you can start cutting cleaner joints on your very next project!
Real-World Scenarios: Matching the Saw to the Job
Consider a weekend DIYer replacing baseboard in three rooms of a starter home, working with a modest tool budget and no dedicated workshop. For that profile, the Metabo HPT C10FCGS makes the most sense: it’s light enough to carry between rooms, simple enough to set up without a steep learning curve, and its capacity comfortably covers standard baseboard and door casing without paying for sliding rails that a single weekend project doesn’t need.
Now picture a remodeling contractor installing crown molding across an entire finished basement, running eight-hour days for a full week. Here, the DEWALT DWS779 or Makita LS1019L earns its keep, since the sliding rail capacity and dual-bevel speed compound directly into fewer stock flips and faster production across hundreds of repeated cuts, and the added upfront cost amortizes quickly against labor time saved.
Finally, imagine a finish carpenter who books high-end custom trim jobs in occupied homes several days a week, where dust containment and precision directly affect client satisfaction and repeat business. For that use case, the Festool Kapex KS 120 REB is the rational purchase despite its price, because near-total dust extraction and rail-system precision aren’t conveniences here — they’re the difference between a five-star referral and a client complaint about sawdust in the carpet.
Buyer’s Decision Framework
If you only cut baseboard and door casing occasionally, choose a single-bevel, non-sliding saw like the DEWALT DWS715 or Metabo HPT C10FCGS, because the reduced capacity rarely matters at that scale and the savings are real. If you regularly install crown molding taller than about 5 inches, choose a sliding dual-bevel saw like the Makita LS1019L or DEWALT DWS779, since vertical fence capacity becomes a hard limitation rather than a minor inconvenience past that threshold. If you’re working in occupied, furnished spaces on a recurring professional basis, prioritize dust extraction and precision over raw price, which points toward the Festool Kapex KS 120 REB. And if shop space is your binding constraint rather than budget, the Bosch GCM12SD‘s glide mechanism deserves serious consideration purely for its reduced footprint against a wall.
How to Choose the Best Miter Saw for Trim Work
- Match blade size to your typical stock width. A 10-inch saw handles most trim comfortably; step up to 12 inches only if you regularly crosscut wide dimensional lumber alongside trim.
- Prioritize a tall, rigid fence over raw motor power. Motor specs vary less between saws than fence height and rigidity do, and the fence is what actually determines whether tall crown stock stays put.
- Decide if sliding capacity earns its cost. Sliding rails add crosscut width and nested crown capacity, but also add weight, moving parts, and price — worth it for frequent wide cuts, less so for occasional baseboard runs.
- Check the positive stop positions. Look specifically for a 31.6-degree stop, since that’s the miter setting used for standard 38-degree spring-angle crown molding cut flat.
- Evaluate dust collection realistically. A bundled dust bag alone rarely captures more than half of generated debris; if you’re working indoors regularly, budget for a shop vac connection.
- Weigh portability against capacity. If you move the saw between job sites or rooms often, weight and footprint matter as much as spec-sheet capacity.
- Read aggregated review sentiment, not just star averages. A high average rating with a small number of reviews tells you less than a slightly lower average across thousands of verified purchases.

Common Mistakes When Buying a Miter Saw for Trim Work
The single most common mistake is buying based on blade size alone, assuming a bigger number automatically means a better saw for trim. In practice, fence height, rigidity, and detent accuracy matter more for finish carpentry than an extra two inches of blade diameter. A second frequent error is skipping the sliding-rail decision entirely and simply buying whatever’s on sale, then discovering mid-project that nested crown molding won’t fit under a non-sliding saw’s limited vertical clearance. Buyers also routinely underestimate dust collection needs, assuming the bundled bag will be sufficient for indoor work, only to find themselves cleaning fine sawdust off furniture and flooring for days afterward. Finally, many first-time buyers skip test-cutting on scrap material before committing to expensive molding, a habit that costs far less in wasted stock than the alternative.
Best Miter Saw for Beginners vs Pros: Which Fits You
The best miter saw for beginners prioritizes forgiving controls, light weight, and a shorter list of adjustment points to learn, which is exactly the case the Metabo HPT C10FCGS makes for itself — simple single-bevel operation without a sliding rail’s added complexity. Beginners also benefit from saws with fewer, clearly marked positive stops rather than a dizzying array of fine-adjustment options that aren’t necessary until you’re cutting complex compound angles regularly. Professional trim carpenters, on the other hand, generally gravitate toward dual-bevel sliding saws precisely because the added complexity buys back time on the job, and the calibration precision that intimidates a first-time buyer is what a pro relies on for consistent, repeatable results across dozens of identical cuts per day. If you’re just getting comfortable with basic 45-degree miters and simple crosscuts, start simple; you can always upgrade once you know exactly which capacity limitations you’re actually running into.
Best Miter Saw for Crown Molding: What to Look For
Crown molding punishes any saw with a short or flexible fence, since the molding has to stand nearly vertical against it during a nested cut, and any wobble translates directly into a gap at the joint. The best miter saw for crown molding combines a tall fence — ideally supporting at least 6 inches of nested material — with dual-bevel capability, so you’re not flipping large, awkward stock between cuts. Both the Makita LS1019L and Festool Kapex KS 120 REB stand out here specifically because their vertical capacity numbers lead their respective classes, letting them handle the wide 52/38 crown profiles common in residential construction without a flat-cut workaround. A positive stop at 31.6 degrees is a smaller but genuinely useful detail, since that’s the miter setting used in the flat-cutting method for standard 38-degree spring crown, and having it marked saves real setup time on every single cut.
Miter Saw Spring Crown Molding Setup and Baseboard Miter Angle Basics
Crown molding confuses people because you’re accounting for both the wall-to-ceiling spring angle and the corner angle simultaneously, and the miter saw spring crown molding setup process depends entirely on knowing your molding’s spring angle before you touch the saw. Standard residential crown typically uses a 38-degree spring angle, often labeled 52/38, and for a standard 90-degree corner cut flat on the saw table, that translates to a miter angle of roughly 31.6 degrees and a bevel angle of roughly 33.9 degrees, with the specific left-or-right setting flipping depending on whether you’re cutting an inside or outside corner piece. According to established trim-carpentry references, these exact numbers are why many saws mark 31.6 and 33.9 as dedicated detent positions on their scales — they’re the mathematical solution for the most common crown profile sold at home improvement stores, as this walkthrough of the flat-cutting method explains in detail.
Baseboard miter angle work is comparatively simple by contrast, since baseboard sits flat against the wall rather than spanning wall and ceiling at an angle. For a standard 90-degree corner, a straightforward 45-degree miter cut on each piece, with no bevel required, is enough to form a clean joint. The real variable to watch for is that very few interior corners are truly square — drywall compound buildup commonly pushes actual corners to 88 or 89 degrees — so checking with a digital angle finder before cutting, rather than assuming 45 degrees will work, saves you from an ugly visible gap after installation.
Miter Saw Dust Collection: Keeping Your Job Site Clean
Miter saw dust collection matters for more than just easy cleanup. Wood dust is classified as a human carcinogen by international health authorities, and prolonged exposure has been linked to respiratory irritation and, in some hardwood species, elevated cancer risk with sustained occupational exposure, according to federal workplace safety guidance on wood dust hazards. That’s a meaningful reason to take dust collection seriously even on a residential remodel, not just a commercial job site. A bundled dust bag alone typically captures somewhere in the neighborhood of half of generated sawdust at best, while saws with an integrated dust chute designed for shop vac attachment — like the DEWALT DWS779 — can push captured debris well above 75 percent. If you’re cutting a substantial amount of MDF trim specifically, which tends to generate finer, more airborne particulate than solid wood, pairing your saw with a shop vac and wearing a properly rated dust mask is worth the modest added setup time, particularly when working inside an occupied, furnished home where cleanup and air quality both matter.
Long-Term Cost & Maintenance
The sticker price on a miter saw is only part of the total cost of ownership. Replacement blades for a quality 80-tooth crosscut blade suited to trim work typically need replacing every one to two years of regular use, more often if you’re cutting a lot of MDF, which dulls carbide teeth faster than solid wood. Sliding saws add a maintenance dimension non-sliding saws don’t have: the rails benefit from periodic cleaning and light lubrication to prevent grit buildup from turning smooth glide action into gritty resistance over time. Belt-driven motors, found on many budget and mid-range saws, will eventually need belt replacement after years of heavy use, while direct-drive motors like the one in the Makita LS1019L sidestep that particular wear item entirely. When you total blade replacement, occasional belt or brush service, and the value of time saved by faster, more accurate cuts, a pricier saw with a strong reliability track record frequently works out cheaper per project over a multi-year span than repeatedly replacing a budget model that drifts out of calibration.

Frequently Asked Questions
❓ What is the best miter saw for trim work on a tight budget?
❓ Do I need a sliding miter saw for crown molding?
❓ What angle do I cut baseboard corners at?
❓ How often should I replace my miter saw blade?
❓ Is a 10-inch or 12-inch miter saw better for trim work?
Conclusion
Choosing the best miter saw for trim work really comes down to matching the saw’s fence height, bevel type, and sliding capability to the specific molding profiles and corner types you actually cut most often, rather than chasing the biggest blade or the longest spec sheet. The DEWALT DWS715 and Metabo HPT C10FCGS cover occasional baseboard and casing work affordably, the SKIL MS6305-00, Makita LS1019L, DEWALT DWS779, and Bosch GCM12SD each solve a specific mid-to-premium problem — budget dual-bevel access, compact crown capacity, wide crosscut range, and space-saving footprint, respectively — and the Festool Kapex KS 120 REB rewards professionals who cut trim daily and need every advantage precision and dust control can offer. Whichever saw you land on, pairing it with a proper fence upgrade, a stop block system for repeated cuts, and correct crown molding angle math will do more for your finished results than any single spec ever will on its own.
✨ Ready to Upgrade Your Trim Game?
🔍 Check current pricing on the pick that matches your project scope, and start cutting tighter, cleaner joints on your very next job!
Recommended for You
- 10 Inch vs 12 Inch Miter Saw: 7 Best Picks for 2026
- Best Sliding Miter Saw 2026: 7 Picks That Actually Deliver
- Best Miter Saw 2026: 7 Top Picks Ranked (DeWalt vs Makita)
Disclaimer: This article contains affiliate links. As an Amazon Associate, I earn from qualifying purchases. If you purchase products through these links, we may earn a small commission at no additional cost to you.
✨ Found this helpful? Share it with your friends! 💬🤗
