
In This Article
Stand in the nail gun aisle long enough and you’ll start hearing two camps argue like they’re debating pickup trucks. The coil framing nailer vs stick crowd both swear their magazine style is the only sensible choice, and honestly, they’re both a little right. One holds a fat drum of nails shaped like a hockey puck. The other carries a straight strip that looks more like ammunition for a very serious staple gun. Neither is “wrong” — they’re built for different rhythms of work, and picking the wrong one is how you end up cursing at a jammed nailer on a Tuesday afternoon instead of framing walls.

These tools replace hours of hand-hammering with a fraction of the effort, which is a big part of why construction safety researchers treat nail gun training and injury prevention as a genuine job-site priority rather than an afterthought. A coil framing nailer stores 200 to 300 nails wound into a round magazine, letting you blast through sheathing or subfloor without stopping every few minutes. A stick nailer holds a slimmer strip of 50 to 100 nails and trades capacity for a lighter, more balanced tool that slips into cramped stud bays. What is a coil framing nailer, exactly, versus a stick model? The short answer: it’s the same core tool with a completely different feeding system, and that single design choice ripples into weight, reload speed, jam frequency, and even which nail head styles you can legally use on a given job.
Below, we’ve pulled together seven real, currently sold framing nailers spanning budget pneumatic guns, cordless battery models, and gas-powered options, so you can see exactly how coil and stick nailers stack up in practice rather than in theory.
Quick Comparison Table
| Nailer | Type | Magazine | Best For |
|---|---|---|---|
| Metabo HPT NR90AES1 | Stick, 21° | ~60 nails | Best overall for beginners |
| Bostitch F21PL | Stick, 21° | ~60 nails | Framing + metal connectors |
| Paslode CFN325XP | Stick, 30° (gas/cordless) | ~40 nails | Cordless mobility |
| DeWalt DCN692 | Stick, 30-34° (cordless) | ~55 nails | Battery ecosystem users |
| Bostitch N89C-1 | Coil, 15° | ~200-300 nails | High-volume production |
| Freeman G2CN90 | Coil, 15° | ~200-300 nails | Budget-conscious framers |
| Grip-Rite GRTCN90 | Coil, 15° | ~200-300 nails | Lightest coil option |
Looking at this lineup, the split is obvious before you even pick a tool up: every coil nailer here carries three to five times the fastener capacity of the stick models, but every one of them also weighs more once that drum is loaded. If reload interruptions cost you more time than the extra weight costs you in fatigue, coil wins on paper. For anyone working overhead or in tight stud bays for hours at a stretch, the lighter stick nailers make more sense even with the extra reload stops.
💬 Just one click — help others make better buying decisions too!😊
Top 7 Framing Nailers: Expert Analysis
1. Metabo HPT NR90AES1 — lightest stick nailer in its class
At roughly 7.5 pounds empty, the Metabo HPT NR90AES1 earns its reputation as the nailer most framers hand a first-timer without a second thought. That weight class matters more than it sounds — after four hours of toenailing studs overhead, a two-pound difference between nailers is the difference between “fine” and “my shoulder is done.” It runs 21-degree plastic-collated full round head nails from 2 to 3-1/2 inches, which covers the vast majority of residential wall framing and sheathing work without switching tools. The tool-free depth adjustment means you can dial in flush drives on soft SPF studs and then crank it up for LVL headers without hunting for an Allen wrench.
Based on the spec comparison against its closest competitors, what stands out is the selective actuation switch that flips between bump and sequential firing — a feature some nailers at this price point skip entirely. Reviewers consistently report years of reliable service with minimal jamming, and this is the same core mechanism that’s carried the Hitachi-to-Metabo lineage for over two decades, so the “new” branding is really a rebadge of a proven platform. This is the pick for a weekend deck builder or a first-year apprentice who wants one dependable tool rather than a garage full of options.
What most buyers overlook is that it lacks a dry-fire lockout and a rafter hook — small omissions that Metabo has stubbornly kept off this model for years despite competitors adding both.
Pros:
- ✅ Lightest stick framing nailer in its category
- ✅ Tool-free depth adjustment works with gloves on
- ✅ Five-year warranty backs a proven, decades-old platform
Cons:
- ❌ No dry-fire lockout on this model
- ❌ No rafter hook included out of the box
Expect to pay in the $150-$190 range at the time of research, which puts it firmly in “why wouldn’t you” territory for anyone weighing entry costs — check current price before buying since availability shifts by retailer.
2. Bostitch F21PL — dual framing and metal connector nailer
The Bostitch F21PL is built for the framer who doesn’t want to carry two separate guns to the same job site. It handles standard 21-degree framing work and switches modes to drive shorter connector nails into joist hangers and hurricane ties, which is a genuinely useful crossover that most single-purpose framing nailers can’t touch. Here’s what to weigh: its 60-nail magazine sits in the same ballpark as the Metabo, but the operating pressure requirement runs a touch higher at 80-120 PSI, meaning an undersized compressor will show its limits faster on this tool than on lighter-duty competitors.
The seven-year warranty is the longest of any nailer in this roundup, which speaks to Bostitch’s confidence in the internals even if the brand gets mixed reactions in professional forums. Reviewers on long-term ownership threads describe running the same F21PL for over a decade of regular use without failure, which counters some of the brand skepticism you’ll find elsewhere online. One honest trade-off worth flagging: the nosepiece is slightly wider in framing mode than the Metabo’s, which can make nailing in the narrowest stud bays marginally more awkward.
If you’re framing walls one week and hanging joist hangers the next, this dual capability alone can justify skipping a second tool purchase entirely.
Pros:
- ✅ Switches between framing and metal connector nailing
- ✅ Seven-year warranty, longest in this comparison
- ✅ Adjustable rafter hook included standard
Cons:
- ❌ Wider nosepiece than Metabo in the narrowest bays
- ❌ Needs a stronger compressor to hit 80+ PSI reliably
Price sits in the $280-$360 range at the time of research — a fair premium over single-purpose stick nailers, given the two-in-one capability.
3. Paslode CFN325XP — best cordless mobility without a battery-only compromise
Drop the hose entirely and the Paslode CFN325XP is what most veteran framers reach for first. It uses a fuel cell and a compact lithium-ion battery to fire 30-degree paper-strip nails from 2 to 3-1/4 inches, and Paslode’s claim of roughly 9,000 nails per battery charge holds up well against actual field use reported by longtime owners. What the spec sheet won’t tell you, but reviewers note, is how dramatically better the recoil control feels compared to pure battery-driven competitors — the combustion-style drive pulses more like a pneumatic gun than an electric hammer.
Rated to operate down to 14°F with the cold-weather fuel formula, it’s genuinely one of the only cordless options that doesn’t fall apart the moment winter framing season starts. The trade-off is real, though: there’s no bump-fire mode here, so every nail requires a deliberate trigger pull, which slows production compared to a bump-capable pneumatic. You’re also feeding it a $6-8 replacement fuel cell every 1,200 shots, a recurring cost pneumatic nailers simply don’t have.
Aggregated buyer feedback skews strongly positive, with long-time Paslode owners frequently mentioning tens of thousands of nails driven without major failure, though a smaller number of buyers report the tool needing a firmer press-and-hold than expected before firing.
Pros:
- ✅ No hose or compressor needed on the job site
- ✅ Rated for cold-weather use down to 14°F
- ✅ Recoil feels closer to pneumatic than battery-only rivals
Cons:
- ❌ No bump-fire mode slows high-volume production
- ❌ Ongoing fuel cell cost adds up over a season
Expect a price in the $400-$450 range for the kit, positioning it as a premium buy for framers who value total mobility over raw production speed.
4. DeWalt DCN692 — best for crews already invested in 20V batteries
If your job box is already full of DeWalt 20V tools, the DeWalt DCN692 slots in without adding a single new charger or battery platform to manage. It drives 30 to 34-degree clipped head or offset full round head paper tape nails from 2 to 3-1/2 inches using a dual-speed brushless motor — speed one sips battery for lighter tasks, speed two delivers pneumatic-like power for LVL and hard lumber. Based on the spec comparison, this is the heaviest tool in our lineup at roughly 9.1 to 9.4 pounds with a battery installed, which is a real consideration if you’re working overhead for extended stretches.
The 55-nail magazine capacity paired with a 7-9 nail dry-fire lockout means more frequent reloading than you’d tolerate from a coil gun, though the trade-off is zero hoses, zero gas cartridges, and genuinely simple maintenance. On paper this means a punch-list carpenter or remodeler gets true portability; a production framer running hundreds of nails an hour will likely find the reload cadence frustrating.
Reviewers who’ve put real hours on it report it jams more frequently than a comparable pneumatic gun and requires more deliberate technique to avoid kicking studs out of alignment during toenailing — an honest trade-off for cutting the cord completely.
Pros:
- ✅ Shares batteries with the broader DeWalt 20V lineup
- ✅ Dual-speed motor adds power for hardwood and LVL
- ✅ No hose, compressor, or gas cartridges required
Cons:
- ❌ Heaviest nailer in this comparison at over 9 pounds
- ❌ Smaller magazine means more frequent mid-job reloading
Pricing lands in the $350-$450 range for the bare tool, with kits (battery and charger included) running higher — check current price since bundle contents vary by retailer.
5. Bostitch N89C-1 — high-capacity coil nailer for production framing
Once you need to drive hundreds of nails without stopping, the Bostitch N89C-1 makes the case for coil over stick better than almost anything else on this list. Its 15-degree wire-collated magazine holds a full coil of 200 to 300 nails from 2 to 3-1/2 inches, meaning a framer sheathing a large wall section can work through an entire panel without a single reload. Here’s what most buyers overlook about this model: despite the bulkier drum, Bostitch engineered it to stay genuinely lightweight for a coil nailer, and the tool-free depth adjustment plus directable exhaust make it comfortable for extended sessions.
Reviewers consistently point to smooth loading and reloading as a standout, which isn’t universal among coil nailers — some competitors in this category are notorious for finicky canister mechanisms that eat up the time savings you’re supposedly getting from the higher capacity. The honest downside is nail availability and cost; 15-degree wire-collated coils are more of a specialty item at some hardware stores compared to the nearly universal 21-degree plastic strips.
For production framers doing subfloor, roof decking, or sheathing all day, the reload savings alone justify the extra bulk in the hand.
Pros:
- ✅ 200-300 nail capacity dramatically cuts reload stops
- ✅ Lightweight for a coil-style framing nailer
- ✅ Tool-free depth adjustment and directable exhaust
Cons:
- ❌ 15-degree wire coils cost more and are less common
- ❌ Bulkier profile than any stick nailer in tight bays
Price runs in the $300-$380 range at the time of research, a reasonable ask for a nailer built around minimizing downtime on big sheathing days.
6. Freeman G2CN90 — most affordable coil framing nailer
Budget shouldn’t mean “hope it survives the job,” and the Freeman G2CN90 is the answer for framers who want coil capacity without a premium price tag. This second-generation redesign reworked the internal components specifically to address reliability complaints from earlier Freeman coil nailers, and the optimized airflow means it draws less air from your compressor while still driving 15-degree nails up to 3-1/2 inches long. What the spec sheet won’t tell you is how much value the included adjustable rafter hook and transparent nail-viewing bucket add for a tool at this price — features that some premium-brand coil nailers charge extra for or omit entirely.
Based on the spec comparison, the 200 to 300 nail capacity matches the pricier Bostitch and Grip-Rite coil options here, which is the whole appeal: you’re not sacrificing magazine capacity, just brand reputation and long-term durability data. Freeman doesn’t have the multi-decade track record of Bostitch or Metabo, so the verifiable long-term review pool is genuinely thinner — that’s a fair thing to weigh rather than paper over.
For a DIYer building a deck once a year or a side-gig framer watching every dollar, this is where the value math works hardest in your favor.
Pros:
- ✅ Lowest price among the coil nailers in this comparison
- ✅ Redesigned internals target earlier reliability complaints
- ✅ Includes adjustable rafter hook and transparent bucket
Cons:
- ❌ Shorter brand track record than Bostitch or Metabo
- ❌ Thinner long-term durability review pool to draw from
Expect to pay in the $150-$200 range, making it the clear budget pick for anyone prioritizing coil capacity on a tighter tool budget.
7. Grip-Rite GRTCN90 — lightest coil nailer in this comparison
Coil nailers have a reputation for feeling like you’re swinging a small fire extinguisher, and the Grip-Rite GRTCN90 is the rebuttal to that stereotype. At just 6.6 pounds, it undercuts every other coil nailer here by a meaningful margin while still holding the same 15-degree wire-weld or plastic sheet coil capacity from 1-3/4 to 3-1/2 inches. What most buyers overlook about Grip-Rite as a brand is that it’s backed by the same “RED Promise” warranty program the company applies across its whole pneumatic tool line, including a 7-year tool warranty and a 90-day satisfaction guarantee that covers soft parts — a level of backing you don’t always get from budget-adjacent brands.
The selectable trigger lets you flip between sequential fire for precision framing and bump fire for high-speed sheathing, giving it genuine flexibility across job types. Reviewers highlight the rotating belt hook and molded rubber grip as small but real quality-of-life upgrades that reduce fatigue on long days. The trade-off is availability of accessories and replacement parts through smaller specialty retailers rather than every big-box store, so factor in lead time if something needs replacing mid-project.
For anyone who’s tried a heavier coil nailer and immediately missed their stick nailer’s balance, this is the closest a coil design gets to closing that gap.
Pros:
- ✅ Lightest coil framing nailer in this entire comparison
- ✅ Selectable bump and sequential firing modes
- ✅ Backed by a 7-year RED Promise warranty
Cons:
- ❌ Parts and accessories less widely stocked than Bostitch
- ❌ Still heavier in-hand than any stick nailer once loaded
Pricing falls in the $300-$370 range at the time of research, positioning it as a strong mid-range pick for anyone chasing coil capacity without the extra weight penalty.
Practical Usage Guide: Setup and Your First 30 Days
Getting a new framing nailer running correctly starts before you ever pull the trigger. Set your compressor’s regulator to the low end of the manufacturer’s PSI range first — most framing nailers run comfortably between 70 and 120 PSI, and starting low lets you dial up power gradually rather than overdriving your first few nails through the workpiece. Load the magazine according to the tool’s specific orientation; coil canisters typically clip in with the nail points facing the feed mechanism, while stick magazines require the strip to slide until it clicks past the pusher spring. In your first week, run a test board of scrap lumber matching your actual framing material and adjust the tool-free depth dial until nail heads sit flush without crushing the wood fibers — sinking heads below the surface weakens the connection and can violate local nailing schedule requirements. A common mistake in the first 30 days is skipping daily air-line lubrication on pneumatic models that require it, which accelerates O-ring wear and causes weak drives that mimic a pressure problem. Keep a small bottle of pneumatic tool oil in your bag and add two to three drops before each shift unless your specific model is explicitly oil-free. Finally, get in the habit of clearing the nosepiece of sawdust and debris at the end of every day — it’s the single easiest way to prevent the jams that eat up far more time than the thirty seconds of cleaning would have cost.

Real-World Scenarios: Matching the Nailer to the Job
Consider three framers with different needs. A weekend DIYer building a 10-by-12 shed on a tight budget, framing maybe two weekends a year, is best served by a lightweight stick nailer like the Metabo HPT NR90AES1 — the lower upfront cost and forgiving weight matter more than raw capacity when you’re only driving a few hundred nails total. A remodeling contractor doing punch-list work across multiple small job sites in a single day benefits enormously from a cordless option like the DeWalt DCN692 or Paslode CFN325XP, since not hauling a compressor between five different houses saves more time than any reload advantage a coil nailer offers. A production framing crew sheathing an entire subdivision of houses, driving thousands of nails daily across large flat surfaces, should lean toward a high-capacity coil nailer like the Bostitch N89C-1 or Grip-Rite GRTCN90 — the reload time saved compounds dramatically across a full crew and a full week. Notice the pattern: it’s rarely about which tool is objectively “better,” but about which bottleneck actually costs you time and money on your specific jobs.
Framing Nailer Jam Fix: Solving the Most Common Problems
Even a well-maintained nailer jams occasionally, and knowing the fix in under a minute keeps your day moving. Problem 1: A nail is bent and stuck at the nosepiece. Disconnect the air supply or remove the battery immediately, open the nosepiece latch, and use pliers to remove the bent fastener before reloading — never try to clear a jam with the tool connected to power. Problem 2: Nails aren’t feeding consistently from a coil magazine. This is often caused by a warped or improperly seated coil; remove it, check that the wire collation isn’t kinked, and reseat it so the feed pawl engages the first nail cleanly. Problem 3: The stick nailer’s pusher spring loses tension over time. A weakening pusher spring causes the last few nails in a strip to misfeed; most manufacturers sell replacement springs cheaply, and swapping one takes under ten minutes. Problem 4: Nails are driving too deep or not deep enough. This usually points to incorrect PSI rather than a mechanical fault — verify your compressor output at the tool, not just at the tank gauge, since long hoses cause real pressure drop. Problem 5: The nailer double-fires or fires on release. Stop using the tool immediately and inspect the trigger valve; this is a genuine safety issue that typically requires a service center rather than a DIY fix. Keeping a basic maintenance kit — spare O-rings, a driver blade, and the specific Allen wrenches your model requires — on the job site turns most of these into two-minute interruptions instead of half-day delays.
✨ Don’t Miss These Exclusive Deals!
🔍 Take your framing projects to the next level with these carefully selected nailers. Click on any highlighted model to check current pricing and availability. The right tool turns a weekend of frustration into a job finished ahead of schedule!
How to Choose a Coil or Stick Framing Nailer
- Match the fastener angle to what your lumberyard actually stocks. A 21-degree plastic-strip nailer is useless if your local supplier only carries 30-degree paper tape — check availability before falling in love with a specific tool.
- Weigh your typical job duration against tool weight. Full-day overhead work favors lighter stick nailers; short bursts of high-volume driving favor coil capacity.
- Consider your power source realistically. If you don’t already own a compressor, a cordless battery or gas model removes a real cost and hassle barrier, even at a higher upfront tool price.
- Check your local building code’s nail head requirements. Some jurisdictions restrict clipped-head nails in shear wall applications, which immediately narrows your collation options.
- Factor in reload frequency versus jam risk. Coil nailers reduce reloads dramatically but can be pickier about nail quality and coil condition.
- Read the warranty terms, not just the length. A seven-year warranty that excludes wear parts offers less real protection than a shorter warranty with broader coverage.
- Buy from the same brand as your existing air tools when possible. Shared fittings, accessories, and even nail compatibility across a brand’s lineup save money over time.
Round Head vs Clipped Head Framing Nailer: What Actually Changes
The head shape on a framing nail isn’t cosmetic — it directly affects both collation angle and, in some jurisdictions, code compliance. Round head nails have a full, unbroken circular head and typically collate at steeper 28 to 34-degree angles using paper tape, which lets the strip sit lower and helps the nailer squeeze into narrower stud bays. Clipped head nails have roughly 20 to 30 percent of the head sheared off so more fasteners can nest tightly together in a plastic-collated strip at a shallower 20 to 22-degree angle, increasing magazine capacity slightly for the same strip length. Here’s what most buyers overlook: some regional building codes and engineered lumber manufacturers explicitly require full round heads for structural shear connections, because the reduced head diameter on clipped nails provides less pull-through resistance under lateral load. Reviewers and contractors in areas with strict code enforcement consistently report double-checking local requirements before buying nails in bulk, since a garage full of clipped-head fasteners becomes useless overnight if an inspector flags them. Practically speaking, if you’re doing general framing in a jurisdiction without specific restrictions, clipped head nails offer a small collation efficiency advantage; if you’re doing anything structural, engineered, or shear-wall related, round head is the safer default. The International Residential Code’s fastener schedule spells out minimum nail types and spacing for structural connections, and it’s worth a five-minute check before committing to nails in bulk — it can avoid a very expensive mistake.
Coil Nailer Magazine Capacity vs Stick Nailer Reload Speed
A coil nailer’s 200 to 300 nail capacity isn’t just a bigger number on a spec sheet — it changes the actual rhythm of a workday. On a sheathing job requiring roughly one nail every six inches along studs spaced 16 inches on center, a single coil load can cover an entire 4-by-8 sheet of plywood with nails to spare, meaning a two-person crew can keep moving across a whole wall section without either person stopping. What the spec sheet won’t tell you is that magazine capacity also reduces a subtler cost: the mental interruption of stopping mid-rhythm to reload breaks pace in a way that adds up over an eight-hour day far more than the raw seconds suggest.
Stick Nailer Reload Speed: The Hidden Productivity Trade-Off
Stick nailers reload faster per individual event — sliding a fresh strip in takes roughly five to ten seconds versus wrestling a coil canister back into position — but they simply need it far more often. Based on the spec comparison, a 50 to 60 nail stick magazine on a similar sheathing job might need reloading three to four times per sheet, and those individual quick reloads compound into more total downtime than one slower coil reload every few sheets. The trade-off flips, though, on jobs with lots of movement between short bursts of nailing — toenailing studs, hanging joist hangers, working through a punch list — where the quick individual reload of a stick nailer never becomes the bottleneck in the first place.
Framing Nailer Weight: Coil vs Stick and Why It Matters
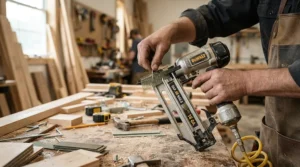
Weight differences between coil and stick framing nailers look small on a spec sheet — often just two to three pounds — but that gap compounds dramatically across a full day of overhead work. A fully loaded coil nailer in this comparison typically runs 8 to 9 pounds, while a comparable stick nailer sits closer to 6.5 to 7.5 pounds, and that difference concentrates specifically at arm’s length when you’re nailing rafters or ceiling joists overhead. Reviewers consistently note that the extra coil weight becomes far more noticeable in vertical or overhead applications than in flat, ground-level sheathing work, which is exactly why many production framers keep both a coil and a stick nailer in the truck rather than picking one exclusively. The Grip-Rite GRTCN90 stands out specifically because it closes much of this gap, proving that coil capacity and manageable weight aren’t mutually exclusive if the manufacturer prioritizes it in the design. If your work is genuinely mixed between overhead framing and flat sheathing, that weight gap alone might be worth more consideration than either magazine capacity or reload speed on their own.
Best Framing Nailer for Beginners
For someone picking up a framing nailer for the first time, forgiveness matters more than raw capability. A lighter stick nailer like the Metabo HPT NR90AES1 reduces the physical learning curve of controlling recoil and aim, and its simple depth adjustment means fewer overdriven or underdriven nails while you’re still building muscle memory. Beginners should also prioritize a sequential-only firing mode, or at least the ability to switch into sequential, over bump-fire capability — sequential firing requires a fresh trigger pull for every nail, which is objectively slower but meaningfully reduces the risk of an accidental double-fire while you’re still developing safe handling habits. Skip coil nailers as a first purchase; the added weight and slightly steeper canister-loading learning curve add friction you don’t need while you’re also learning basic technique, PSI adjustment, and safe positioning. Once you’re comfortable and find yourself doing genuinely high-volume work, upgrading to a coil nailer becomes an easy, informed decision rather than a guess.
Common Mistakes When Buying a Framing Nailer
The most frequent mistake is buying based on brand reputation alone without checking nail availability in your area — a fantastic nailer that takes fasteners your local store doesn’t stock becomes a fantastic paperweight. A close second is underestimating compressor requirements; pairing a high-CFM-demand framing nailer with an undersized pancake compressor leads to inconsistent drive depth that gets blamed on the tool rather than the air supply. Buyers also frequently skip reading return policies on cordless models, which often carry different, more restrictive terms than pneumatic tools due to battery and fuel cell components. Another overlooked factor is assuming heavier automatically means more durable — as the Grip-Rite GRTCN90 demonstrates, modern engineering can deliver coil capacity without the weight penalty older designs required. Finally, many first-time buyers skip a critical step: actually checking their state or local nailing schedule requirements before assuming any 21-degree or 30-degree nailer will satisfy code, when in fact head style and shank type can matter as much as the angle itself.
Long-Term Cost and Maintenance
The sticker price on a framing nailer is only part of its real cost over a working life. Pneumatic nailers generally have the lowest cost-per-nail once you already own a compressor, since there’s no recurring fuel or battery expense beyond occasional O-ring kits and driver blade replacement. Cordless gas models like the Paslode CFN325XP carry an ongoing fuel cell cost that adds up over a full framing season — budget roughly $6 to $8 per 1,200-shot cartridge, which is a real recurring line item worth factoring into total ownership cost. Battery-only models like the DeWalt DCN692 avoid fuel costs entirely but eventually need battery replacements, typically every few years of regular use, at a cost that can rival a portion of the tool’s original price. Coil nailers, meanwhile, often see slightly higher fastener costs per nail than stick nailers due to the wire collation process, though the difference is usually small enough to be outweighed by labor time savings on high-volume jobs. Across a multi-year ownership period, the tools with the strongest warranties in this comparison — the Bostitch F21PL at seven years and the Grip-Rite GRTCN90 at seven years under its RED Promise — offer meaningful protection against the internal seal and spring wear that eventually affects every pneumatic nailer.
Safety, Regulations, and Compliance Guide
Framing nailers are powerful tools, and nail gun injuries hospitalize construction workers more often than injuries from any other tool category on a job site. The safest operating practice recommended by federal safety guidance is using sequential trigger mode rather than bump fire whenever precision matters more than raw speed, since sequential mode requires a deliberate trigger pull for every single nail and meaningfully reduces unintentional discharges. Always disconnect the air supply, remove the battery, or extract the fuel cell before clearing a jam or performing any maintenance — this single habit prevents the majority of accidental discharge injuries reported industry-wide. For detailed jobsite safety requirements and PPE recommendations specific to pneumatic and cordless nail guns, the OSHA Nail Gun Safety guidance covers required eye and hearing protection, hose securing standards, and trigger configuration recommendations in full detail. On the code compliance side, always confirm your local jurisdiction’s adopted amendments before assuming any given nail length, gauge, or head style satisfies structural requirements for framing and sheathing connections — amendments vary meaningfully by state and even by county. Wearing ANSI-rated eye protection and hearing protection isn’t optional gear for framing nailer work; sound levels from pneumatic nail guns regularly exceed the threshold considered hazardous for repeated daily exposure, and long-running professional test data from outlets like Pro Tool Reviews’ framing nailer testing consistently backs up how much recoil and noise vary between otherwise similar-looking tools.
Frequently Asked Questions
❓ Is a coil framing nailer better than a stick nailer?
❓ What angle framing nailer do I need?
❓ Can I use a stick nailer for sheathing?
❓ How much does a good framing nailer cost?
❓ Do cordless framing nailers work as well as pneumatic?
Conclusion
The coil framing nailer vs stick decision really comes down to matching magazine style to the actual rhythm of your work, not chasing whichever spec sheet looks more impressive. If you’re doing high-volume sheathing, subfloor, or production framing where reload interruptions genuinely cost you money, a coil nailer like the Bostitch N89C-1 or the surprisingly light Grip-Rite GRTCN90 pays for itself in saved downtime. If your work involves overhead framing, tight stud bays, or frequent movement around a job site, a stick nailer like the Metabo HPT NR90AES1 keeps fatigue lower across a full day. And if you’re cutting the cord entirely, the Paslode CFN325XP and DeWalt DCN692 each solve mobility in slightly different ways worth weighing against your existing tool ecosystem. Whichever direction you land on, checking current pricing, verifying nail availability locally, and confirming your jurisdiction’s nailing schedule before you buy will save far more headaches than the tool choice itself.
Recommended for You
- 21 vs 30 Degree Framing Nailer: 7 Best Picks for 2026
- 7 Best Framing Nailer Picks for 2026: Pro vs Budget Guide
- Best Cordless Brad Nailer 2026: 7 Top Picks Tested
Disclaimer: This article contains affiliate links. As an Amazon Associate, I earn from qualifying purchases. If you purchase products through these links, we may earn a small commission at no additional cost to you.
✨ Found this helpful? Share it with your friends! 💬🤗
