
In This Article
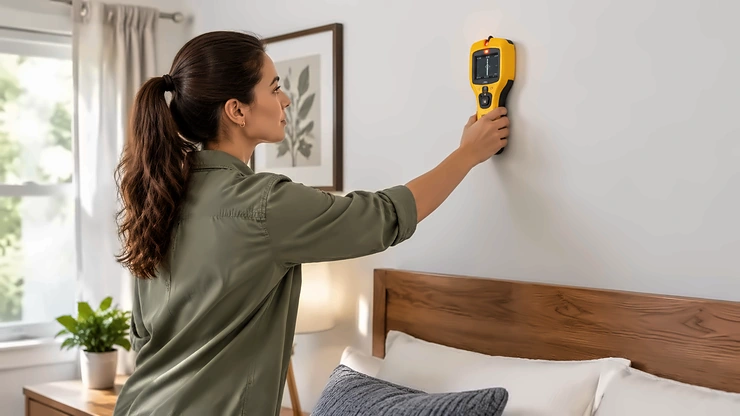
A stud finder for home renovation is a handheld device that locates the wood or metal framing studs behind drywall or plaster. Better models also flag live wires, pipes, and metal fasteners, so every screw, anchor, and bracket lands where the wall can actually carry the load.
Drywall is a polite fiction. It looks sturdy, it sounds sturdy when you knock on it, and it will happily hold a picture frame for a decade. Hang a 65-inch television from it alone and you’ve built a very expensive gravity experiment.
That’s why a decent wall stud detector is the first tool worth buying for any renovation, ahead of the fancy drill and the laser level. It costs less than a family dinner out. It quietly prevents the three classic disasters: the shelf that peels off the wall, the bracket that drifts out of level, and the drill bit that meets a live wire at full speed.
One honest note before we dive in. I haven’t personally run these seven tools through your walls, and this guide won’t pretend otherwise. What you get instead is arguably more useful. Real spec sheets are decoded into plain English, aggregated review sentiment comes from published tests and verified buyer feedback, and the reasoning about who should buy what is straight.
Along the way we’ll cover how an electronic stud finder for home use differs from a magnet on a stick. We’ll look at what a stud finder with wire detection can and can’t tell you, and where wire and pipe detection needs backup. Then comes shelf mounting and TV wall mounting without drama. Prices are ranges only, since they shift constantly, so check current price before you buy.
Quick Comparison: 7 Stud Finder for Home Renovation Picks at a Glance
Here’s the short version before the deep dive. Skim the table, then read the full analysis for any pick that catches your eye.
| Product | Type | Wire / Pipe Detection | Price Range | Best For |
|---|---|---|---|---|
| C.H. Hanson 03040 Magnetic Stud Finder | Magnetic | None | About $10-$20 | Budget backup, quick shelf and picture jobs |
| Zircon StudSensor HD70 | Electronic (center-finding) | Stud-focused | Roughly $35-$50 | First-time buyers on standard drywall |
| Zircon MultiScanner A200 | Electronic multi-mode | Live AC alert, metal scan | $45-$60 range | All-round renovators on a budget |
| Franklin Sensors ProSensor M210 | 13-sensor array | Live wire alert | $50-$90 range | Fast, whole-stud mapping |
| Zircon MetalliScanner m40 | Metal detector | Metal pipes and fasteners | $60-$150 range | Lath-and-plaster and older homes |
| Bosch GMS 120 | Multi-material scanner | Live cable, ferrous and non-ferrous metal | Roughly $100-$140 | Gut renovations and deep scanning |
| Walabot DIY 2 | Phone-based imaging | Wires and pipes, including plastic | $140-$300 range | Visual learners and heavy-duty projects |
Looking at the comparison above, the Hanson 03040 is the cheapest way into reliable stud hunting. The Zircon MultiScanner A200 adds live-wire alerts for a modest step up, and the Franklin Sensors ProSensor M210 is the pick if you want the entire stud displayed at once. Old plaster walls point toward the Zircon MetalliScanner m40, while the Bosch GMS 120 and Walabot DIY 2 suit people who’d rather see hazards than guess at them.
💬 Just one click — help others make better buying decisions too!😊
Top 7 Stud Finder for Home Renovation Picks: Expert Analysis
Every pick below gets the same treatment: what the specs mean in practice, what verified reviewers keep saying, and who should skip it. Where model-specific review data was thin, I say so instead of inventing a consensus.
1. C.H. Hanson 03040 Magnetic Stud Finder — battery-free budget workhorse
There’s something charming about a tool with no screen, no battery, and no opinion. The Hanson 03040 uses rare-earth magnets to snap onto the nails or screws that fasten drywall to studs, and that’s the whole trick.
Retailers list its scan depth anywhere from three-quarters of an inch to two inches. Treat it as a standard half-inch drywall tool and you won’t be disappointed. A rotating bubble level lets you mark plumb and level lines as you go, and the magnet is strong enough to hang on the wall hands-free once it finds a fastener.
On paper this means it’s brilliant for quick picture and shelf jobs and a lovely backup when your electronic unit sulks near an outlet. Reviewers consistently praise the simplicity and the grip of the magnet. A common complaint is that it fails on old plaster walls and can be fooled if you slide it too fast, because it finds fasteners, not wood.
Pros:
- ✅ No batteries, no calibration, always ready
- ✅ Strong magnet holds hands-free on the wall
- ✅ Built-in level for clean marking
Cons:
- ❌ Finds fasteners only, not the stud itself
- ❌ Struggles on plaster and thick walls
Expect a price in the $10-$20 range. For the money it’s a near-perfect second tool, though not a primary one for a full renovation.

2. Zircon StudSensor HD70 — backlit center-finding simplicity
The Zircon StudSensor HD70 is the “just tell me where the stud is” machine. It uses electronic capacitive sensing to locate the edges and center of wood and metal studs, then lights a Target Spotlight when you’re dead on.
The backlit LCD matters more than it sounds, because renovation zones are dim, dusty, and full of shadows. Retail specs list a scan depth around 1.5 inches, enough for standard drywall and many double-layer situations. The translucent base with an illuminated marking groove helps you pencil the center without eyeballing. It runs on a single 9V battery, which is usually sold separately.
Here’s the honest analysis: this is the friendliest electronic stud finder for home use if you’ve never owned one. I couldn’t verify a large model-specific review pool, so I won’t quote ratings. What published roundups of Zircon’s capacitive finders consistently note is that they reward patient technique, meaning calibrate on an empty stretch of wall and scan slowly.
Pros:
- ✅ Backlit LCD readable in dim rooms
- ✅ Center-finding means fewer passes
- ✅ Handles typical drywall depth
Cons:
- ❌ 9V battery usually not included
- ❌ Readings get noisy near outlets and switches
Plan on roughly $35-$50. It’s solid value if your renovation is mostly standard drywall and shelf mounting.
3. Zircon MultiScanner A200 — live-wire alerts without the premium price
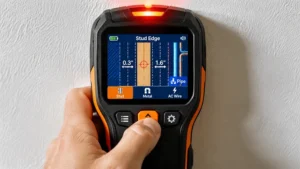
If one tool had to do everything for a first-time renovator, the Zircon MultiScanner A200 is the safest bet on this list. A 3-mode switch moves you between stud scanning, thick-wall scanning, and metal detection. ACT (Auto Correcting Technology) automatically recalibrates and forgives the classic mistake of starting your scan over a stud.
The headline feature is WireWarning, which alerts you to live, unshielded AC wiring up to roughly 2 inches deep in every mode. That turns the A200 into a legitimate stud finder with wire detection for people who don’t want to spend triple. Bob Vila’s team put eight stud finders through their paces and named it best overall.
Reviewers praise the accuracy on hitting stud centers and the bright red SpotLite indicator. The recurring complaint is limited ability to see through plaster, with at least one buyer reporting it missed copper pipes behind it. That’s expected, since it alerts to live AC, not pipes.
Pros:
- ✅ Live AC alert active in every scan mode
- ✅ Auto-recalibration forgives rookie errors
- ✅ Limited lifetime warranty in the U.S. and Canada
Cons:
- ❌ Won’t map pipes or dead wires
- ❌ 9V battery not included
Expect the $45-$60 range. It’s the best-balanced pick here.
4. Franklin Sensors ProSensor M210 — 13 sensors map the whole stud at once
Most stud finders take one measurement and make you hunt. The Franklin Sensors ProSensor M210 takes thirteen at once, then lights LEDs across the wall to show the stud’s full width instantly.
That design means you press it flat and read the result, with no sliding back and forth and no calibration. It reaches about 1.7 inches deep and adds a live wire meter. Franklin’s family can even display two objects at the same time, which helps spot double studs and corners. ProToolReviews rated the sibling ProSensor 710 and T13 at 9.5 out of 10, and the M210 carries well over a thousand verified reviews at a major home-improvement retailer.
Reviewers praise speed and the lack of false positives. The recurring critiques are a shallow handle that’s awkward to grip, finger placement interfering with readings, and weaker results on metal. Franklin’s own instructions recommend staying about three inches away from outlets and switches.
Pros:
- ✅ Shows full stud width instantly
- ✅ No calibration needed
- ✅ Live wire meter included
Cons:
- ❌ Awkward, shallow handle
- ❌ Less convincing on metal studs
Budget $50-$90 depending on retailer. For fast, confident marking on drywall, it’s hard to beat.
5. Zircon MetalliScanner m40 — the lath-and-plaster problem solver
Older homes hide their studs behind lath, plaster, and a century of paint. Electronic finders get confused there, which is exactly where the Zircon MetalliScanner m40 shines.
It doesn’t sense wood at all. Instead it detects metal, finding the nail pattern that fastens lath or drywall to the beam beneath. Published specs put ferrous detection at roughly 4 inches and non-ferrous around 2 inches. Wide Scan and Pinpoint modes let you search broadly, then narrow down. It also finds metal pipes, rebar, and screws, which makes it a useful partner for wire and pipe detection when you’re opening up an old kitchen.
Verified reviewers describe finding studs in drywall over lath-and-plaster after other finders failed. One complaint is that the manufacturer’s documentation is too generalized about detection parameters. It also won’t warn you about live wires.
Pros:
- ✅ Finds studs by nail pattern in plaster
- ✅ Detects pipes, rebar, and fasteners
- ✅ Wide and Pinpoint scan modes
Cons:
- ❌ No live-wire warning
- ❌ Takes practice to read the signals
Pricing runs $60-$150 depending on retailer. For plaster, it earns its place.
6. Bosch GMS 120 — deep, multi-material scanning
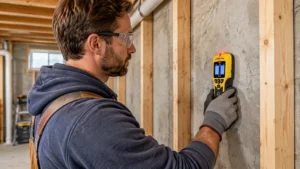
The Bosch GMS 120 is the one you reach for when a wall is about to be opened and surprises are unwelcome. Datasheets list ferrous metal detection to about 4¾ inches, non-ferrous to around 3 inches, and live cables to roughly 2 inches. Wooden substructures register at roughly an inch to 1.5 inches, depending on the version.
Automatic calibration, a backlit display, and a three-color LED ring reduce interpretation errors. A rubberized, IP54-rated housing means it survives a dusty job site. That’s the full wire and pipe detection package for steel and copper pipes, rebar, and live cable in a single handheld.
I couldn’t pull a strong pool of aggregated review data for this model, so the case rests on specs. On paper it’s the deepest scanner here for metal. The trade-off is that it’s bulkier than the Zircons and its wood detection is modest, so pair it with a dedicated stud method if framing is your priority.
Pros:
- ✅ Detects live cable, ferrous and non-ferrous metal
- ✅ Rugged, dust and splash protected housing
- ✅ Automatic calibration
Cons:
- ❌ Wood detection depth is modest
- ❌ Bulkier than basic finders
Expect roughly $100-$140. It’s a smart buy for gut renovations.
7. Walabot DIY 2 — see inside the wall on your phone
The Walabot DIY 2 isn’t a stud finder in the traditional sense. It’s a radar-style imager that connects over Wi-Fi to your iOS or Android phone and draws what’s inside the wall.
It can show wood and metal studs, pipes (including plastic), and both live and non-live wires, to depths the maker cites around 4 inches. A built-in rechargeable battery means it won’t drain your phone. Expert mode even tracks movement, which some owners use to check for pests.
Reviewer sentiment is mixed, which is worth knowing. Buyers praise how it centers studs for mounting rails and reveals wires other tools miss. Others report a learning curve, and one owner of the older model said the DIY 2 does a fraction of what its predecessor did. Another found few studs in a thin-paneled mobile home.
Pros:
- ✅ Visual map of studs, pipes, and wires
- ✅ Detects plastic pipes and non-live wires
- ✅ Wireless with rechargeable battery
Cons:
- ❌ Needs a phone and a learning curve
- ❌ Priciest option here
Budget $140-$300 depending on bundle. It rewards patience and punishes impatience.
✨ Ready to scan smarter?
🔍 Take your next renovation to the next level with these carefully selected tools. Click any highlighted product name to check current pricing and availability. Whatever you choose, you’ll end up with rock-solid, level, professional-looking results you’ll be proud of!
How to Choose a Stud Finder for Home Renovation
Choosing well comes down to matching the tool to your walls and your risk tolerance. Work through these steps in order.
- Identify your wall type first. Standard drywall suits electronic and magnetic finders. Plaster over lath points toward metal detection.
- Decide how much hidden-hazard detection you need. Light shelf work needs only a stud locator. Opening walls calls for a stud finder with wire detection, and for plumbing you want true wire and pipe detection.
- Check scan depth against your wall. Double-layer drywall or thick plaster needs 1.5 inches or more, not the bare minimum.
- Prefer center-finding or full-width displays if you hate doing edge math with a pencil.
- Consider power and ergonomics. Many models need a 9V battery you buy separately, and a comfortable grip matters over a long day.
- Weigh the learning curve honestly. A magnet is instant, an electronic stud finder for home use takes a few minutes, and imaging tools take practice.
- Budget for a backup. A cheap magnet verifies what the electronic unit claims.
A solid stud finder for home renovation is the one you’ll actually use correctly.
Electronic Stud Finder for Home Use vs. Magnetic Stud Finders (and Other Methods)
Wikipedia notes that stud finders fall into magnetic and electronic families. Each approach has real strengths, and none is perfect on its own.
| Method | How It Works | Strengths | Weaknesses | Best For |
|---|---|---|---|---|
| Knocking on the wall | Listening for solid vs. hollow | Free, instant | Unreliable, easy to misread | Rough guess only |
| Hanson 03040 Magnetic Stud Finder | Magnet finds nails and screws | Cheap, no batteries | Fasteners only, struggles on plaster | Quick verification |
| Zircon MultiScanner A200 | Electronic density sensing plus alerts | Center finding, live-wire warning | Needs calibration, can be fooled near metal | All-round renovators |
| Walabot DIY 2 | Radar-style imaging | Shows pipes, wires, studs | Learning curve, higher cost | Complex or high-risk walls |
The table shows why one method rarely wins every scenario. The Hanson 03040 is perfect as a cross-check, the A200 handles day-to-day scanning, and the Walabot DIY 2 earns its cost only when hidden hazards are likely. Smart renovators combine two methods rather than trusting a single beep.
Stud Finder with Wire Detection: What the Alert Actually Tells You
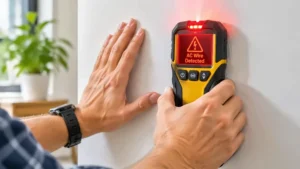
A stud finder with wire detection is a reassuring thing to own, and a dangerous thing to over-trust. Most alerts, including the Zircon MultiScanner A200 and Franklin Sensors ProSensor M210, detect live, unshielded AC wiring. That means energized wire that isn’t buried in metal conduit.
Here’s what the alert can’t do. It won’t find a dead wire, a low-voltage cable, or a shielded run. It also won’t tell you how a wire is routed. The Walabot DIY 2 goes further by claiming to detect non-live wires too, which matters when a circuit was switched off at the breaker.
Practical advice follows from the spec sheet. Wires often run vertically from outlets and switches, frequently stapled beside studs. So the zone just above and below any outlet is a hazard zone, even when your scanner stays quiet. Turn off the breaker for the area before drilling, and treat the wire alert as a second line of defense, never the first.
Wire and Pipe Detection: When a Stud Finder Isn’t Enough
True wire and pipe detection means separating electrical, copper, steel, and plastic lines, and few tools do that completely. The Bosch GMS 120 covers live cable plus ferrous and non-ferrous metal, and the Zircon MetalliScanner m40 finds metal pipes and fasteners. Only the Walabot DIY 2 claims to image plastic pipes visually.
That gap matters in older houses. The Electrical Safety Foundation International recommends homeowners get electrical systems inspected when a home is 40 or more years old, and it urges calling a licensed electrician for electrical work. A scanner reduces risk, but it isn’t a substitute for an expert’s eyes.
Layer your safeguards. Check the walls above and below plumbing fixtures, use a short drill bit that won’t reach deep, and drill a small pilot hole before committing. When in doubt, cut a tiny inspection opening. It’s cheap to patch and expensive to ignore.
Wall Stud Detector Accuracy by Wall Type
Even the best wall stud detector is only as good as the wall it’s scanning. Here’s how the common surfaces behave.
- Standard drywall: The easiest case. Electronic and magnetic finders both work well.
- Double-layer drywall: Needs deeper scanning, so favor the Franklin Sensors ProSensor M210 or a thick-wall mode on the Zircon MultiScanner A200.
- Lath and plaster: Electronic units often struggle here. The Zircon MetalliScanner m40 or a magnet that finds nails works better.
- Metal studs: Detectable, but anchoring changes. Use toggle bolts or specialty anchors, not wood screws.
- Concrete or block basements: No studs to find. Use masonry anchors and a hammer drill.
- Textured or heavily painted walls: Slow down. Texture changes density readings.
The pattern is simple: know your wall, pick the sensing method that suits it, and verify with a second method when the stakes are high.
Practical Usage Guide: How to Scan a Wall Like a Pro
This is the transformation content Amazon listings skip. Follow these steps for cleaner, faster results.
- Predict first. Studs are typically 16 or 24 inches apart, center to center, and often sit beside outlets. Make a guess before you scan.
- Calibrate on empty wall. Place the tool flat, away from outlets and switches, then power on and hold still.
- Scan both directions. Move slowly left to right, mark the first edge, then repeat right to left. Matching marks mean a good read.
- Mark edges and center. A stud is roughly an inch and a half wide, so the midpoint is your target.
- Verify with a second method. A magnet or a thin finishing nail confirms before the big drill comes out.
- Scan vertically. Moving up and down along the line catches fire blocking and horizontal obstructions.
Maintenance is minimal. Remove the 9V battery during storage, wipe the sensing face, and keep it out of damp garages. Common first-month mistakes include scanning too fast, pressing too hard, and trusting a single beep.
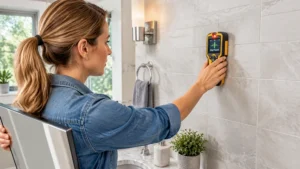
Shelf Mounting: A Case Study for a Home Office Wall
Imagine a six-foot run of floating shelves in a home office, loaded with books, a monitor, and a printer. That’s real weight, and it’s why shelf mounting deserves a proper stud strategy.
Start by deciding whether the shelf’s brackets align with the studs or the studs dictate the bracket spots. For a heavy run, plan on screwing into studs at every bracket. Light decor can use anchors, but books are heavier than they look.
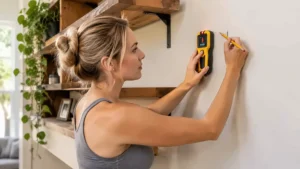
Use the Zircon StudSensor HD70 or the Zircon MultiScanner A200 to find centers, then confirm with the Hanson 03040. Mark each center, use a level, and pre-drill pilot holes. If a stud lands inconveniently, slide the bracket along a rail or use a wood backer board across several studs.
The ROI is simple. A few minutes of careful scanning turns shelf mounting from a gamble into a one-time job you never revisit.
TV Wall Mounting: Case Study and Safety Checklist
TV wall mounting is where stud finders earn their keep. A 65-inch set on drywall alone is a recipe for disaster, so aim for at least two studs.
Picture a living room with a stud pattern that doesn’t match the mount’s hole spacing. Use the Franklin Sensors ProSensor M210 to show full stud width, then mark both edges and the center. Hold the mount against the wall, level it, and mark holes over stud centers, not edges.
Safety matters beyond the drilling. The U.S. Consumer Product Safety Commission’s Anchor It! campaign highlights that tip-overs of TVs and furniture hit children hardest, with a large majority of fatalities involving kids under six. A properly mounted TV, plus anchored furniture, reduces that risk.
Keep power cords out of the wall unless you use a code-compliant in-wall kit, and consider a licensed electrician for that step. Scan for wires first, because TV wall mounting often sits near outlets.
Price Range and Value Analysis: Cost Per Project
Price isn’t just what you pay at the register. It’s what you avoid paying later.
| Product | Price Range | What You’re Paying For | Best For |
|---|---|---|---|
| Hanson 03040 | About $10-$20 | Simplicity, no batteries | Light jobs, backup |
| Zircon StudSensor HD70 | Roughly $35-$50 | Backlit, center-finding electronics | Standard drywall |
| Zircon MultiScanner A200 | $45-$60 range | Live-wire alert, multi-mode | All-round use |
| Bosch GMS 120 | Roughly $100-$140 | Deep metal and cable detection | Opening walls |
| Walabot DIY 2 | $140-$300 range | Visual imaging, plastic pipes | Complex projects |
Looking at the table, the jump from the budget tier to the A200 buys the biggest safety upgrade per dollar. Moving up to the Bosch GMS 120 or Walabot DIY 2 only pays off if you’re opening walls or working in older homes. A single punctured water line can cost many times more than the priciest scanner here, so value is really about risk.
Long-term costs are modest. Expect fresh 9V batteries now and then, and the Zircon MultiScanner A200 includes a limited lifetime warranty in the U.S. and Canada. Magnetic tools like the Hanson 03040 need nothing at all.
Common Mistakes When Buying and Using a Stud Finder
Even the best stud finder for home renovation can’t save a sloppy process. Watch for these.
- Buying on depth alone. A big number means little if the interface confuses you.
- Trusting the first beep. Verify with a second pass or a second tool.
- Starting the scan over a stud. This skews calibration unless your tool, like the A200, auto-corrects.
- Scanning near outlets and switches. Metal boxes distort readings, so step back a few inches.
- Treating a wire alert as a green light. It detects only certain live wires.
- Ignoring wall type. Plaster demands a different tool than drywall.
- Skipping the battery check. A weak 9V creates strange, inconsistent readings.
Avoid these and your scanner becomes a precision instrument rather than a coin flip.
FAQ
❓ How deep can a wall stud detector scan?
❓ Can a stud finder detect plumbing pipes?
❓ Do electronic stud finders work on plaster walls?
❓ Is a wire alert enough to skip turning off the breaker?
❓ Why does my electronic stud finder give false readings?
Conclusion
Choosing the right stud finder for home renovation comes down to matching the tool to your walls, your projects, and your appetite for risk. The Hanson 03040 is the humble, battery-free backup every toolbox deserves. The Zircon StudSensor HD70 and Zircon MultiScanner A200 cover the everyday electronic stud finder for home use territory, with the A200 adding a genuinely useful live-wire alert.
If you want the whole stud displayed at once, the Franklin Sensors ProSensor M210 is the fastest path to confident marks. Old plaster walls call for the Zircon MetalliScanner m40. Serious renovators opening walls will appreciate the deeper reach of the Bosch GMS 120 or the visual mapping of the Walabot DIY 2.
Whatever you pick, remember the real rule: scan twice, verify once, and respect hidden wiring and plumbing. Do that and shelf mounting and TV wall mounting become satisfying weekend wins instead of expensive lessons.
Recommended for You
- Level For Drywall Installation: 7 Proven Picks For 2026
- Digital Caliper For Machinists: 7 Best Picks Ranked (2026)
- Laser Measure For Contractors: 7 Best Proven Picks (2026)
Disclaimer: This article contains affiliate links. As an Amazon Associate, I earn from qualifying purchases. If you purchase products through these links, we may earn a small commission at no additional cost to you.
✨ Found this helpful? Share it with your friends! 💬🤗
