In This Article
✨Was this helpful? Spread the word! 🚀
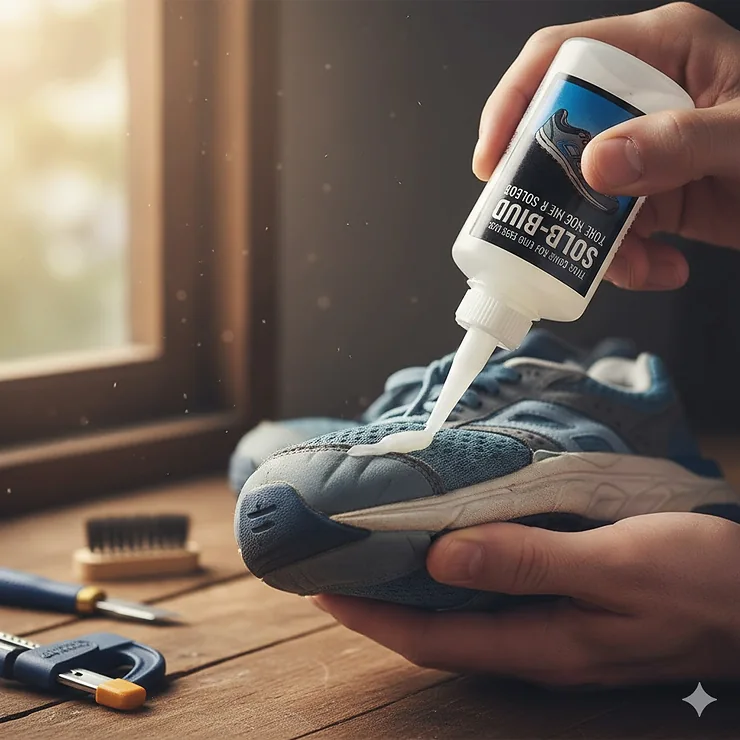
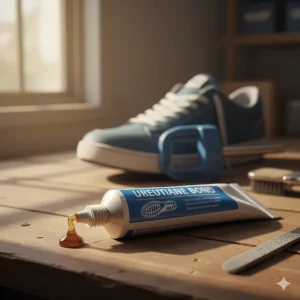
Look, we’ve all been there. You’re walking down the street when suddenly—flap, flap, flap—your sole starts coming apart like a bad comedy routine. Maybe it’s your favorite running shoes that have seen better days, or those leather boots you just can’t let go of. Before you toss them in the trash and shell out $100+ for a new pair, let me tell you something: finding the best glue for shoe soles can literally save you hundreds of dollars every year.
I’ve tested more shoe adhesives than I’d like to admit, and honestly, not all of them are created equal. Some crack in cold weather, others turn into a gooey mess when it rains, and a few just straight-up don’t work. However, the right glue for rubber shoe soles or leather can make your kicks last months—even years—longer than you’d expect.
What makes a great shoe sole repair adhesive? It needs to be flexible (because shoes bend), waterproof (unless you only wear them indoors), and strong enough to withstand daily abuse. Whether you’re looking for the best glue for tennis shoe soles or something heavy-duty for work boots, this guide breaks down everything you need to know. We’re talking real products, actual prices, and honest reviews from people who’ve actually used these adhesives—not just marketing fluff.
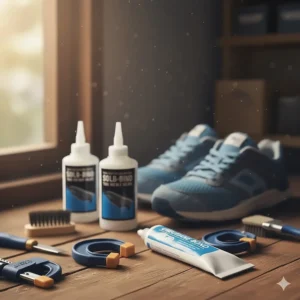
Quick Comparison Table: Top Shoe Sole Glues at a Glance 📊
| Product | Best For | Price Range | Drying Time | Flexibility | Rating |
|---|---|---|---|---|---|
| Sof Sole Shoe Goo | All-purpose repairs | $5-8 | 24 hours | Excellent | ⭐⭐⭐⭐⭐ |
| Boot-Fix Shoe Glue | Fast emergency fixes | $12-15 | 10-45 seconds | Good | ⭐⭐⭐⭐½ |
| E6000 Craft Adhesive | Heavy-duty projects | $4-8 | 24-48 hours | Very Good | ⭐⭐⭐⭐⭐ |
| Loctite Shoe Glue | Extreme conditions | $6-8 | Minutes to set | Excellent | ⭐⭐⭐⭐½ |
| Gorilla Clear Grip | Hard materials | $6-12 | 24 hours | Moderate | ⭐⭐⭐⭐ |
| ALECPEA Shoe Repair Kit | DIY enthusiasts | $10-15 | 2-5 minutes | Good | ⭐⭐⭐⭐ |
| Shoe-Fix Professional | Athletic footwear | $12-15 | 10 minutes | Excellent | ⭐⭐⭐⭐½ |
💬 Just one click – help others make better buying decisions too!😊
🛒 Ready to Fix Your Shoes? ✨
Don’t let damaged soles ruin your favorite footwear! Click on any product name above to check current Amazon prices and read verified customer reviews. Most of these adhesives qualify for Prime shipping, so you could be repairing your shoes by tomorrow! 🚀
Top 7 Best Glue for Shoe Soles: Expert Analysis 🔍
1. Sof Sole Shoe Goo — Best Overall for Most Shoe Repairs
If I had to pick just one adhesive for my shoe repair arsenal, this would be it. Sof Sole Shoe Goo has been the industry standard for decades, and there’s a reason professional cobblers swear by it.
Key Specifications:
- ✅ Volume: 3.7 fl oz tube
- ✅ Drying time: Sets in 24 hours
- ✅ Temperature resistance: -40°F to 180°F
- ✅ Works on: Leather, rubber, vinyl, canvas
What Makes It Special: This urethane-based formula dries crystal clear and remains flexible even after curing completely. Unlike rigid adhesives that crack under pressure, Shoe Goo moves with your shoe, making it perfect for areas that flex constantly. It’s also 100% waterproof once cured, so you won’t have to worry about rainy days undoing your repair work.
Real Customer Feedback: One Amazon reviewer mentioned seeing this being used at a professional shoe repair shop. When they asked the cobbler about it, he “swore by it.” The reviewer loved that it’s clear, so even if you accidentally get some on the shoe body, you can wipe it off while wet or cut it off after drying. They fixed three pairs of their wife’s shoes, and months later, they “still look like the day after I fixed them.”
Pros:
✅ Industry-trusted formula used by professionals
✅ Excellent flexibility prevents re-cracking
✅ Clear finish makes repairs nearly invisible
Cons:
❌ 24-hour curing time requires patience
❌ Strong solvent smell during application
Price: Typically $5-8 for a single tube, or around $14-16 for a 2-pack
2. Boot-Fix Shoe Glue — Best for Fast Emergency Repairs
When you need a quick fix and you need it NOW, Boot-Fix Shoe Glue is your hero. This cyanoacrylate-based adhesive (think super glue, but specifically formulated for footwear) sets in literal seconds.
Key Specifications:
- ✅ Volume: 20g tube with fine-tip nozzle
- ✅ Bonding time: 10-45 seconds
- ✅ Full cure: 24 hours for maximum strength
- ✅ Viscosity: Specifically formulated for shoe materials
What Makes It Different: Unlike regular super glue that becomes brittle, Boot-Fix remains flexible after drying. The formula’s viscosity is engineered specifically for the types of materials used in modern footwear. Most repairs don’t even require clamping—just hold firmly for 45 seconds and you’re good to go. It’s completely waterproof and designed to withstand both blistering summer heat and icy winter conditions.
Real Customer Feedback: Travelers and commuters particularly love this product. Users frequently mention that soles are mended almost instantly, and the finished bond remains clear. One practical machinist forum user tried it skeptically but reported that after repairing many shoes, “all of them still holding up (after 2 months).” They appreciated that it’s “like a super glue” where you simply apply it to one or both sides, press together for about 30 seconds, and you’re done.
Pros:
✅ Lightning-fast bonding in under a minute
✅ No clamping required for most repairs
✅ Professional-grade formula trusted by cobblers
Cons:
❌ Smaller tube size means less product
❌ Higher price point per ounce
Price: $12-15 per 20g tube
3. E6000 Craft Adhesive — Best Heavy-Duty Multi-Purpose Option
For those who want one adhesive that does it all, E6000 Craft Adhesive delivers industrial-strength bonding with impressive versatility.
Key Specifications:
- ✅ Volume: Available in 1 oz, 2 oz, and 3.7 oz tubes
- ✅ Setting time: 4 minutes tack time
- ✅ Full cure: 24-72 hours depending on materials
- ✅ Temperature range: -40°F to 150°F
- ✅ Tensile strength: 3,500 lb/in²
What Makes It Stand Out: E6000 is essentially industrial-grade adhesive that civilians can buy. It bonds virtually everything—metal, leather, vinyl, wood, plastic, rubber, and more. The perchloroethylene (PCE) solvent base creates an incredibly strong, waterproof bond. Once cured, it can withstand heat, cold, abrasion, and even harsh chemicals. The flexibility after curing ensures it won’t crack under stress.
Real Customer Feedback: A shoe repair enthusiast shared that after trying Gorilla Glue (which failed after an hour), they switched to Shoe Goo and E6000. When the rubber sole started separating on their favorite Hoka sneakers, the E6000 repair “has securely held for over two weeks now” with daily wear. Multiple users mention using it for everything from climbing shoes to hiking boots with excellent results.
Pros:
✅ Incredible bond strength for tough repairs
✅ Works on more materials than most competitors
✅ Non-flammable formula
Cons:
❌ Longer cure time requires patience
❌ Not ideal for glass-to-glass bonding
❌ Can be difficult to remove once applied
Price: $4-8 depending on size and retailer
4. Loctite Shoe Glue — Best for Extreme Temperature Conditions
If you live somewhere with wild temperature swings or work in harsh environments, Loctite Shoe Glue with its revolutionary Flextec formula is specifically engineered for you.
Key Specifications:
- ✅ Volume: 0.6 fl oz bottle
- ✅ Setting time: Sets in minutes
- ✅ Temperature resistance: -58°F to 248°F (!)
- ✅ Works on: Rubber, leather, vinyl, canvas, textiles, foam
What Makes It Special: That temperature range isn’t a typo. Loctite can handle everything from Arctic cold to desert heat without the bond failing. The Flextec formulation bonds multi-materials with tremendous strength while maintaining flexibility—perfect for areas with constant flexing. It dries completely clear for invisible repairs and offers excellent resistance to vibration, impact, and moisture.
Real Customer Feedback: One innovative user mentioned using this on bicycle tires to patch small cuts and holes from road debris. “Fill in the cut, let it dry overnight and all is good. Makes my tires last much longer.” For actual shoe repairs, reviewers consistently praise its strong, flexible hold that doesn’t crack. Another customer specifically mentioned using it to attach heel protectors to rubber soles, and after proper surface preparation (sanding, then applying to both surfaces, waiting a couple minutes, clamping for two days), the bond has “held up” perfectly.
Pros:
✅ Extreme temperature resistance
✅ Quick-setting for faster repairs
✅ Gap-filling properties for imperfect surfaces
Cons:
❌ Smaller bottle size
❌ Requires proper surface preparation for best results
Price: $6-8 per 0.6 oz bottle, often sold in multi-packs
5. Gorilla Clear Grip Contact Adhesive — Best for Hard Shoe Materials
When you’re dealing with wooden heels, metal hardware, or hard plastic components, Gorilla Clear Grip provides the rock-solid bond you need.
Key Specifications:
- ✅ Formula: Polyurethane-based
- ✅ Available sizes: 2 gram tubes to large bottles
- ✅ Curing time: 24 hours for full strength
- ✅ Waterproof: Yes, once fully cured
What Makes It Work: While Gorilla Glue makes numerous adhesives, the Clear Grip contact adhesive variant is specifically recommended by the company for rubber shoe repairs. The polyurethane formula creates an incredibly strong, waterproof bond that’s also resistant to both hot and cold temperatures. It’s particularly effective on harder substances that need a more rigid connection—think broken heels or wooden shoe components.
Real Customer Feedback: One Amazon reviewer described a situation where “the whole bottom part of my shoe had fallen off” and they tried several different glues that didn’t work. They specifically needed something “more flexible but still strong.” Gorilla Glue “worked perfectly!” The versatility impressed users who’ve successfully bonded everything from soccer cleats to dress shoes with excellent long-term results.
Pros:
✅ Exceptional strength for hard materials
✅ Temperature and water resistant
✅ Trusted brand with wide availability
Cons:
❌ Less flexible than rubber-specific formulas
❌ Can foam during curing process
❌ Not ideal for highly flexible sole repairs
Price: $6-12 depending on size
6. ALECPEA Shoe Glue Sole Repair Kit — Best Complete DIY Solution
For those who want everything in one package, ALECPEA Shoe Glue Sole Repair Kit includes not just the adhesive but all the tools you need for professional-looking repairs.
Key Specifications:
- ✅ Kit includes: 120ml clear glue, applicators, sandpaper, rubber bands
- ✅ Initial drying: 2-5 minutes
- ✅ Full cure: 24-48 hours
- ✅ Applicator: Precision needle tip
What Makes It Appealing: The needle applicator is genuinely a game-changer—it lets you place glue exactly where you need it without waste. The kit approach means you don’t need to hunt down sandpaper or find rubber bands; it’s all included. The formula creates a transparent, waterproof bond that’s strong yet flexible. For those willing to use a hair dryer to help speed initial bonding, many repairs can be set in minutes.
Real Customer Feedback: A recent review on Footwearify praised the needle applicator as “making it super easy to get glue exactly where you need it without any waste.” When they tested it on hiking boots, “the bond was strong and held without any issue.” The reviewer noted that while it requires patience for full curing, the wait is worth it considering how well it performs. The kit provides enough product for multiple repairs, working on everything from sneakers to leather bags.
Pros:
✅ Complete kit with all necessary tools
✅ Precision applicator prevents mess
✅ Good value with enough for multiple repairs
Cons:
❌ Full cure requires 24-48 hours
❌ Can thicken over time in the bottle
❌ Acts fast, so you need to work quickly
Price: $10-15 for the complete kit
7. Shoe-Fix Professional Grade Glue — Best for Athletic and Sports Footwear
Athletes and active individuals need repairs that can keep up with dynamic movement. Shoe-Fix Professional Grade Glue is specifically formulated to flex with activewear shoes and withstand the stresses of running, jumping, and daily activity.
Key Specifications:
- ✅ Setting time: Usable in under 10 minutes
- ✅ Full cure: 24 hours
- ✅ Finish: Clear, non-sticky
- ✅ Flexibility: Designed for athletic movement
What Makes It Athletic-Ready: This fast-setting formula bonds both soles and uppers quickly, often becoming usable in under 10 minutes. The flexibility ensures bonds won’t crack or fail under the dynamic stresses of athletic activity. The clear, non-sticky finish keeps even sports sneakers looking sharp after repair. It’s particularly effective on the types of synthetic materials used in modern running shoes and cross-trainers.
Real Customer Feedback: Athletes and busy professionals praise how quickly it works—no need to pause your routine for a full day while repairs cure. One reviewer on Eye And Pen tested it extensively and noted that “repairs can be completed in seconds with minimal setup, making it perfect for emergencies or on-the-go fixes.” However, some customers mention it’s pricier than bulk adhesives and can have inconsistent results on non-leather materials if surface preparation is skipped.
Pros:
✅ Specifically engineered for athletic shoes
✅ Fast setting keeps you moving
✅ Clear finish maintains shoe appearance
Cons:
❌ Higher price point than generic options
❌ Requires proper surface preparation
❌ May not work as well on all synthetic materials
Price: $12-15 per tube
Understanding Shoe Sole Adhesive Chemistry 🧪
Ever wondered why some glues work better than others? It all comes down to chemistry, my friend. The best glue for shoe soles repair depends heavily on what type of materials you’re bonding and what stresses they’ll face.
Types of Shoe Adhesives
Polyurethane-Based Adhesives like Shoe Goo and Gorilla Glue create flexible, rubber-like bonds. These are ideal for soles because they move with your shoe instead of cracking. Think of them as the yoga instructors of the glue world—bendy and resilient.
Cyanoacrylate Adhesives (super glue variants) like Boot-Fix offer lightning-fast bonding. They work through a chemical reaction with moisture in the air. The specialized shoe formulas add flexibility agents to prevent the brittleness you’d get from hardware store super glue. These are your sprinters—quick but not always for the long haul unless formulated specifically for footwear.
Contact Cement formulations require applying to both surfaces, letting them dry until tacky, then pressing together. This creates an instant, permanent bond. It’s old-school but effective, especially for larger surface areas.
According to shoe repair industry standards, professional cobblers often use different adhesives for different parts of shoes—one type for soles, another for heels, and yet another for leather repairs. This isn’t just being fancy; each adhesive type has specific strengths that make it better suited for particular applications.
Why Flexibility Matters
Here’s something most people don’t think about: your shoes flex thousands of times per day. Every step bends the sole, especially at the ball of your foot. If you use a rigid adhesive, it’ll crack within days—sometimes hours. That’s why all our top picks emphasize flexibility after curing.
The best glue for tennis shoe soles needs even more flexibility than dress shoe adhesives because athletic shoes undergo more dramatic flexing during sports activities. A basketball player landing from a jump, a runner’s foot strike, or a tennis player’s quick lateral movements all create intense stress on repaired areas.
How to Choose the Best Glue for Your Shoe Type 👞
Not all shoes are created equal, and neither are their repair needs. Let me break down what works best for different footwear types.
Athletic Shoes and Sneakers
Running shoes, basketball sneakers, and cross-trainers typically use synthetic rubber soles attached to mesh or synthetic leather uppers. For these, you want something that dries fast and stays flexible. Shoe-Fix or Boot-Fix work excellently here because they bond synthetic materials well and won’t slow down your active lifestyle.
When dealing with the best glue for tennis shoe soles specifically, consider how much lateral movement tennis involves. The constant side-to-side action means standard repairs might fail faster. Go with something like Sof Sole Shoe Goo or E6000 for maximum durability.
Leather Boots and Dress Shoes
Leather requires different consideration. It’s a natural material that breathes and flexes differently than synthetics. Loctite Shoe Glue and E6000 both excel with leather because they can penetrate slightly into the material while remaining flexible. For high-end leather boots, you might even want to use what cobblers call a “lasting adhesive”—these are designed specifically for the leather-to-sole interface.
Work boots deserve special mention. They face harsh conditions daily—construction sites, factories, outdoor work. For these workhorses, go heavy-duty with E6000 or Gorilla Clear Grip. The Occupational Safety and Health Administration has guidelines about workplace footwear, and maintaining that footwear properly can prevent workplace injuries.
Rubber Boots and Galoshes
When you need glue for rubber shoe soles—like rain boots, waders, or galoshes—waterproofing is non-negotiable. Shoe Goo is legendary in this category. Many anglers and hunters swear by it for repairing waders, where even a pinhole leak ruins your day. The rubber-to-rubber bond it creates is virtually permanent.
Canvas Shoes and Casual Sneakers
Canvas presents an interesting challenge because it’s fabric rather than leather or synthetic. The glue needs to penetrate the weave without bleeding through visibly. Loctite handles this well thanks to its Flextec formula. ALECPEA‘s precision applicator also helps control where glue goes, preventing unsightly stains on canvas.
Specialized Footwear
Climbing shoes need repairs that won’t compromise your grip. Rock climbing is dangerous enough without worrying about equipment failure. Climbers often use Shoe Goo because it’s been tested in that community for decades. Similarly, cycling shoes with clip-in cleats need strong bonds around the cleat area—E6000 works well here.
According to the American Podiatric Medical Association, wearing shoes with proper support prevents foot problems. Keeping your supportive shoes in good repair is part of that equation. A well-repaired shoe beats a cheap replacement that lacks proper support.
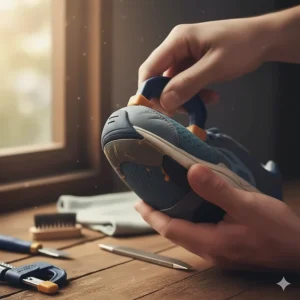
Step-by-Step Guide: How to Repair Shoe Soles Like a Pro 🔧
Alright, let’s get practical. Having the best glue for shoe soles means nothing if you don’t apply it correctly. Here’s how to do it right.
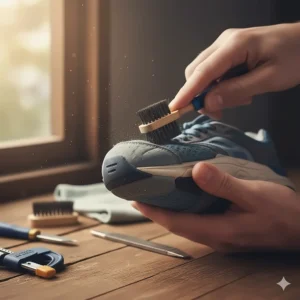
Surface Preparation (Most Important Step!)
Seriously, skip this and you’re wasting your time and glue. Clean surfaces are crucial for strong bonds.
- Remove all dirt and debris – Use a stiff brush to scrub both surfaces. Get into those grooves.
- Degrease thoroughly – Wipe with rubbing alcohol or acetone. Shoe soles accumulate oils from walking, and these prevent adhesion. Let the solvent evaporate completely.
- Roughen smooth surfaces – Use sandpaper (80-120 grit works well) to scuff up both the sole and the shoe. This creates more surface area for the glue to grip. The ALECPEA kit includes sandpaper for this exact reason.
- Remove dust – After sanding, wipe again with alcohol to remove sanding dust. I know, I know—more cleaning. But trust me.
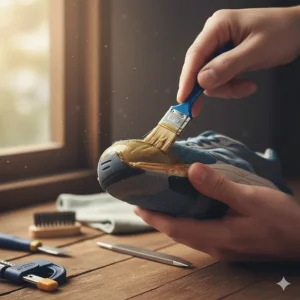
Application Technique
Different adhesives have different application methods:
For instant-bond types (Boot-Fix, Shoe-Fix):
- Apply thin bead to one surface
- Press together immediately
- Hold firmly for 30-60 seconds
- Avoid movement for 10 minutes
For rubber cement types (Shoe Goo, E6000):
- Apply to both surfaces
- Wait until tacky (about 5-10 minutes)
- Press together firmly
- Clamp or weight down for at least 4 hours
Pro tip: For separated soles, work in sections rather than trying to glue the entire sole at once. Do the toe or heel first, let it set, then do the opposite end. This prevents the sole from misaligning while you’re working.
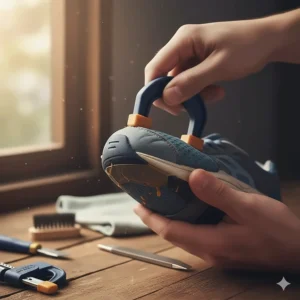
Clamping and Curing
Proper clamping makes the difference between a repair that lasts weeks versus one that lasts years. Here’s how to do it right:
Simple clamps: Rubber bands work surprisingly well for shoes. Wrap them around the entire shoe to apply even pressure.
Heavy books: Old school but effective. Stack heavy books on the shoe, using paper or cloth to prevent the glue from sticking to the books.
Specialized shoe lasts: Professional cobblers use these, but you can improvise with wooden blocks shaped to fit inside the shoe.
Whatever method you use, make sure pressure is distributed evenly. Uneven pressure creates weak spots in the bond.
Curing Time and Temperature
This is where patience pays off. The packaging might say “sets in 10 minutes,” but that doesn’t mean it’s fully cured. For maximum strength:
- Minimum wait: Let it sit undisturbed for at least the time listed on the product
- Optimal cure: Wait 24-48 hours before heavy use
- Temperature: Keep the shoe at room temperature (65-75°F) during curing. Cold slows curing; excessive heat can cause issues too
Don’t rush this. I’ve seen people ruin perfectly good repairs by wearing the shoes too soon. Set them aside and forget about them for a day.
Common Mistakes to Avoid
Using too much glue: More isn’t better. Excess glue just oozes out and makes a mess without improving the bond.
Skipping surface prep: I’ll say it again—clean, roughened surfaces are essential.
Not reading instructions: Different products have different requirements. Five minutes of reading can save you from a failed repair.
Repairing wet shoes: Moisture interferes with most adhesives. Dry shoes completely first, even if it takes a couple days.
Giving up too soon: Sometimes repairs fail not because the glue was bad, but because application wasn’t perfect. Don’t be afraid to try again with better technique.
Comparing Shoe Glue vs Professional Repair 💰
Let’s talk money, because that’s probably why you’re considering DIY repair in the first place.
| Factor | DIY Repair | Professional Repair |
|---|---|---|
| Cost | $5-15 (glue lasts multiple repairs) | $15-50 per pair |
| Time | 30 min work + 24hr cure | Drop off and pick up |
| Quality | Good (with practice) | Excellent |
| Convenience | Do it at home | Requires trip to shop |
| Learning Curve | Moderate | None |
| Equipment Needed | Minimal | None |
When to DIY:
- Simple sole detachment
- Minor heel damage
- Canvas or fabric tears
- You enjoy hands-on projects
- Multiple pairs need repair
- Budget is tight
When to Go Pro:
- Complex structural damage
- High-value shoes (expensive boots, dress shoes)
- Resoling (complete sole replacement)
- You lack time or space for DIY
- First attempt failed miserably
- Warranty considerations
Here’s an interesting fact from repair industry data: Americans throw away an estimated 300 million pairs of shoes annually, many with damage that’s easily repairable. Learning to fix your own shoes isn’t just about saving money—it’s about reducing waste and extending the life of quality footwear.
Environmental and Cost Benefits of Shoe Repair 🌍
Beyond personal savings, repairing shoes has broader implications. The footwear industry creates significant environmental impact through manufacturing and disposal.
The True Cost of New Shoes
Manufacturing a single pair of sneakers generates approximately 30 pounds of CO2 emissions. When you multiply that by billions of pairs produced annually, the environmental footprint becomes staggering. By repairing rather than replacing, you’re directly reducing demand for new production.
According to environmental research, extending the life of clothing and footwear by just nine months reduces carbon, water, and waste footprints by 20-30% each. That tube of glue for rubber shoe soles doesn’t just save you money—it’s an environmental choice.
Financial Analysis Over Time
Let’s do some quick math:
- Average athletic shoes: $80-150
- Professional repair: $25-50
- DIY repair materials: $5-15
If you repair shoes just 3-4 times per year instead of buying new, you save $200-500 annually. Over five years, that’s $1,000-2,500 in savings. Enough for a nice vacation or a significant chunk of retirement savings.
Plus, repaired shoes often feel better than new ones because they’re already broken in. There’s value in that comfort that’s hard to quantify.
Professional Tips for Long-Lasting Repairs 🛠️
Want your shoe repairs to last as long as possible? Here are some pro techniques that cobblers use but rarely share.
Pre-Treatment Techniques
Before you even open that tube of glue, consider these preparation steps that professionals swear by:
Solvent cleaning: Many cobblers use a two-step cleaning process. First, they brush off visible dirt and debris. Then they use a solvent like acetone or isopropyl alcohol to remove invisible oils and residues. This might seem excessive, but oils from your skin, lotions, and even the manufacturing process can interfere with adhesion. A clean surface is a happy surface.
Strategic sanding: Don’t just randomly scrub with sandpaper. Sand in a crosshatch pattern to create maximum grip for the adhesive. For smooth rubber soles, use 80-grit sandpaper first, then finish with 120-grit. This creates microscopic grooves running in multiple directions, giving the glue more purchase points.
Application Secrets
Temperature matters: Most adhesives work best when both the glue and the surfaces are at room temperature (65-75°F). If your shoes have been in a cold garage or hot car, let them normalize to room temperature first. Some professionals even warm bottles of contact cement slightly (in warm water, never direct heat) to reduce viscosity and improve flow.
Thin layers work better: Resist the temptation to glob on adhesive. Multiple thin layers create stronger bonds than one thick layer. For contact cements, apply a thin coat to both surfaces, let them dry until tacky, then apply a second thin coat before pressing together. The total adhesive thickness should rarely exceed 1-2mm.
Tack time awareness: When products say “wait until tacky,” they mean it. The surface should feel sticky but not wet when you touch it lightly with your finger. Too wet and the adhesive will squish out; too dry and it won’t bond properly. This sweet spot usually happens 5-15 minutes after application, depending on temperature and humidity.
Advanced Clamping Methods
Rubber band wrapping: For shoes with complex curves, wrap rubber bands in a spiral pattern from toe to heel. This distributes pressure more evenly than straight wraps. Use different thicknesses for different pressure levels—thicker bands for more pressure.
Custom pressure points: For areas that need extra pressure (like separated heels), create custom clamps using wooden blocks wrapped in cloth. Position them precisely where needed and secure with rubber bands or actual clamps.
The bag of rice trick: Fill a sturdy plastic bag with rice or beans, place it inside the shoe, and it will conform to the shoe’s shape while providing even outward pressure. This works brilliantly for repairs on the shoe’s interior where traditional clamping is impossible.

Troubleshooting Failed Repairs 🔍
Even with perfect technique, sometimes repairs don’t hold. Let’s diagnose common problems and their solutions.
The Repair Failed Within Days
Possible causes:
- Surface contamination (oil, moisture, or dirt)
- Insufficient curing time before wearing
- Wrong adhesive type for the materials
- Extreme temperature exposure too soon
Solution: Strip away all old adhesive completely using a scraper and solvent. Re-prep surfaces more thoroughly than before—extra cleaning and sanding. Choose a different adhesive if the original one wasn’t suitable for your materials. Allow a full 48-hour cure before any wear.
Glue Squeezed Out and Looks Messy
Possible causes:
- Too much adhesive applied
- Insufficient pressure application time
- Surfaces not held firmly together
Solution: For future repairs, use less glue—a thin, even coat is sufficient. Clean up squeeze-out immediately with a cotton swab dampened in acetone (test on an inconspicuous area first). For dried squeeze-out, carefully trim with a sharp craft knife, then smooth with fine sandpaper.
Sole Separated Again in the Same Spot
Possible causes:
- Original damage point experiences most stress
- Incomplete surface coverage
- Adhesive dried before surfaces pressed together
Solution: When re-repairing, extend the glued area slightly beyond the original repair zone. This distributes stress over a larger area. Consider reinforcing high-stress points with a patch of compatible material glued on top.
FAQ: Common Questions About Shoe Sole Repair ❓
❓ How can you tell if shoe glue has gone bad or expired?
❓ What's the difference between shoe glue and contact cement for repairs?
❓ Can shoe sole glue repair sandals or flip-flops effectively?
❓ Is it safe to repair children's shoes with shoe glue?
❓ Why does glue for shoe soles cost more than regular super glue?
Conclusion: Finding Your Perfect Shoe Sole Adhesive 🎯
After diving deep into the world of shoe adhesives, here’s the bottom line: the best glue for shoe soles depends on your specific needs, but you can’t go wrong with any of our top seven picks.
For most people, Sof Sole Shoe Goo remains the gold standard—it’s affordable, versatile, and proven over decades of use. When you need something faster, Boot-Fix delivers professional-quality repairs in seconds. If you’re tackling heavy-duty projects across multiple materials, E6000 provides industrial strength at consumer prices. And for those facing extreme conditions, Loctite‘s temperature resistance is unmatched.
Remember, proper surface preparation matters more than which specific adhesive you choose. Clean, degreased, and roughened surfaces create strong bonds regardless of glue type. Take your time, follow the instructions, and let the repair cure fully before wearing the shoes.
Whether you’re fixing the best glue for tennis shoe soles or repairing work boots, you now have the knowledge to tackle the job confidently. Stop throwing away repairable shoes and start saving money while reducing waste. Your wallet—and the planet—will thank you.
🎁 Start Repairing Your Shoes Today! ✨
Ready to save money and extend your favorite shoes’ lifespan? Click on any product link in this guide to check current prices on Amazon. Most items are Prime-eligible for fast, free shipping. Don’t let damaged soles force you into buying new shoes when a $10 repair can add months or years of life! 🚀
Recommended for You 📚
- Glue for Leatherette: 7 Best Adhesives for Perfect Bonds in 2025
- Best Glue for Leather in 2025: 7 Expert-Tested Options That Work
- 7 Best Leather Repair Glue for 2025: Expert Reviews
Disclaimer: This article contains affiliate links. If you purchase products through these links, we may earn a small commission at no additional cost to you.
✨ Found this helpful? Share it with your friends! 💬🤗