In This Article
✨Was this helpful? Spread the word! 🚀
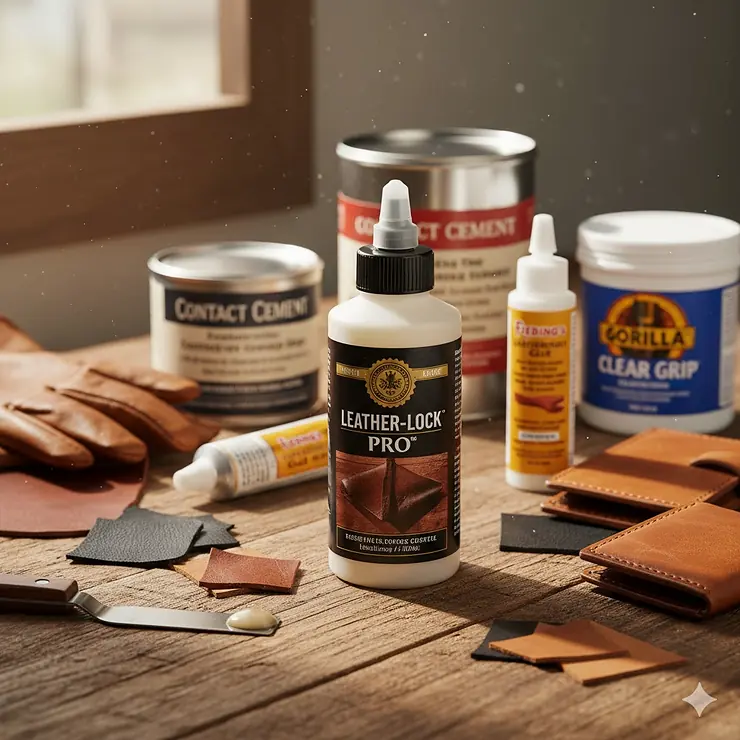
Listen, I’ve been there. You’re staring at your favorite leather jacket with a rip, or maybe you’re knee-deep in a leather crafting project, and you’re wondering: what is the best glue for leather? Trust me, choosing the wrong adhesive can turn your repair into a disaster faster than you can say “ruined vintage boots.”
Here’s the thing about leather – it’s not like gluing paper or plastic. Leather is porous, flexible, and needs an adhesive that moves with it, not against it. I’ve tested dozens of leather adhesives over the years, from budget options to professional-grade cements, and I’m here to share what actually works.
Whether you need best glue for leather to leather bonding for a DIY belt project, a quick fix for your car seats, or a permanent solution for footwear repairs, the right adhesive makes all the difference. The market’s flooded with options claiming to be the ultimate solution, but only a handful deliver on that promise. Some dry too stiff, others don’t hold up to wear and tear, and a few are downright toxic to work with.
In this comprehensive guide, we’ll explore seven thoroughly tested adhesives that actually earn their spot in your toolkit. From contact cements favored by professional cobblers to flexible craft glues perfect for embellishments, you’ll discover exactly which leather adhesive suits your specific needs. Plus, I’ll share insider tips on application techniques, common mistakes to avoid, and how to choose between different formulations based on your project requirements.
Quick Comparison Table: Top Leather Glues at a Glance 📊
| Product | Type | Size | Dry Time | Waterproof | Best For | Price Range |
|---|---|---|---|---|---|---|
| Barge All-Purpose TF Cement | Contact Cement | 2oz – 32oz | 10-15 min | ✅ Yes | Professional repairs, shoes | $7-$25 |
| E6000 Craft Adhesive | Industrial Adhesive | 3.7oz | 4-24 hrs | ✅ Yes | Multi-material projects | $6-$15 |
| Fiebing’s Leathercraft Cement | Water-Based Cement | 4oz – 32oz | 5-10 min | ❌ No | Indoor crafts, wallets | $8-$22 |
| Shoe Goo | Repair Adhesive | 3.7oz | 24 hrs | ✅ Yes | Footwear, soles | $5-$12 |
| Aleene’s Leather & Suede Glue | Craft Glue | 4oz | 3-5 min | ❌ No | Embellishments, light repairs | $5-$8 |
| Tear Mender | Fabric/Leather Adhesive | 2oz – 6oz | 3-15 min | ✅ Yes | Clothing, flexible items | $7-$15 |
| Gorilla Micro Precise Super Glue | Cyanoacrylate | 5g | 10-45 sec | ❌ Limited | Small, quick repairs | $5-$10 |
💬 Just one click – help others make better buying decisions too!😊
✨ Ready to Find Your Perfect Match?
Each adhesive in this table brings something unique to the workbench. Contact cement delivers industrial strength for heavy-duty applications, while craft glues offer beginner-friendly precision for decorative work. The key is matching the adhesive properties to your specific project needs.
Top 7 Best Glue for Leather: Expert Analysis 🏆
1. Barge All-Purpose TF Cement – The Professional’s Choice
When professional cobblers reach for their go-to adhesive, they’re grabbing Barge. I’ve watched this cement hold shoe soles together through thousands of steps, and it’s earned every bit of its legendary reputation.
Key Specifications:
- Available in 2oz, quart (32oz) containers
- Toluene-free formula (newer versions)
- Temperature range: Withstands -40°F to 180°F
- Bonds leather, rubber, wood, glass, metal, vinyl
Price Range: $7-$25 depending on size
What Makes It Special: This contact cement creates an instant, flexible bond that professional craftspeople trust. The application requires coating both surfaces, letting them dry slightly until tacky, then pressing together for an immediate, permanent hold. Unlike regular glues that need clamping time, Barge bonds on contact – hence the name “contact cement.”
Customer Feedback: Users consistently praise its industrial strength and versatility. However, some note the strong odor requires well-ventilated workspaces. One reviewer mentioned it held their leather boots together for over three years of daily wear.
Pros:
✅ Professional-grade bonding strength
✅ Remains flexible after curing
✅ Waterproof and weather-resistant
Cons:
❌ Strong chemical odor during application
❌ Requires proper ventilation and technique
Best Uses: Shoe repairs, leather furniture restoration, belt making, heavy-duty leather-to-leather bonding
2. E6000 Craft Adhesive – The Versatile Workhorse
E6000 has saved more of my craft projects than I can count. This industrial-strength adhesive works on practically everything while maintaining flexibility – a rare combination that makes it invaluable for mixed-material projects.
Key Specifications:
- Industrial strength formula
- Available in 3.7oz tubes (also mini sizes)
- Non-flammable and washer/dryer safe
- Temperature resistant: -40°F to 150°F
Price Range: $6-$15 per tube
What Makes It Special: Unlike many super-strong adhesives that dry rigid, E6000 maintains flexibility even after full cure. This makes it perfect for leather items that need to bend and flex with use. The self-leveling formula means you don’t need to be a perfectionist with application.
Customer Feedback: Crafters love its versatility and strength. Multiple reviews mention using it for everything from jewelry making to automotive repairs. Some users note it takes longer to fully cure but appreciate the working time this provides.
Pros:
✅ Bonds to virtually any material
✅ Maintains flexibility when dry
✅ Paintable and UV resistant
Cons:
❌ 24-72 hour full cure time
❌ Strong odor during application
Best Uses: Mixed-material crafts, jewelry, leather embellishments, furniture repairs, outdoor gear
3. Fiebing’s Leathercraft Cement – The Safety-Conscious Option
For those working in homes with kids or pets, Fiebing’s offers peace of mind. This water-based cement delivers strong bonds without the harsh chemicals found in many professional adhesives.
Key Specifications:
- Water-based, non-toxic formula
- Non-flammable safety profile
- Available in 4oz and 32oz bottles
- Quick-drying with twist-cap applicator
Price Range: $8-$22 depending on size
What Makes It Special: The water-based formula makes this one of the safest leather adhesives available. Despite being gentle, it creates strong, flexible bonds suitable for most leather crafting projects. The clear-drying finish means no visible glue lines on your finished work.
Customer Feedback: Leatherworkers appreciate its ease of use and safety profile. Reviews consistently mention the clean application and reliable bonding. However, users note it’s not suitable for items exposed to heavy moisture or outdoor conditions.
Pros:
✅ Non-toxic and non-flammable
✅ Easy to apply with precision
✅ Dries clear with flexible bond
Cons:
❌ Not weather-resistant
❌ Lower strength than contact cements
Best Uses: Indoor leather crafts, wallets, purses, belts, bags, baseball gloves, furniture
4. Shoe Goo – The Footwear Specialist
Shoe Goo has been the secret weapon of skateboarders and athletes for decades. Originally formulated for rebuilding worn shoe heels, it’s evolved into the go-to solution for all types of footwear repairs.
Key Specifications:
- 3.7oz clear or black formula
- Waterproof and abrasion-resistant
- Sets in 24 hours, full cure in 48-72 hours
- Works on leather, rubber, vinyl, canvas
Price Range: $5-$12 per tube
What Makes It Special: Unlike thin adhesives, Shoe Goo’s thicker consistency allows it to fill gaps and rebuild worn areas. It doesn’t just glue – it actually reconstructs damaged sections of shoes. The formula resists water and creates extra traction, making it ideal for both repairs and protection.
Customer Feedback: With over 22,000 five-star reviews on Amazon, users rave about how it’s saved countless pairs of shoes from the trash. Athletes particularly appreciate how it holds up to intense use. Some mention using it on everything from work boots to designer heels.
Pros:
✅ Waterproof and extremely durable
✅ Fills gaps while bonding
✅ Creates non-slip surface
Cons:
❌ Takes 24+ hours to fully set
❌ Can be messy if over-applied
Best Uses: Shoe sole repairs, heel restoration, sneaker protection, boot maintenance
5. Aleene’s Leather & Suede Glue – The Crafter’s Favorite
When you need precision without power tools, Aleene’s delivers. This fast-tacking adhesive has been America’s favorite crafting glue for over 75 years, and their leather-specific formula lives up to the family reputation.
Key Specifications:
- 4oz bottle with customizable tip
- Fast-tacking formula
- Dries clear and flexible
- Won’t soak through or stain
Price Range: $5-$8 per bottle
What Makes It Special: The customizable applicator tip sets this apart. Cut at different ridges to control glue flow – use the top ridge for detail work with small embellishments, or cut at the bottom for larger coverage. This precision makes it perfect for decorative leather work where you need control.
Customer Feedback: Crafters love how quickly they can work with this glue. Reviews highlight its ability to hold embellishments securely without bleeding through leather or creating stains. However, users note it’s not intended for heavy-duty repairs or items that see constant wear.
Pros:
✅ Fast-tacking for quick projects
✅ Adjustable applicator for precision
✅ Won’t stain or soak through
Cons:
❌ Not suitable for washable items
❌ Lower strength for heavy-use applications
Best Uses: Leather embellishments, beadwork, fringe attachment, jewelry, decorative crafts
6. Tear Mender Instant Fabric and Leather Adhesive – The Quick-Dry Champion
Tear Mender works so fast, you’ll wonder if it’s magic. Originally formulated in 1932 for repairing farm machinery drive belts, this natural latex adhesive has stood the test of time.
Key Specifications:
- Natural latex formula
- Wearable in 3 minutes, washable in 15 minutes
- Available in 2oz, 6oz, and larger sizes
- Waterproof, UV-resistant, acid-free
Price Range: $7-$15 depending on size
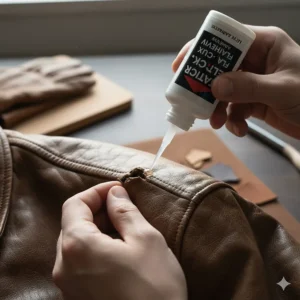
What Makes It Special: Speed. That’s Tear Mender’s superpower. When you need repairs done fast – like fixing a ripped jacket before heading out – this adhesive delivers. The natural latex formula penetrates porous materials quickly, creating permanent bonds that withstand washing and weather.
Customer Feedback: Users consistently mention how it’s saved clothing from the donation pile. The social mission behind the product (made by visually impaired employees at a nonprofit) also resonates with customers. Some note it’s not suitable for all fabric types, particularly silk or high-polyester content.
Pros:
✅ Incredibly fast drying time
✅ Waterproof and UV-resistant
✅ Natural, non-toxic formula
Cons:
❌ Contains latex (allergen concern)
❌ Not suitable for all fabric types
Best Uses: Clothing repairs, leather jackets, outdoor gear, awnings, tents, convertible tops
7. Gorilla Micro Precise Super Glue – The Detail Work Expert
When you need surgical precision for tiny repairs, Gorilla’s micro-precise applicator gives you control that regular glue bottles can’t match. This cyanoacrylate formula works fast and bonds strong.
Key Specifications:
- 5g precision applicator
- Cyanoacrylate (super glue) formula
- Sets in 10-45 seconds
- Bonds plastic, wood, metal, ceramic, rubber, leather
Price Range: $5-$10 per applicator
What Makes It Special: The pen-style applicator with micro-precise tip lets you place glue exactly where you need it without mess or waste. For small leather repairs – like reattaching a zipper pull or fixing a torn seam – this precision is invaluable. However, remember that super glue creates rigid bonds, so it’s not ideal for flexible leather applications.
Customer Feedback: Users praise the applicator design and instant bonding. Reviews mention it’s perfect for quick fixes and small repairs. However, some note it’s not waterproof and doesn’t provide the flexibility needed for items that bend frequently.
Pros:
✅ Ultra-precise application
✅ Instant bonding (10-45 seconds)
✅ Anti-clog cap design
Cons:
❌ Not flexible when cured
❌ Not waterproof or weather-resistant
Best Uses: Small repairs, zipper fixes, hardware attachment, emergency repairs, detail work
Understanding Different Types of Leather Adhesives 🧪
Not all adhesives are created equal, and understanding the differences helps you choose the right one. Let me break down the main categories so you can match the glue type to your project needs.
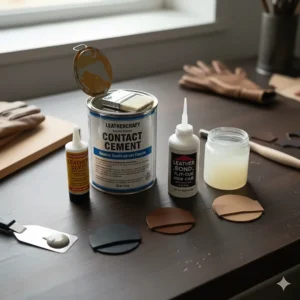
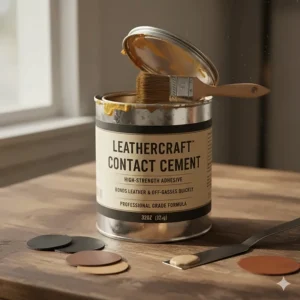
Contact Cement: The Heavy-Duty Champion
Contact cement represents the gold standard for professional leather work. This adhesive type requires coating both surfaces, allowing them to dry until tacky (usually 5-15 minutes), then pressing them together for an instant, permanent bond. The chemical reaction creates incredibly strong connections that resist stress and movement.
How It Works: The solvent-based formula (or water-based in newer versions) allows the adhesive to penetrate leather fibers. Once both surfaces reach the right tackiness, they form a chemical bond on contact – no clamping or waiting required.
Best Applications: Shoe repairs, belt making, leather furniture restoration, professional crafting
Popular Options: Barge All-Purpose Cement, professional contact adhesives
Craft Adhesives: The Flexible Friend
Craft adhesives offer the perfect balance between strength and workability. These formulas dry more slowly than contact cements, giving you time to position pieces perfectly. Many maintain flexibility after curing, making them ideal for items that bend and flex.
How It Works: These adhesives typically use polymer-based formulas that create flexible bonds. The longer dry time means you can reposition pieces if needed, and the final bond moves with your leather rather than restricting it.
Best Applications: Decorative leather work, mixed-material projects, embellishments, craft projects
Popular Options: E6000 Craft Adhesive, Aleene’s Leather & Suede Glue
Cyanoacrylate (Super Glue): The Speed Demon
Cyanoacrylate adhesives bond almost instantly when they contact moisture (which exists on most surfaces). However, they create rigid bonds that don’t flex well with leather’s natural movement.
How It Works: The chemical reaction with moisture causes rapid polymerization, creating incredibly strong bonds in seconds. The trade-off is a lack of flexibility and limited working time.
Best Applications: Small, quick repairs, hardware attachment, rigid leather items
Popular Options: Gorilla Micro Precise Super Glue, Loctite super glues
Specialty Formulas: Purpose-Built Solutions
Some adhesives are formulated specifically for unique situations. Tear Mender uses natural latex for fast-drying repairs on clothing. Shoe Goo creates thick, protective coatings while bonding. These specialized options excel at their intended purpose.
How They Work: Each specialty formula addresses specific challenges. Natural latex penetrates quickly for fabric-leather combinations. Thick formulas fill gaps while bonding. UV-resistant options protect outdoor items.
Best Applications: Clothing repairs, shoe restoration, outdoor gear, specific project needs
Popular Options: Tear Mender, Shoe Goo
How to Choose the Best Glue for Leather Projects 🎨
Picking the right adhesive isn’t guesswork – it’s about matching properties to requirements. Here’s my systematic approach to choosing what is the best glue for leather for your specific needs.
Step 1: Assess Your Project Type
Start by categorizing your work. Are you repairing worn shoes? Creating decorative pieces? Restoring vintage furniture? The project type determines baseline requirements. Heavy-duty repairs need contact cement strength, while craft projects benefit from flexible adhesives with longer working times.
Step 2: Consider Flexibility Requirements
Leather moves, bends, and flexes naturally. If you’re working on clothing, bags, or frequently-used items, flexibility is non-negotiable. Rigid adhesives will crack and fail. Contact cements and specialty craft adhesives maintain flexibility, while cyanoacrylates create hard bonds.
Step 3: Evaluate Environmental Exposure
Will your leather item face rain, snow, or intense sunlight? Waterproof adhesives like Barge, Shoe Goo, and Tear Mender handle moisture. UV-resistant formulas prevent sun damage. Indoor-only items can use water-based options like Fiebing’s.
Step 4: Factor in Dry Time Constraints
Sometimes you need repairs done yesterday. Tear Mender bonds in minutes. Super glue sets in seconds. But if you’re crafting and need positioning time, slower-drying options like E6000 give you room to work.
Step 5: Account for Safety Concerns
Working around children or pets? Choose non-toxic, water-based adhesives. Need ventilation for solvent-based cements? Make sure your workspace accommodates it. Fiebing’s and Aleene’s offer safer alternatives to heavy-duty industrial cements.
Step 6: Match Material Combinations
Bonding leather to leather differs from leather to metal or leather to fabric. Multi-purpose adhesives like E6000 excel at mixed materials. Pure leather-to-leather bonding works best with contact cement or leather-specific glues.
Step 7: Budget Appropriately
Professional-grade adhesives cost more but deliver superior performance. Craft glues offer economical solutions for lighter applications. Calculate cost-per-use rather than just bottle price – a $20 quart of Barge lasts through dozens of projects.
Application Techniques for Professional Results 👨🎨
Even the best adhesive fails if applied incorrectly. I’ve learned these techniques through countless projects and a few memorable mistakes. Let me save you the learning curve.
Surface Preparation: The Foundation of Success
Clean leather bonds better. Period. Use rubbing alcohol or leather cleaner to remove oils, dirt, and old adhesive residue. For smooth-grain leather, lightly roughen the surface with fine sandpaper – this creates mechanical grip for the adhesive. Let surfaces dry completely before applying glue.
Temperature and Humidity Control
Adhesives perform best at room temperature (65-75°F). Cold slows curing. Heat accelerates it (sometimes too fast). High humidity affects some formulas, while others require moisture to cure. Check your adhesive’s specifications and adjust your workspace accordingly.
Contact Cement Mastery
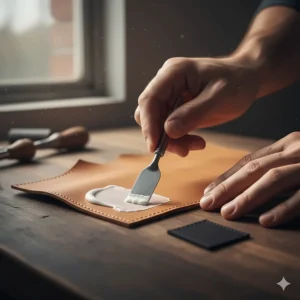
Here’s the pro technique: Apply thin, even coats to both surfaces using an acid brush or foam applicator. Let them dry until they feel tacky but don’t stick to your finger when touched lightly (usually 5-15 minutes). Align pieces carefully – once they touch, the bond is instant and permanent. Use wax paper between surfaces to position perfectly, then remove paper as you press sections together.
Craft Adhesive Application
Apply these glues more generously than contact cement. A thin bead along the seam works for most projects. Press pieces together and use clamps or weights to maintain pressure while drying. Wipe excess with a damp cloth immediately – dried adhesive is much harder to remove.
Super Glue Precision Work
Less is more with cyanoacrylate. One small drop covers about one square inch. Apply to one surface only, then press pieces together for 10-45 seconds. Don’t move pieces during initial set. For strongest bonds on porous materials like leather, apply a very thin layer, let it soak in slightly, then apply a second layer and bond immediately.
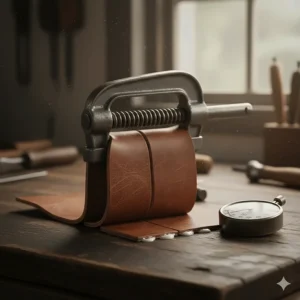
Clamping and Pressure Techniques
Different adhesives need different pressure levels. Contact cement bonds on touch but benefits from rolling or pounding to ensure full contact. Craft adhesives need sustained pressure – use clamps, weights, or even heavy books. Super glue requires brief firm pressure during initial set.
Curing Time Patience
Dry time and cure time aren’t the same. An adhesive might feel dry in hours but take days to reach full strength. Avoid stressing bonds before complete curing. For leather items, this means waiting before wearing, using, or exposing to moisture.
Common Mistakes to Avoid When Gluing Leather ⚠️
I’ve made every mistake in the book so you don’t have to. Here are the pitfalls that can ruin your leather projects and how to sidestep them.
The Too-Much-Glue Trap
More isn’t better with adhesives. Excess glue creates messy squeeze-out, extends drying time, and can actually weaken bonds. It also shows through thin leather or stains suede. Use the minimum amount needed for coverage – you can always add more if needed.
Skipping Surface Prep
Trying to save five minutes by skipping cleaning costs you the entire project when the bond fails. Oils from handling, dust from storage, and old adhesive residues prevent proper bonding. Always prep your surfaces.
Wrong Adhesive Selection
Super glue on flexible leather clothing? Water-based glue on outdoor furniture? These mismatches doom projects from the start. Match adhesive properties to application requirements. When in doubt, ask yourself: “Will this flex? Will it get wet? Does it need instant bonding or working time?”
Insufficient Ventilation
Solvent-based adhesives release fumes that aren’t just unpleasant – they’re unhealthy. Work near open windows or with fans. Professional workshops use respirators for heavy adhesive use. Don’t compromise on ventilation.
Ignoring Manufacturer Instructions
Each adhesive has specific application requirements developed through extensive testing. That “apply to both surfaces” instruction on contact cement? Critical. The “wait 24 hours before use” on certain adhesives? Not a suggestion. Read and follow instructions.
Rushing the Process
Leather work requires patience. Trying to use an item before adhesive fully cures leads to bond failure. Attempting to reposition contact cement after surfaces touch causes incomplete bonding. Give adhesives the time they need.
Poor Storage Practices
Adhesive bottles left uncapped dry out. Storing in hot garages or freezing sheds affects performance. Keep adhesives in cool, dry locations with caps tightly sealed. For contact cement, store upside down so the cap doesn’t stick.
Comparing Leather Adhesives to Traditional Alternatives 📈
Let’s see how modern leather adhesives stack up against old-school methods and understand why they’ve become the preferred choice for most applications.
| Feature | Modern Adhesives | Stitching | Rivets | Traditional Glues |
|---|---|---|---|---|
| Strength | Excellent to Superior | Superior | Excellent | Fair to Good |
| Flexibility | Varies (Most Good) | Excellent | Limited | Poor |
| Water Resistance | Good to Excellent | Good | Excellent | Poor |
| Application Speed | Fast to Instant | Slow | Moderate | Moderate |
| Skill Required | Low to Moderate | High | Moderate | Low |
| Cost | Low to Moderate | Low materials, high labor | Moderate | Low |
| Appearance | Invisible | Visible (decorative) | Visible | Sometimes visible |
| Reversibility | Difficult to Impossible | Easy | Easy | Moderate |
Why Modern Adhesives Win for Most Projects
Stitching remains the gold standard for high-end leather goods, but it requires specialized tools, skills, and significant time investment. Modern adhesives deliver comparable strength for most applications while eliminating the learning curve. They’re particularly valuable for repairs where accessing the reverse side for stitching isn’t possible.
Rivets create strong connections but limit flexibility and leave visible hardware. Adhesives bond invisibly, maintaining the leather’s natural appearance. For decorative work where visible fasteners aren’t desired, adhesives are unbeatable.
Traditional animal-based glues served leatherworkers for centuries but lacked water resistance and strength. Modern synthetic formulas outperform them in virtually every category while offering easier application and better shelf stability.
Best Glue for Leather to Leather Bonding: Special Considerations 🔗
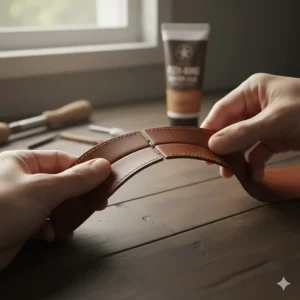
When joining leather pieces together, you’re not just bonding materials – you’re creating a structural joint that needs to withstand stress, movement, and time. This application demands specific attention.
Grain vs. Flesh Side Bonding
The grain (smooth finished side) and flesh (rough underside) of leather present different surfaces. Flesh-to-flesh bonding typically works better because the porous structure provides mechanical grip. When bonding grain sides, roughen them lightly with sandpaper to create texture for adhesive penetration.
Edge Bonding Techniques
Leather edges require special care. Apply adhesive carefully to avoid excess squeeze-out that’s difficult to clean. For thick leather, slightly bevel edges before gluing – this creates more surface area for bonding and a cleaner finished edge. Use edge bevelers or sandpaper for this preparation.
Matching Leather Types
Different leather types bond differently. Vegetable-tanned leather is porous and bonds well with most adhesives. Chrome-tanned leather is denser and may need roughening. Suede and nubuck benefit from adhesives that won’t mat the nap – Aleene’s Leather & Suede Glue was specifically formulated for this.
Strength Requirements Analysis
Consider the stresses your joint will face. A belt buckle attachment endures constant pulling. Bag panels experience twisting and flexing. Shoe repairs withstand impact and abrasion. Match adhesive strength to stress levels – contact cements for high-stress applications, craft adhesives for moderate use.
Layering and Reinforcement
Sometimes bonding alone isn’t enough. Professional leatherworkers often combine adhesive with stitching for maximum strength. The adhesive holds pieces perfectly aligned while stitching adds structural integrity. For repairs, backing patches bonded to both sides create stronger fixes than surface gluing alone.
Maintenance and Care Tips for Glued Leather Items 🧼
Your adhesive work isn’t done when the glue dries. Proper care ensures your repairs and projects last for years. Here’s how to maintain glued leather items effectively.
Cleaning Best Practices
Avoid harsh chemicals near glued seams, especially with water-based adhesives. Use leather-specific cleaners and test in inconspicuous areas first. For waterproof adhesive bonds, regular leather care products work fine. Apply cleaners with soft cloths, avoiding excessive rubbing on glued areas that could stress the bond.
Conditioning Around Adhesive Bonds
Leather needs periodic conditioning to prevent drying and cracking. When conditioning near glued seams, use products compatible with your adhesive. Most modern adhesives tolerate leather conditioners, but test first. Apply conditioner sparingly near seams to avoid weakening water-based adhesives.
Weather Protection Strategies
Even waterproof adhesives benefit from protection. For outdoor leather items, apply weather-resistant treatments that create barriers against moisture. Store leather items in climate-controlled environments when not in use. Extreme temperature fluctuations stress adhesive bonds.
Recognizing Early Failure Signs
Check glued areas periodically for separation, white stress marks, or flexibility changes. Early detection allows re-gluing before complete failure. If edges start lifting, clean and re-glue immediately – small repairs prevent larger problems.
Long-Term Storage Guidelines
Store glued leather items flat or properly supported to avoid stressing bonds. Don’t fold along glued seams. Use acid-free tissue paper to separate items and absorb moisture. Store away from direct sunlight and heat sources that could soften adhesives.
Professional vs. DIY Leather Repair: When to Call an Expert 👔
Sometimes DIY makes sense. Other times, you need professional help. Here’s how to decide whether to tackle repairs yourself or hire a pro.
Projects Perfect for DIY
Simple tears, small holes, loose seams, and embellishment attachment are all DIY-friendly. If you can see and access both sides of the repair area, have the right adhesive, and the item isn’t irreplaceable or extremely valuable, go for it. Small leather craft projects also benefit from the hands-on learning experience.
When Professional Help Makes Sense
Complex structural repairs, valuable vintage items, designer goods under warranty, and intricate restoration work merit professional attention. If the repair requires specialized tools, dyes for color matching, or professional techniques you don’t possess, hiring an expert saves money in the long run by avoiding costly mistakes.
Cost-Benefit Analysis
Compare DIY supplies and time investment against professional service costs. A $10 bottle of adhesive might save hundreds compared to professional repair. But if you need multiple specialty products you’ll rarely use again, professional service becomes economical.
Finding Qualified Leather Repair Specialists
Look for cobblers, leather repair shops, and upholstery specialists with positive reviews and examples of previous work. Ask about their adhesive preferences and techniques. Quality professionals use many of the same products we’ve discussed but bring years of experience to challenging repairs.
Building Your Repair Skills
Start with low-stakes projects to develop confidence. Practice on scrap leather before tackling important items. Watch tutorial videos from experienced leatherworkers. Join online communities where you can ask questions and share results. Skills build gradually through hands-on experience.
Environmental and Safety Considerations ♻️
Using adhesives responsibly protects both you and the environment. Here’s what you need to know about safe, sustainable leather adhesive use.
Ventilation Requirements
Solvent-based adhesives release volatile organic compounds (VOCs) that require adequate ventilation. Work near open windows with cross-breezes or use exhaust fans. For extended projects, consider respirators with organic vapor cartridges. Water-based alternatives like Fiebing’s Leathercraft Cement produce minimal fumes.
Skin Contact Safety
Most adhesives irritate skin and some cause allergic reactions. Wear disposable gloves when working with contact cements and industrial adhesives. If adhesive contacts skin, wash immediately with soap and water. For cyanoacrylate (super glue), soak in warm soapy water – never pull bonded skin apart.
Proper Disposal Methods
Never pour liquid adhesives down drains. Dried adhesive on newspapers or cardboard can typically go in regular trash. Check local hazardous waste regulations for large quantities or professional-grade products. Many communities hold hazardous waste collection days for proper disposal.
Eco-Friendly Alternatives
Water-based adhesives like Fiebing’s and Tear Mender reduce environmental impact compared to solvent-based products. Barge now offers toluene-free formulations that maintain performance while eliminating harmful chemicals. Choose products with lower VOC content when options exist.
Child and Pet Safety
Store all adhesives in locked cabinets away from children and pets. Even “non-toxic” adhesives can cause stomach upset if ingested. Keep phone numbers for poison control readily available. Work in areas pets can’t access – they’re attracted to interesting smells.
According to the Environmental Protection Agency, proper ventilation and responsible disposal of adhesive products helps protect indoor air quality and prevents environmental contamination.
Troubleshooting Common Leather Gluing Problems 🔧
Even experienced crafters encounter problems. Here’s how to diagnose and fix the most common leather adhesive issues.
Poor Bond Strength Issues
Problem: Adhesive doesn’t hold or bonds pull apart easily.
Causes: Inadequate surface preparation, wrong adhesive for application, insufficient drying time, contaminated surfaces.
Solutions: Clean surfaces thoroughly, roughen smooth leather slightly, use appropriate adhesive for stress level, allow full curing time before use.
Visible Glue Lines and Stains
Problem: Adhesive shows through leather or creates dark spots.
Causes: Too much adhesive applied, adhesive not suitable for leather type, improper cleanup of excess.
Solutions: Use less adhesive, choose clear-drying formulas, wipe excess immediately with appropriate cleaner, test application technique on scrap first.
Cracking and Inflexibility
Problem: Bonded area becomes rigid and cracks with use.
Causes: Using inflexible adhesive on flexible leather, applying too thick a layer, wrong adhesive type.
Solutions: Choose flexible adhesives for items that bend, apply thinner layers, consider leather-specific formulas like E6000 or contact cement.
Adhesive Won’t Dry
Problem: Glue remains tacky indefinitely.
Causes: Excessive application, inadequate ventilation, high humidity, expired adhesive.
Solutions: Improve airflow, reduce adhesive amount, check expiration dates, consider humidity levels in workspace.
Peeling or Lifting Edges
Problem: Edges of bonded areas separate over time.
Causes: Insufficient edge coverage, stress concentration at edges, poor initial bonding.
Solutions: Apply adhesive fully to edges, reinforce stress points, use edge beveling techniques, consider stitching in addition to gluing.
Color Changes in Leather
Problem: Leather darkens or changes color around glued areas.
Causes: Solvent penetration, adhesive migration through leather.
Solutions: Test adhesives on scrap first, use adhesives formulated for leather, avoid over-application that causes seepage.
Price Range and Value Analysis: Finding Your Budget Sweet Spot 💰
Understanding cost-versus-performance helps you invest wisely in leather adhesives without overspending or compromising quality.
| Price Tier | Price Range | Typical Options | Best For | Value Rating |
|---|---|---|---|---|
| Budget | $5-$10 | Aleene’s, small Shoe Goo tubes, craft adhesives | Light crafts, occasional repairs, beginners | ⭐⭐⭐ Good |
| Mid-Range | $10-$20 | E6000, Fiebing’s 4oz, Tear Mender, small Barge | Regular crafting, quality repairs, multi-use | ⭐⭐⭐⭐ Excellent |
| Professional | $20-$35 | Barge quart, bulk professional cements | Heavy-duty work, professional use, frequent projects | ⭐⭐⭐⭐⭐ Outstanding |
Cost-Per-Use Calculations
A $7 tube of Aleene’s might last 10-15 small craft projects – roughly $0.50-$0.70 per use. A $22 quart of Barge covers 50+ major repairs – about $0.44 per use. Larger containers typically offer better value if you’ll use them before expiration.
When to Invest in Premium Products
Choose professional-grade adhesives for valuable items, frequent projects, or applications requiring maximum strength. A $25 investment in Barge makes sense for serious hobbyists or small business work. Budget options suffice for one-time repairs or learning projects.
Long-Term Storage and Shelf Life
Factor in shelf life when buying larger quantities. Most adhesives last 1-2 years sealed, less once opened. Buying in bulk only makes sense if you’ll use it. Smaller containers cost more per ounce but reduce waste if you don’t use adhesives frequently.
Multi-Purpose Value Consideration
Adhesives like E6000 that work on multiple materials offer greater value than leather-only formulas if you do varied crafting. A single versatile adhesive might eliminate the need for three specialized products.
FAQ: Your Leather Glue Questions Answered ❓
❓ What glue should I use for leather car seats?
❓ How long does leather glue typically last once applied?
❓ Can I use regular super glue on leather to leather repairs?
❓ Is it better to glue or sew leather projects together?
❓ How do I remove dried leather glue without damaging material?
Conclusion: Making Your Best Leather Glue Choice 🎯
After exploring seven excellent adhesives and diving deep into application techniques, you’re equipped to choose confidently. Remember, what is the best glue for leather depends entirely on your specific project needs.
For professional-grade repairs and heavy-duty work, Barge All-Purpose TF Cement remains the industry gold standard. Its instant bonding, waterproof flexibility, and proven track record make it worth every penny for serious leatherwork. When you’re tackling shoe repairs, belt making, or furniture restoration, Barge delivers professional results.
If versatility matters most, E6000 Craft Adhesive bridges the gap between strength and flexibility while bonding virtually any material combination. It’s perfect for crafters who work with leather alongside metal, fabric, or other materials. The longer working time gives beginners room to perfect their technique.
For safety-conscious crafters or those working indoors with limited ventilation, Fiebing’s Leathercraft Cement offers a non-toxic solution that doesn’t compromise on quality. It’s particularly valuable for home-based leatherworking where ventilation is challenging.
The key to success with any adhesive lies in proper application. Clean your surfaces thoroughly. Choose the right adhesive for your specific application. Follow manufacturer instructions precisely. Allow adequate curing time. These fundamentals ensure professional results regardless of which product you select.
Start with one adhesive that matches your most common project type. As you build experience and tackle varied work, expand your toolkit. Many professional leatherworkers keep multiple adhesives on hand, selecting based on project requirements. There’s no single “best” adhesive – only the best choice for each specific application.
Your leather projects deserve quality adhesives that protect your investment of time, materials, and creativity. Whether you’re repairing beloved vintage pieces, creating custom leather goods, or exploring leathercraft as a new hobby, the right adhesive makes all the difference between frustration and success.
✨ Transform Your Leather Projects Today! 🚀
Ready to achieve professional leather repairs and create stunning leatherwork? Click any product link above to check current Amazon pricing and customer reviews. These carefully selected adhesives will help you tackle any leather project with confidence. Don’t let worn leather items sit unused – grab your adhesive and start repairing today!
Recommended for You
- 7 Best Leather Repair Glue for 2025: Expert Reviews
- 7 Best Soaker Hose for Foundation in 2025 + Expert Tips
- Gardening Knife Guide: 7 Best Tools for 2025
Disclaimer: This article contains affiliate links. If you purchase products through these links, we may earn a small commission at no additional cost to you.
✨ Found this helpful? Share it with your friends! 💬🤗