
In This Article
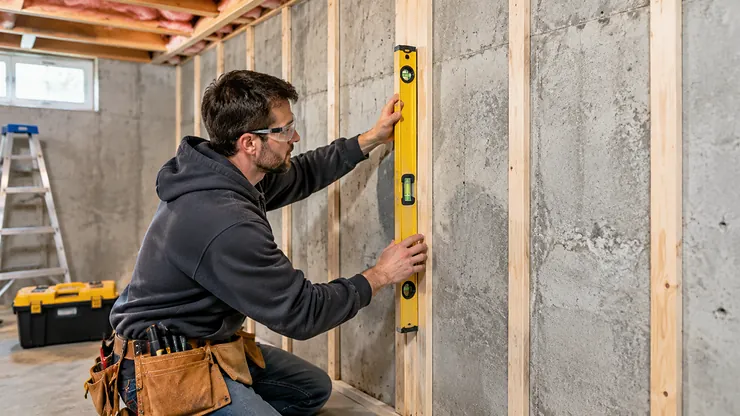
Hang a sheet of drywall a quarter-inch out of plumb and you won’t notice. Then comes the taping knife, the second coat, the primer, and the glossy trim, and suddenly that quarter-inch is a shadow line you can see from across the room. A good level for drywall installation is cheap insurance against that regret. A bad one, or an untrue one, quietly builds the regret into every wall.
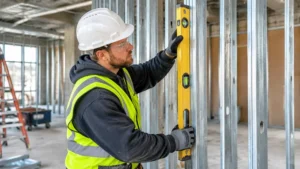
Here’s the tricky part: the “right” tool depends on the job. Checking a freshly framed wall calls for a long level for wall framing. Squaring up an outlet box is a torpedo level’s job. A drywall installer level has to survive being dropped, leaned, dusted, and kicked, and keep telling the truth anyway.
This guide compares seven real, widely sold options across budget, mid-range, and premium tiers. It explains what each spec means on an actual jobsite, and covers the framing basics that make your level more useful, including stud spacing and how wall framing sets up every sheet you hang. We also look at drywall taping tools, because a level and a knife share the same goal: a flat wall.
As of November 2026, prices fluctuate, so every cost below is a range. Check current listings before you buy.
Quick Comparison Table: 7 Levels for Drywall Installation
| Product | Format | Price Range | Best For |
|---|---|---|---|
| Stabila Type 196 (48″ + 16″ set) | Non-magnetic box-beam pair | Roughly $300-$350 | Pros who want a lifetime-accuracy benchmark |
| Empire e75 True Blue 78″ Magnetic | Full-height magnetic box level | Around $90-$120 | Door frames, full walls, steel-stud work |
| Empire eXT78 Extendable (48″-78″) | Telescoping box level | Around $120-$160 | One-level-does-it-all installers |
| Craftsman CMHT82347 48″ Box Beam | Standard 48″ box level | Budget tier, check listing | Homeowners hanging their first sheets |
| Johnson Magnetic Glow View Torpedo | Compact magnetic torpedo | Typically under $25 | Outlet boxes, tight bays, quick plumb checks |
| Klein Tools 935AB4V Torpedo | Four-vial metal torpedo | Typically under $25 | Pipe, conduit, and cutout work |
| Milwaukee 48-22-5207 Billet Torpedo (7″) | Compact billet torpedo | Roughly $20-$30 | Strong-magnet, tool-belt carry |
The table sorts by use more than by price. The two Empire levels and the Stabila Type 196 set are your wall-scale references. The Craftsman CMHT82347 is the entry-level sheet-checker. The three torpedoes are detail tools you’ll reach for constantly.
Notice how little the budget Craftsman CMHT82347 and the premium Stabila Type 196 differ in job description. They differ in how long they stay accurate under abuse. If you hang drywall twice a year, the cheaper tool usually wins on value. If you do it every week, the Stabila Type 196‘s longevity changes the math.
💬 Just one click — help others make better buying decisions too!😊
Top 7 Levels for Drywall Installation: Expert Analysis
1. Stabila Type 196 (48″ + 16″ Set, Cat. 37816) — the accuracy benchmark pros measure everything against
The Stabila Type 196 earns its reputation on one promise: it reads true no matter which way you flip it. The listed accuracy is 0.5 mm per meter, roughly 1/32 inch over 72 inches, in both normal and reverse positions, and the vials carry a lifetime accuracy guarantee. The aluminum box-beam frame is stiff enough to keep a wall check honest, and the 48-inch piece weighs about 3.6 pounds, light enough to hold against a ceiling line without tiring.
The 16-inch partner is the sleeper hit. A 2×4 stud bay on 16-inch centers leaves about 14.5 inches of clear space, so the short level fits between studs for blocking and backing checks. This set is for people who dislike re-checking their tools.
Forum veterans repeatedly call Stabila tough and dependable. Skeptics counter that it costs far more than rivals and isn’t dramatically better to the eye. Both camps agree it holds calibration.
Pros:
- ✅ Certified accuracy in normal and reverse positions
- ✅ Rigid box-beam frame resists flexing
- ✅ 16-inch level fits inside a stud bay
Cons:
- ❌ Costs several times more than budget alternatives
- ❌ Type 196 is non-magnetic
Price: roughly $300-$350 for the set at some retailers. Value verdict: worth it for daily users, overkill for occasional ones.
2. Empire e75 True Blue 78″ Magnetic Box Level (EM75.78) — best full-height value with strong magnets
The Empire e75 targets the sweet spot between hardware-store flimsy and premium-priced. Empire lists accuracy at 0.0005 inch per inch in all working positions, with precision-milled top and bottom edges and a limited lifetime warranty on frame and vials. The tool-free removable end caps let the level scribe cleanly into corners, which helps when you’re checking a sheet tight to the ceiling.
At 78 inches, it spans door-frame height and nearly an entire wall’s worth of plumb in one placement, so you’re not stacking short readings that drift.
Reviewers on retailer pages mention strong magnets, large readable vials, and accuracy on both long edges, and one calls it a good budget alternative to Stabila. A minority of older forum posts report disappointment after hard use, a reminder that any level reads untrue after enough abuse.
Pros:
- ✅ Magnetic for steel studs and door frames
- ✅ True Blue vials stand out in dim rooms
- ✅ Replaceable end caps absorb drops
Cons:
- ❌ Long length is awkward in tight rooms
- ❌ Durability under abuse draws mixed opinions
Price: around $90-$120. Value verdict: excellent for full-wall checks without premium money.
3. Empire eXT78 Extendable True Blue (48″-78″) — one level that replaces three
The Empire eXT78 collapses to 48 inches and stretches to 78, which means one tool in the truck instead of a 4-footer, a 6-footer, and a door-jamb level. High-contrast vial surrounds improve visibility, and an integrated ruler scale helps with repeat layout marks.
The practical meaning is flexibility. Hanging 54-inch-wide sheets sideways or checking a taller opening? Extend and go. The trade-off is physics: any joint adds a spot where tolerance can creep, so a check after any hard drop is smart.
Buyers on retailer pages praise the space savings and sturdiness, and one notes the lifetime limited warranty on vial and casing. Several describe it replacing multiple levels in their kit.
Pros:
- ✅ Covers multiple lengths in one tool
- ✅ Integrated ruler helps with repeat marks
- ✅ Great for cramped vehicle storage
Cons:
- ❌ Extension joint is a potential accuracy-check point
- ❌ Heavier than a fixed 48-inch level
Price: around $120-$160. Value verdict: smart for mobile installers and tight storage.
4. Craftsman CMHT82347 48″ Box Beam Level — the budget sheet-checker
At 48 inches, the Craftsman CMHT82347 matches the width of a standard drywall sheet, so it can check the face of a full panel in one placement. A box-beam body adds stiffness compared to thin I-beam budget levels, which keeps the reading steady across that span.
Bob Vila’s testing team named it best bang for the buck, which matches what the format promises: decent accuracy for people who hang drywall occasionally, not professionals who abuse tools daily.
I couldn’t verify a detailed breakdown of its user-review sentiment, so treat the editorial pick as a signal rather than a guarantee. For any budget level, the smart move is to check it against a known-straight reference before trusting it.
Pros:
- ✅ 48-inch length matches sheet width
- ✅ Box-beam body resists bending
- ✅ Low entry cost for first projects
Cons:
- ❌ Verification of long-term accuracy is on you
- ❌ Less proven under daily jobsite abuse
Price: budget tier, check current price. Value verdict: a sensible starter if you’ll test it first.
5. Johnson Level & Tool Magnetic Glow View Torpedo Level — everyday detail work on a small budget
The Johnson Glow View is a compact magnetic torpedo, and the name hints at vials designed to read in dim spaces, which matters when you’re peering into a dark corner or attic bay. Magnetic edges let it hold on steel without a free hand.
A torpedo handles outlet boxes, window returns, and cutout alignment, jobs where a 48-inch level is clumsy. Bob Vila’s team picked it as the best torpedo, which tells you it balances price and legibility.
I couldn’t verify rating counts for this specific listing, so lean on the editorial pick and check vial accuracy yourself. Johnson as a brand has a loyal following in level forums, with some users saying every Johnson they checked read true.
Pros:
- ✅ Magnetic grip frees your hands
- ✅ Compact for outlets and corners
- ✅ Low-cost tool you won’t cry over losing
Cons:
- ❌ Short body limits precision over distance
- ❌ Rating data hard to verify per listing
Price: typically under $25. Value verdict: a cheap, practical addition.
6. Klein Tools 935AB4V Torpedo Level — four vials and a pipe-hugging profile
The Klein 935AB4V adds a fourth vial and an all-metal build to the torpedo format. The extra vial reads angled runs, and the shape lets it hang from pipe or conduit, handy when you’re checking boxes and cutouts beside electrical work. The bright color makes it easy to find in a dusty tool bag.
HomeGrail’s 2026 roundup ranked it best overall among torpedo levels, praising readability and a well-designed magnet track. One reviewer notes the dedicated design has limitations outside electrical-style work, which is fair: it’s a specialist more than a general-purpose level.
Pros:
- ✅ Four vials cover plumb, level, and angles
- ✅ All-metal construction feels durable
- ✅ Hangs on pipe or conduit
Cons:
- ❌ Magnets draw criticism for being modest
- ❌ Specialist design isn’t a general pick
Price: typically under $25. Value verdict: a good fit if you also touch electrical rough-in.
7. Milwaukee 48-22-5207 Compact Billet Torpedo (7″) — strong magnets in a belt-friendly size
The Milwaukee 48-22-5207 is a 7-inch billet torpedo with a laser-etched ruled edge, rare-earth magnets advertised at twice the holding power, and a lifetime limited warranty. The ruled edge lets you mark and check without grabbing a tape, and the compact size rides easily in a pocket.
Home Depot shows a 4.7 average across 488 reviews, with 82 percent recommending, and one reviewer calls the magnets the strongest they’ve used. The listing says “Metric,” so check which markings you’re buying.
A 7-inch body limits precision on long runs, so it complements a box level rather than replacing one.
Pros:
- ✅ Very strong rare-earth magnets
- ✅ Laser-etched ruled edge for quick marks
- ✅ Lifetime limited warranty
Cons:
- ❌ Short body gives less reference length
- ❌ Metric marking listing may confuse buyers
Price: roughly $20-$30. Value verdict: worth it as a steel-stud companion tool.
What Is a Level for Drywall Installation?
A level for drywall installation is a spirit-level tool, typically a 24- to 78-inch box beam or I-beam, used to confirm studs, headers, and drywall sheets sit plumb (vertical) and level (horizontal) before fasteners go in. Shorter torpedo versions check outlet boxes and cutouts. Accuracy is measured in inches per inch or millimeters per meter.
The idea is old, and the concept of the spirit level has been around for centuries: a sealed vial with a bubble that centers when the surface is true. What has changed is the engineering. Modern frames resist twisting, vials stay accurate in reverse, and magnets let a level hold itself against steel.
Why does it matter for drywall specifically? Because the surface is unforgiving. Paint and light show every wave. If a stud wall is out of plumb, a level tells you before the sheet hides the problem. Think of it as a truth-teller you consult before the wall can lie to you.
How to Choose a Level for Drywall Installation
Picking the right level for drywall installation comes down to a handful of decisions. Work through them in order.
- Match length to the task. A 48-inch level fits a standard sheet width; 72 to 78 inches suits full-height walls and door openings.
- Check accuracy ratings. Look for specs stated in inches per inch or mm/m, and for accuracy in reverse positions.
- Decide on magnets. If you work around steel studs or door frames, magnetic is a time-saver; for wood studs, it matters less.
- Inspect the frame. Box-beam frames resist bending better than basic I-beams, which matters over long spans.
- Read the vials. High-contrast vials reduce squinting in poorly lit rooms.
- Weigh the warranty. Lifetime vial or frame coverage signals confidence, but read what it excludes (bent frames usually void it).
- Budget for two levels. One long, one torpedo covers most drywall work.
Where beginners go wrong is spending on length and skipping the torpedo. A 78-inch level can’t reach inside a cabinet cutout, and a 7-inch level can’t judge a wall. Pair them.
Drywall Installer Level: What Working Pros Actually Carry
A drywall installer level isn’t a single tool; it’s a small kit shaped by how the day actually goes. Installers move fast, set tools down on dusty floors, and lean levels against sheets. That abuse is why durability, end-cap protection, and vial clarity matter more than spec-sheet bragging.
A typical working kit includes a 48-inch level for checking sheets and a longer one for door and window openings. Fine Homebuilding’s long-running coverage of the Stabila Type 196-2 notes the box-frame design and the guaranteed accuracy in any direction, which explains its standing among pros. Add a torpedo for boxes and cutouts.
The honest analysis: if you’re paid by the board and your levels get dropped weekly, a higher-priced drywall installer level amortizes quickly because it doesn’t need re-checking. For occasional use, a mid-priced option like the Empire e75 gives most of the benefit. The real cost isn’t the tool; it’s the rework when a “close enough” reading turns out wrong.
Long Level for Wall Framing: Why Length Matters
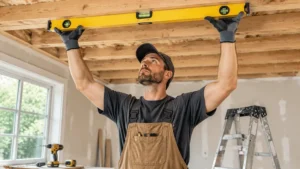
A long level for wall framing earns its keep before drywall ever arrives. Framing sets the plane that every sheet follows, and a 72- or 78-inch level averages out small bumps in individual studs, giving you a truer reading of the wall.
Short levels get fooled. A crowned stud can read plumb over 24 inches and still bow across the full wall. A longer reference bridges the bump and reveals the lean. That’s why the Empire e75 at 78 inches and the extendable Empire eXT78 suit framing checks, and why the Stabila Type 196 family is a common pro choice for the same job.
Practical tip: place the level on the stud edges, not on the sides, and check at least three positions per wall. If readings disagree, find the crowned stud and fix it now. Shimming or planing a stud costs a minute; fixing a wavy finished wall costs a weekend.
Torpedo Level for Drywall: Small Tool, Big Jobs
A torpedo level for drywall handles the details that a long level can’t reach. Think outlet and switch boxes, window and door returns, soffits, and any cutout where plumb and level matter but space is tight.
The trio here covers different needs. The Johnson Glow View is a budget magnetic pick with readable vials. The Klein 935AB4V adds a fourth vial and a pipe-friendly profile. The Milwaukee 48-22-5207 brings strong magnets and a ruled edge.
Honest caveat: a torpedo’s short body can’t verify a wall, only a feature. Trust it for “is this box straight?” and not for “is this wall plumb?” Also remember magnets can attract metal dust that shifts a reading, so wipe the edge occasionally.
Used well, a torpedo level for drywall saves a surprising number of tape-measure trips and re-cuts.
Stud Spacing and Wall Framing: What Your Level Is Checking
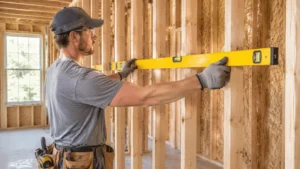
Behind every sheet is a pattern, and stud spacing is its rhythm. The residential standard is 16 inches on center, meaning the center of one stud sits 16 inches from the center of the next. Some non-load-bearing interior walls use 24 inches on center. Sixteen works because a 48-inch drywall sheet then lands edges and a middle seam on studs, giving you solid places to screw.
The framing (construction) overview on Wikipedia explains how studs, plates, and headers form the skeleton that drywall covers. Your level’s job is to verify that skeleton before you cover it.
What to check:
- Each stud face for plumb, so sheets sit flat.
- Plate tops for level, so sheets don’t wander.
- Stud spacing against your marks, because a stud that drifts off 16 inches on center can miss a sheet’s edge.
Wall framing flaws don’t disappear under drywall; they telegraph through paint. Catching them with a level in the framing stage is the cheapest fix in the entire project.
Spirit Level vs Laser Level vs Digital Level
Not every job needs a bubble. Here’s how the main tool types compare for drywall-related tasks.
| Tool Type | Strength | Weakness | Best For |
|---|---|---|---|
| Box spirit level | No batteries, tough, accurate on short spans | Limited by length | Checking sheets and framing |
| Torpedo level | Fits tight spots, magnetic | Short reference length | Boxes, cutouts, returns |
| Cross-line laser | Projects long lines across rooms | Needs batteries, loses visibility in bright light | Ceiling and wall layout lines |
| Digital level | Numeric angle readouts | Slower reads, more wear sensitivity | Precise angle work |
A spirit level wins for checking an existing surface, since it needs nothing but gravity. A laser wins for transferring a line across a room, like marking a chalk-free reference for drywall seams. Digital models read angles precisely but add batteries and fragility.
For most people hanging drywall, a box level plus a torpedo covers everything. Add a laser only if you’re marking long runs repeatedly. Buying the laser first is the classic beginner misstep.
Drywall Taping Tools: Where Your Level Fits In
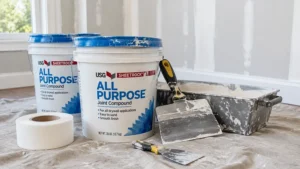
Hanging is half the story. The other half is finishing, and drywall taping tools decide whether seams vanish. The core kit includes 6-inch and 12-inch knives, a mud pan, a sanding pole or sponge, and for those who want speed, an automatic taper.
Level 5 Tools sells entry-friendly flat box sets that suit beginners unsure whether a full taping setup will pay off, and its Level5 Tools Drywall Corner Roller (4-707) helps seat tape in inside corners. A Johnson Level JTS48HD Drywall T-Square (48-inch aluminum) helps mark straight cut lines on sheets.
A quick note on terminology: “Level” in finishing refers to the Gypsum Association’s finish ratings, Level 0 through Level 5, not spirit levels. Trim-Tex’s breakdown explains that Level 5 adds a skim coat across the whole surface. Your spirit level’s contribution to that finish is indirect but real: flat, plumb framing means less mud to hide mistakes. Good drywall taping tools can’t fix a crooked wall, they can only disguise it.
Practical Usage Guide: Your First 30 Days With a New Level
New levels deserve a quick audit before they touch a project. Follow this routine.
Day one: the flip test. Place the level on a flat, stable surface, mark where it sits, note the bubble position, then rotate it end for end and read again. If the bubble sits in a different spot, the vial is off. Do this for both horizontal and plumb vials.
Week one: build the habit. Check each stud edge for plumb before hanging. Use the longest level you own for walls and the torpedo for details. Wipe vials with a soft cloth, since dust can fool your eyes.
Maintenance schedule: re-run the flip test monthly and after any drop. Keep end caps on; they protect the frame corners that matter most for accuracy.
Common first-month mistakes:
- Trusting a reading taken on a dirty stud edge.
- Using a level as a pry bar or hammer, which can void warranties and bend frames.
- Checking just once, rather than at three positions.
- Forgetting that a bent frame lies even if the vial is fine.
A level that fails the flip test is a hazard, not a tool. Return it while you can.
Real-World Scenarios: Matching Levels to Buyers
The first-time homeowner. Budget around $50-$150, one finished basement wall, a weekend of work. A Craftsman CMHT82347 plus a Johnson Glow View handles sheet checks and outlet boxes without overspending. Run the flip test first.
The weekend remodeler with steel studs. Frequent small jobs, mixed materials. The magnetic Empire e75 at 78 inches grips steel and spans door frames, and a Milwaukee 48-22-5207 adds strong-magnet detail checking.
The working installer. Daily use, constant drops, lots of travel. The Empire eXT78 saves truck space, while a Stabila Type 196 set provides a certified reference that survives abuse. Add a Klein 935AB4V if electrical boxes are routine.
The common thread: one long level plus one torpedo, scaled to how often you work and how hard you are on tools. Spending extra for the premium reference makes sense once your hourly rate depends on not re-doing work.
Long-Term Cost and Maintenance: What a Level Really Costs
Sticker price is only part of the cost. Think total cost of ownership: purchase price, years of reliable service, and the cost of errors a bad reading causes.
A budget level around $50 that needs replacing every few years costs more per year than a $300 set that lasts a decade with a lifetime guarantee, if you use it daily. For a homeowner hanging drywall once, the cheaper tool is the rational buy. The break-even depends on frequency.
Hidden costs matter too. A level that drifts without you noticing can cost entire sheets in rework. A magnetic model that picks up metal debris needs occasional cleaning. And warranties only help if you read them: bent frames typically void coverage.
Maintenance is cheap: wipe vials, keep end caps on, store the level flat or hanging, and re-check accuracy after drops. A five-minute flip test each month is the best insurance you can buy.
FAQ
❓ What size level is best for hanging drywall?
❓ Is a magnetic level worth it for drywall work?
❓ How often should I check my level's accuracy?
❓ Can I use a laser level instead of a spirit level for drywall?
❓ Why do my drywall seams show even with straight framing?
Conclusion
The best level for drywall installation is the one that matches your workload. For occasional projects, a mid-priced box level like the Empire e75 plus a budget torpedo such as the Johnson Glow View covers the job. For daily professionals, the Stabila Type 196 set earns its premium through certified accuracy that survives abuse. If truck space is tight, the Empire eXT78 consolidates three lengths into one.
Remember what the level is really protecting: your finish. Check framing early, confirm stud spacing before sheets go up, and verify your tools regularly. A wall that starts plumb needs less mud, less sanding, and less swearing.
Pick one long level and one torpedo, run the flip test, and let gravity do the honest work.
✨ Ready to build it right?
🔍 Compare the Empire e75, Stabila Type 196, and the rest above, then click through to check current pricing and availability. Your future paint job will thank you!
Recommended for You
- Digital Caliper For Machinists: 7 Best Picks Ranked (2026)
- Laser Measure For Contractors: 7 Best Proven Picks (2026)
- Socket Set For Beginner DIYers: 7 Best Picks, Zero Regrets (2026)
Disclaimer: This article contains affiliate links. As an Amazon Associate, I earn from qualifying purchases. If you purchase products through these links, we may earn a small commission at no additional cost to you.
✨ Found this helpful? Share it with your friends! 💬🤗
