In This Article
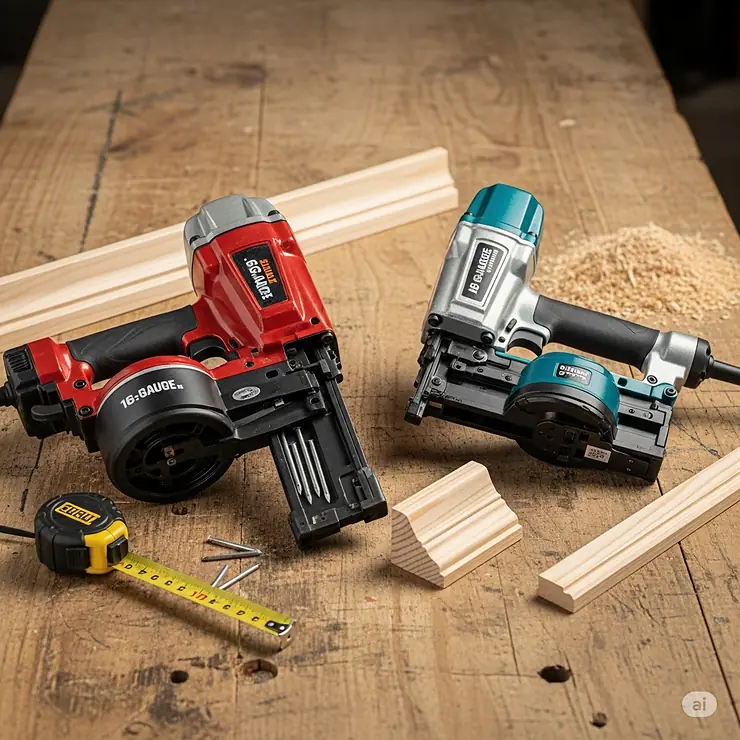
Choosing between a 16 vs 18 gauge nailer can make or break your woodworking project. Whether you’re a professional contractor or a weekend DIY enthusiast, understanding these two powerful tools is essential for achieving flawless results. The difference isn’t just about numbers – it’s about precision, holding power, and knowing exactly when to use each tool.
✨Was this helpful? Spread the word! 🚀
I’ve spent years working with both nailer types, and I can tell you that selecting the wrong gauge can lead to split wood, weak joints, or unsightly holes that require extensive filling. The good news? Once you understand the fundamental differences between 16 vs 18 gauge nailer applications, you’ll never second-guess your tool choice again.
Understanding Gauge Numbers: Why Lower Means Thicker 🔢
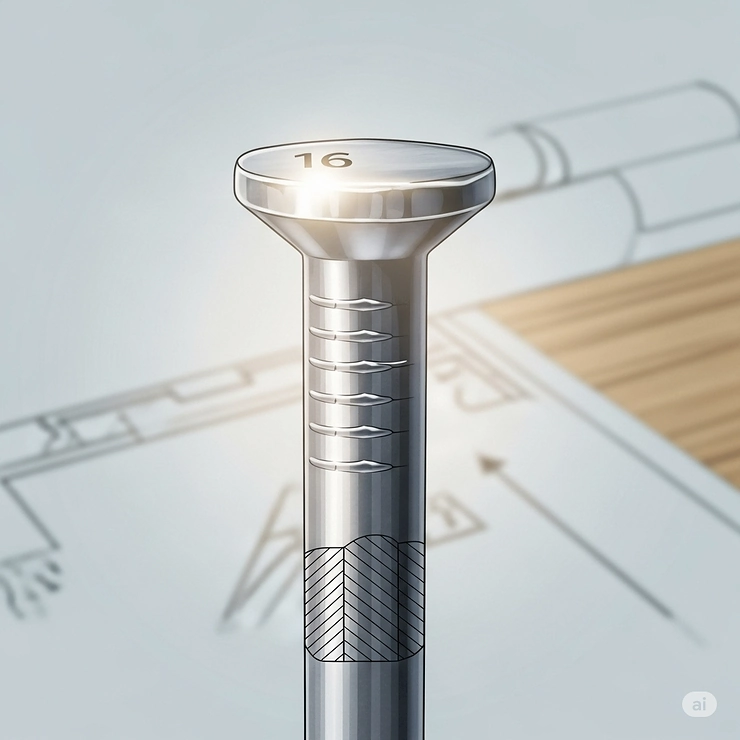
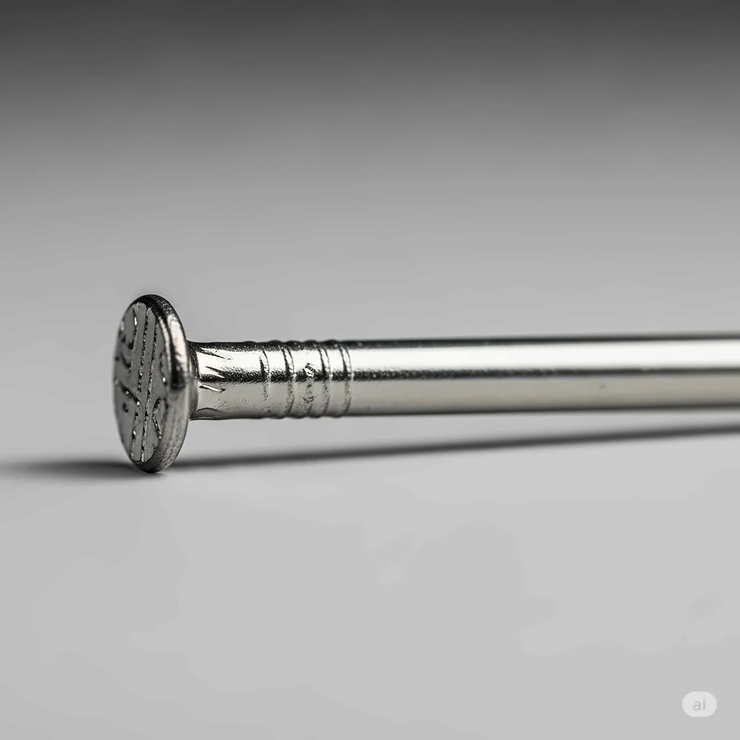
Before diving into specific applications, let’s clear up a common misconception. In the nail gun world, gauge numbers work inversely to what you might expect. The lower the gauge number, the thicker the nail. This means:
✅ 16 gauge nails = Thicker, stronger nails (0.0625 inches thick)
✅ 18 gauge nails = Thinner, more delicate nails (0.0475 inches thick)
Think of it this way: if you lined up nails side by side in one inch, you could fit more 18-gauge nails than 16-gauge nails because they’re thinner. This fundamental difference drives every other aspect of how these tools perform.
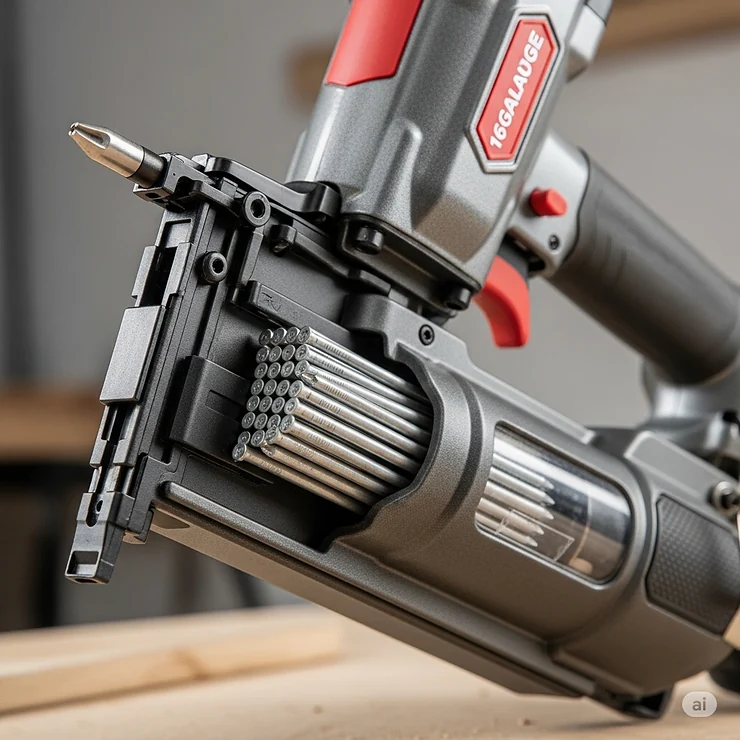
The Power Players: 16 Gauge Finish Nailers 💪
When Strength Matters Most
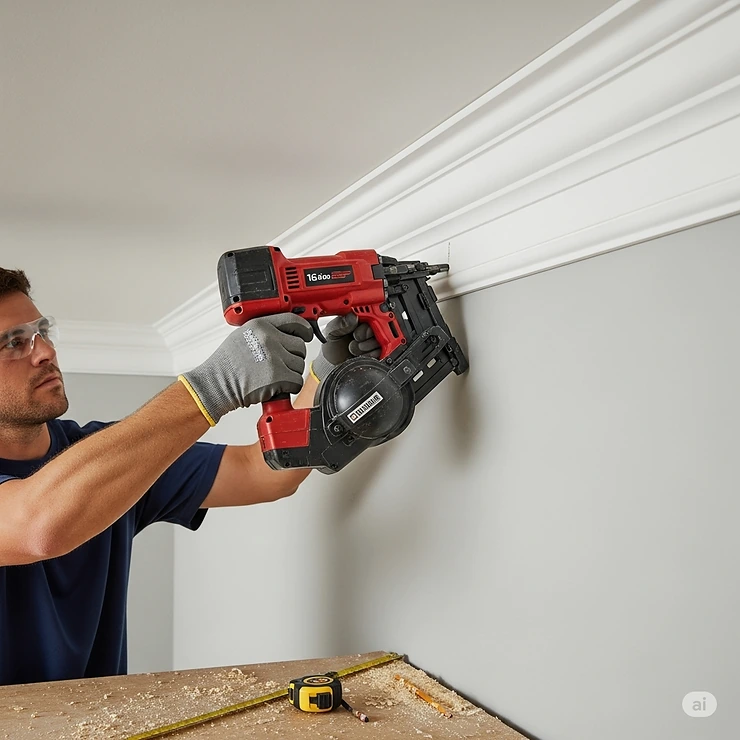
16-gauge finish nailers are the workhorses of the nail gun family, designed for projects that require superior holding power and durability. These tools drive nails from 1¼ inches to 2½ inches in length, making them perfect for substantial trim work and structural applications.
Top Applications for 16 Gauge Nailers:
- Crown molding installation
- Baseboard and casing work
- Door and window trim
- Cabinet construction and installation
- Chair rails and wainscoting
- Hardwood flooring applications
- Exterior trim projects
Real-World Performance Benefits
The thicker 16-gauge nails provide several advantages that make them indispensable for certain projects:
Superior Holding Power: The larger diameter and head size of 16-gauge nails provide greater surface area for gripping materials, making them ideal for hardwood applications where smaller gauges might fail.
Versatility in Dense Materials: These nailers can drive through tough materials like MDF, hardwoods, and even fiber cement without bending or breaking.
Professional-Grade Results: For contractors working on high-end trim installations, the holding power of 16-gauge nails ensures joints remain secure for years.
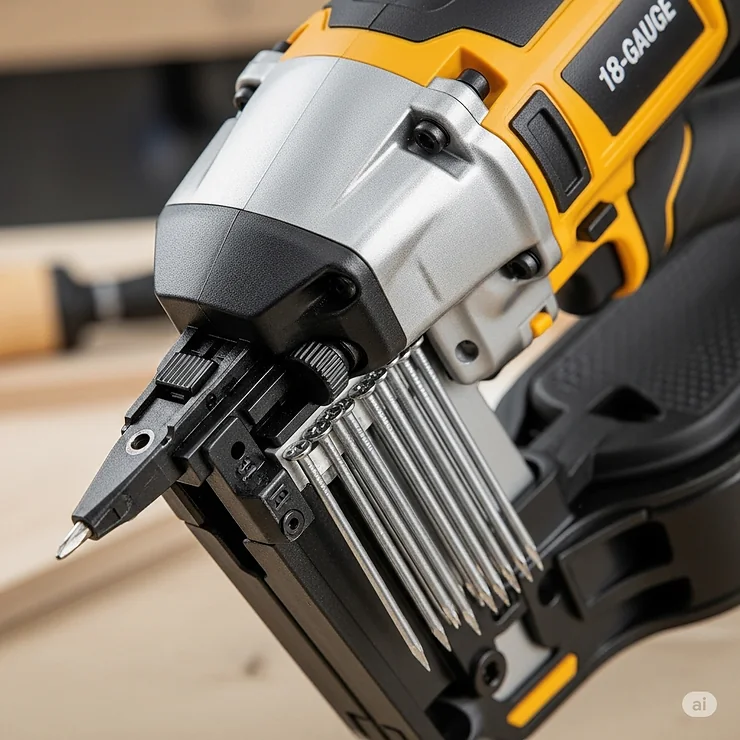
The Precision Masters: 18 Gauge Brad Nailers ✨
When Finesse Trumps Force
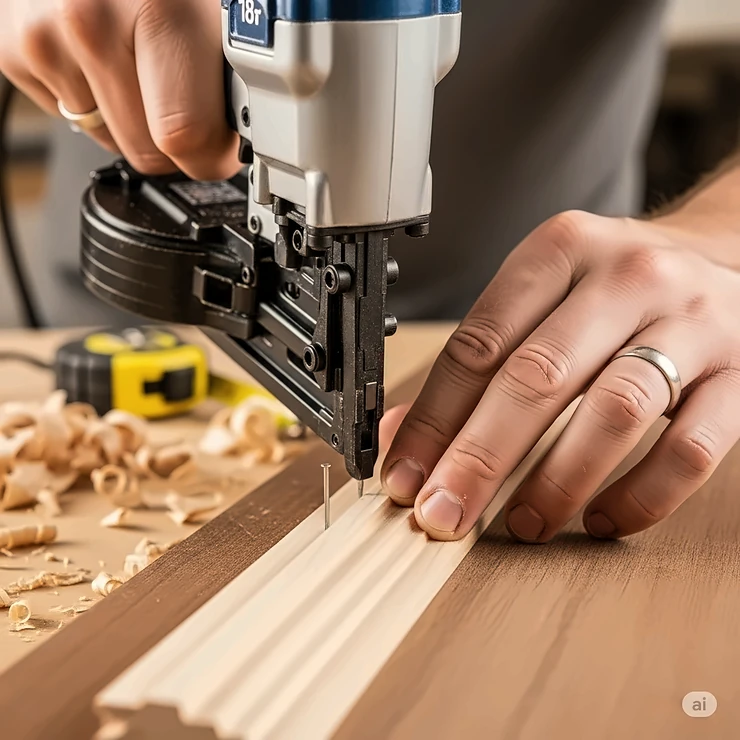
18-gauge brad nailers excel at precision work, leaving smaller nail holes that often don’t require filling, making them perfect for delicate trim work where appearance matters most. These tools typically drive nails from ⅝ inch to 2 inches in length.
Ideal Applications for 18 Gauge Nailers:
- Lightweight decorative molding
- Picture frame assembly
- Paneling and beadboard installation
- Veneer work
- Small furniture projects
- Delicate trim applications
- Craft and hobby projects
Precision Advantages
Minimal Wood Damage: The thinner profile significantly reduces the risk of splitting delicate materials, especially important when working with thin moldings or softwoods.
Clean Finish: The smaller hole left by 18-gauge nails often doesn’t require wood filler, saving time and creating a cleaner finish.
Enhanced Maneuverability: Most 18-gauge nailers are lighter and more compact, making them easier to use in tight spaces or overhead applications.
Product Spotlight: Top 16 vs 18 Gauge Nailer Options 🛠️
Premium 16 Gauge Finish Nailers
DEWALT DCN660B 20V MAX Cordless Angled Finish Nailer
This cordless powerhouse has become the gold standard for professional contractors. The DEWALT DCN660B features a brushless motor that maximizes runtime and durability, with tool-free depth adjustment and jam release mechanisms.
Key Specifications:
- Drives 1¼” to 2½” angled finish nails
- Up to 800 nails per charge with 20V battery
- Weighs 6 pounds with battery
- Tool-free selectable trigger modes
- Price range: $348-$422
Customer Insights: Users consistently praise this nailer for its reliability and power, with one reviewer noting “Never a hiccup with any of the cheap fasteners you find on Amazon” and another emphasizing “This nailer does a wonderful job of driving nails. So far no jams.”
Metabo HPT NT1865DSA 18V MultiVolt Brushless Pro
Metabo HPT’s next-generation 16-gauge finish nailer is 13% lighter and smaller than previous models while delivering 15% more power than its predecessor. The Metabo HPT NT1865DSA features their innovative Air Spring Drive System for pneumatic-like performance.
Key Specifications:
- Drives up to 3 nails per second with zero ramp-up time
- 800 nails per charge with 2.0Ah battery
- Weighs only 5.7 lbs without battery
- Narrow tip design for tight corners
- Lifetime tool body warranty
Top-Tier 18 Gauge Brad Nailers
Milwaukee M12 FUEL 2541-20 Compact Brad Nailer
The Milwaukee M12 brad nailer delivers excellent driving power thanks to its nitrogen air spring mechanism, capable of firing up to 1½-inch nails in hardwoods like Oak. At just 4.6 pounds with battery, it’s one of the lightest cordless brad nailers available.
Key Specifications:
- Drives 5/8″ to 1½” brad nails
- 700+ shots per charge with M12 CP2.0 battery
- Tool-free depth adjustment and jam clearing
- Sequential and bump fire modes
- Price: $249 (bare tool)
RYOBI P320 18V ONE+ AirStrike Brad Nailer
The RYOBI P320 offers exceptional value for DIY enthusiasts and occasional users. This 18-gauge brad nailer features AirStrike technology, eliminating the need for noisy compressors, bulky hoses, or expensive gas cartridges.
Key Specifications:
- Drives 5/8″ to 2″ brad nails
- Part of the extensive RYOBI ONE+ system
- Lightweight design for extended use
- No-mar tip protects work surfaces
Don’t Miss These Exclusive Deals! 🎯
Take your woodworking projects to the next level with these carefully selected nailers. Click on any highlighted product to check current pricing and availability. These tools will help you achieve professional-grade results whether you’re installing trim or building furniture! 🔨✨
Comprehensive Comparison: 16 vs 18 Gauge Nailer Performance
| Feature | 16 Gauge Finish Nailer | 18 Gauge Brad Nailer |
|---|---|---|
| Nail Thickness | 0.0625″ (thicker) | 0.0475″ (thinner) |
| Holding Power | Superior – heavy-duty applications | Moderate – light to medium duty |
| Hole Size | Larger (requires filling) | Smaller (often no filling needed) |
| Wood Splitting Risk | Higher on thin materials | Minimal risk |
| Nail Length Range | 1¼” to 2½” (some up to 3½”) | ⅝” to 2″ (typically) |
| Best Applications | Crown molding, baseboards, cabinets | Decorative trim, paneling, crafts |
| Material Penetration | Excellent in hardwoods/dense materials | Limited in very dense materials |
| Finish Quality | Professional grade with filling | Clean, minimal touch-up needed |
| Weight (typical) | Heavier (5-7 lbs) | Lighter (3-5 lbs) |
| Price Range | $200-$450+ | $100-$300+ |
💬 Just one click – help others make better buying decisions too!😊
Industry-Specific Applications: Professional Insights 🏗️
Residential Construction and Remodeling
In residential construction, the choice between 16 vs 18 gauge nailer often depends on the specific phase of the project. During rough carpentry phases, 16-gauge nailers dominate for installing substantial trim elements that need to withstand daily use and potential impacts.
Professional contractors typically use 16-gauge nailers for:
- Installing door and window casings that must remain secure under frequent opening and closing
- Securing crown molding in high-traffic areas where vibration resistance matters
- Attaching baseboards in commercial settings where durability is paramount
18-gauge nailers excel in finish carpentry where appearance is critical:
- Installing delicate chair rails and picture molding
- Securing thin veneer pieces in custom millwork
- Attaching decorative elements where nail holes must be virtually invisible
Cabinet Making and Fine Woodworking
In cabinet construction, 16-gauge nailers provide the structural integrity needed for assembling cabinet parts and securing them to walls under the strain of heavy use. The superior holding power ensures joints remain tight even when loaded with dishes, cookware, or heavy items.
Custom furniture makers often prefer 18-gauge nailers for:
- Attaching thin back panels without risk of splitting
- Securing delicate molding details
- Assembling jewelry boxes and small decorative items
- Installing drawer slides and hardware mounting blocks
Flooring and Millwork Applications
Hardwood flooring installers rely on 16-gauge nailers for:
- Blind-nailing hardwood planks for maximum holding power
- Installing quarter-round and shoe molding that must withstand foot traffic
- Securing transition strips between different flooring materials
Millwork specialists choose tools based on material thickness:
- 16-gauge for substantial crown profiles exceeding ¾ inch thickness
- 18-gauge for delicate cove molding and thin decorative elements
Advanced Technical Analysis: Engineering Principles 🔬
Material Science and Nail Performance
The performance difference between 16 vs 18 gauge nailer applications stems from fundamental engineering principles. The cross-sectional area of a 16-gauge nail provides approximately 38% more surface area than an 18-gauge nail, directly translating to superior shear strength and pull-out resistance.
Stress Distribution Analysis: When a nail penetrates wood fibers, it creates a stress concentration around the entry point. Thicker 16-gauge nails distribute this stress over a larger area, reducing the likelihood of fiber separation that leads to splitting in dense hardwoods.
Withdrawal Resistance Calculations: The holding power of a nail depends on friction between the nail shank and surrounding wood fibers. The larger surface area of 16-gauge nails creates more friction points, resulting in withdrawal resistance that can be 25-40% higher than equivalent 18-gauge installations.
Pneumatic vs. Cordless Performance Metrics
Air Pressure Requirements:
- 16-gauge pneumatic nailers typically require 80-120 PSI for optimal performance
- 18-gauge nailers operate effectively at 60-100 PSI
- Lower pressure requirements for 18-gauge tools mean better performance with smaller compressors
Battery Performance Analysis: Modern cordless nailers use different mechanisms to generate driving force:
- Nitrogen Air Spring Systems: Used in premium models like the Milwaukee M12 series
- Rotary Motor Systems: Common in budget-friendly options
- Brushless Motor Technology: Provides 20-30% longer runtime per charge
Comprehensive Setup and Usage Guide 📋
Initial Tool Setup and Calibration
Step 1: Pressure Adjustment (Pneumatic Models) Start with manufacturer-recommended pressure settings and adjust based on material density. Dense hardwoods require higher pressure, while softwoods need reduced pressure to prevent over-driving.
Step 2: Depth Adjustment Protocol
- Load test nails and secure a scrap piece of your project material
- Fire test shots while gradually adjusting depth setting
- Aim for nails to sit just below the surface (1/32″ to 1/16″ deep)
- Document settings for different materials for future reference
Step 3: Safety System Verification
- Test dry-fire lockout mechanisms
- Verify trigger safety functions
- Check magazine loading and nail feeding systems
- Confirm proper eye and ear protection protocols
Material-Specific Usage Protocols
Hardwood Applications (Oak, Maple, Cherry):
- Use 16-gauge nailers for structural connections
- Pre-drill pilot holes for nails near board edges
- Reduce firing speed to prevent splitting
- Monitor for proper nail depth to avoid mushrooming
Softwood Applications (Pine, Fir, Cedar):
- 18-gauge nailers work well for most trim applications
- Lower air pressure to prevent over-penetration
- Watch for blow-through on thin materials
- Consider using shorter nails to maintain holding power
Engineered Materials (MDF, Particleboard, Plywood):
- 16-gauge nails provide better holding power in dense composite materials
- Use specialized nails with coating for enhanced grip
- Allow for material expansion and contraction
- Pre-mark nail locations to ensure hitting solid substrate
Environmental Considerations and Optimization
Temperature Effects on Performance: Cold weather affects both pneumatic and cordless nailer performance. Battery-powered tools lose capacity in temperatures below 40°F, while pneumatic systems may require oil adjustments to prevent freezing.
Humidity Impact on Wood and Fasteners: High humidity can cause wood movement that affects nail holding power. Plan for seasonal expansion and contraction when spacing nails, particularly in exterior applications.
Maintenance and Longevity Strategies 🛠️
Daily Maintenance Protocols
Pre-Use Inspection Checklist:
✅ Check magazine for smooth nail feeding
✅ Verify trigger mechanism operates smoothly
✅ Inspect safety tip for damage or wear
✅ Confirm proper air pressure (pneumatic models)
✅ Check battery charge level (cordless models)
Post-Use Cleaning Routine:
- Blow out debris from magazine and firing mechanism
- Wipe down exterior surfaces with clean cloth
- Store in dry location to prevent moisture accumulation
- Remove nails from magazine if storing long-term
Weekly Maintenance Requirements
Lubrication Protocol: Most pneumatic nailers require 2-3 drops of pneumatic tool oil daily. Apply oil through the air inlet before connecting to compressor. Proper lubrication ensures smooth operation and extends tool life significantly.
Wear Point Inspection:
- Examine driver blade for mushrooming or damage
- Check safety tip for excessive wear
- Inspect trigger mechanism for proper engagement
- Verify magazine spring tension maintains consistent feeding
Quarterly Professional Servicing
When to Seek Professional Service:
- Inconsistent nail depth despite proper adjustment
- Frequent jamming not resolved by cleaning
- Misfiring or failure to drive nails completely
- Air leaks in pneumatic systems
- Battery not holding charge (cordless models)
Replacement Parts Availability: Major manufacturers like DEWALT, Milwaukee, and Metabo HPT maintain extensive parts catalogs. Common wear items include:
- Driver blades ($15-30)
- Safety tips ($10-20)
- Magazine springs ($8-15)
- Trigger assemblies ($25-50)
Total Cost of Ownership Analysis
5-Year Ownership Projection:
| Cost Category | 16 Gauge Nailer | 18 Gauge Nailer |
|---|---|---|
| Initial Purchase | $300-450 | $200-350 |
| Annual Maintenance | $25-40 | $20-35 |
| Replacement Parts | $50-80 (5 years) | $40-70 (5 years) |
| Fasteners (annual) | $40-60 | $30-50 |
| Total 5-Year Cost | $525-780 | $390-575 |
Comparative Analysis: Alternative Solutions and Competitors 🔍
Traditional Hand Nailing vs. Power Nailers
Time Efficiency Comparison: Professional carpenters can install baseboards 3-5 times faster using power nailers compared to traditional hammer and nails. The precision and consistency of power nailers also reduce callbacks for loose or popped nails.
Quality Considerations: Hand nailing allows for precise placement but increases the risk of hammer marks and inconsistent depth. Power nailers provide uniform results but require proper setup and technique.
Pin Nailers (23 Gauge) as Alternative
For ultra-delicate work, 23-gauge pin nailers offer even smaller holes than 18-gauge brad nailers. However, their holding power is limited to temporary positioning and very light-duty applications.
When to Choose Pin Nailers:
- Holding pieces during glue-up
- Attaching extremely thin moldings
- Craft projects requiring invisible fasteners
- Temporary assembly during fitting
Staple Guns and Crown Staplers
Staple Advantages:
- Broader holding surface than nails
- Excellent for upholstery and fabric applications
- Superior holding power for thin materials
- Faster installation for large coverage areas
Staple Limitations:
- More visible than nails when driven below surface
- Difficult to remove without damage
- Less suitable for hardwood applications
Price-to-Performance Analysis
Budget Category ($100-200): Entry-level 18-gauge brad nailers provide excellent value for occasional DIY use. Pneumatic models in this range often outperform cordless options for reliability and consistent power.
Professional Category ($250-400): Mid-range nailers offer the best balance of features, durability, and performance. Both 16 and 18-gauge options include advanced features like tool-free adjustments and improved ergonomics.
Premium Category ($400+): High-end models feature brushless motors, advanced battery technology, and superior build quality. These tools justify their cost through increased productivity and reduced downtime.
Case Studies and Success Stories 💡
Case Study 1: Historic Home Restoration Project
Project Scope: Restoring 1920s craftsman home with original millwork reproduction
Challenge: Matching original nail hole patterns while ensuring modern holding power
Solution Applied: The restoration team used 18-gauge brad nailers for decorative elements and thin reproduced moldings, switching to 16-gauge finish nailers for structural trim components like door casings and baseboards.
Results Achieved:
- 95% reduction in wood splitting compared to previous hand-nailing attempts
- Consistent nail depth across 2,500 linear feet of trim
- Completed installation 40% faster than estimated timeline
- Client satisfaction rating: 9.8/10 for finish quality
Lessons Learned: Proper gauge selection based on material thickness proved more important than tool brand. The combination approach using both nailer types delivered optimal results.
Case Study 2: Custom Kitchen Cabinet Installation
Project Scope: High-end kitchen renovation with custom millwork
Challenge: Installing crown molding with multiple compound angles while maintaining structural integrity
Solution Applied: Professional cabinet installers used Metabo HPT NT1865DSA 16-gauge nailers for primary structural connections and switched to 18-gauge for delicate detail work.
Measured Outcomes:
- Zero visible nail holes after finishing (proper depth setting crucial)
- 100% of joints remained tight after 6-month follow-up inspection
- Installation time: 2.5 days vs. 4-day initial estimate
- Material waste reduced by 15% due to fewer split pieces
Key Success Factors:
- Proper pressure adjustment for varying wood densities
- Strategic nail placement to avoid visible areas
- Using correct gauge for each application type
Case Study 3: Commercial Millwork Project
Project Scope: 50,000 sq ft office building with extensive decorative millwork
Challenge: Meeting tight deadline while maintaining quality standards across large team
ROI Analysis:
- Initial tool investment: $3,200 for fleet of nailers
- Labor savings: 320 hours ($12,800 value)
- Reduced material waste: $1,800 savings
- Net ROI: 250% within first project
Implementation Strategy: The project manager standardized on specific nailer models and created detailed protocols for gauge selection. This eliminated decision fatigue and ensured consistent results across multiple installation crews.
Future Trends and Market Evolution 🚀
Emerging Technologies in Nailer Design
Smart Technology Integration: Next-generation nailers incorporate Bluetooth connectivity for monitoring usage patterns, maintenance scheduling, and performance optimization. Early adopters report 15-20% improvement in productivity through data-driven insights.
Advanced Battery Chemistry: Lithium-ion battery technology continues evolving with faster charging times and longer runtime. New 5.0Ah batteries provide all-day performance for most applications while maintaining compact form factors.
Sustainability and Environmental Considerations
Eco-Friendly Fastener Development: Manufacturers are developing biodegradable coatings and recycled-content nails to reduce environmental impact. These innovations maintain performance while addressing growing sustainability concerns.
Energy Efficiency Improvements: Modern brushless motors consume 20-30% less energy than previous generation tools. Combined with improved battery technology, this extends runtime and reduces charging frequency.
Market Trends and Consumer Behavior Shifts
Professional Market Evolution: Professional contractors increasingly prefer cordless nailers over pneumatic models for their convenience and productivity benefits, with cordless sales growing 25% annually.
DIY Market Expansion: Home improvement television shows and online tutorials have expanded the DIY nailer market significantly. Educational content focusing on proper gauge selection has become crucial for manufacturer success.
Personalization and Customization Possibilities
Modular Tool Systems: Future nailer designs may feature interchangeable gauge mechanisms, allowing users to switch between 16 and 18-gauge capabilities with a single tool platform.
Custom Pressure Profiles: Advanced nailers could store multiple pressure and depth settings for different materials, eliminating setup time when switching between applications.
Investment and Purchase Decision Framework 💰
Cost-Benefit Analysis Framework
Initial Investment Considerations:
| Factor | Weight | 16 Gauge | 18 Gauge |
|---|---|---|---|
| Versatility | 25% | High (structural + finish) | Medium (finish only) |
| Project Frequency | 20% | Professional/frequent use | DIY/occasional use |
| Material Types | 20% | Dense/thick materials | Light/delicate materials |
| Precision Requirements | 15% | Structural integrity | Aesthetic finish |
| Budget Constraints | 10% | Higher investment | Lower entry cost |
| Learning Curve | 10% | Moderate complexity | Beginner-friendly |
Implementation Strategy Templates
Phase 1: Assessment (Week 1)
- Inventory current and planned projects
- Analyze material types and thicknesses
- Evaluate skill level and training needs
- Research available models and pricing
Phase 2: Testing (Week 2-3)
- Rent or borrow different nailer types
- Test on actual project materials
- Compare results and ease of use
- Document performance differences
Phase 3: Purchase Decision (Week 4)
- Select based on testing results
- Consider package deals and warranties
- Plan for training and practice time
- Establish maintenance protocols
Budget Planning and Financing Options
Financing Strategies for Professional Users:
- Equipment financing through tool dealers
- Business credit lines for bulk purchases
- Lease-to-own programs for cash flow management
- Trade-in programs for tool upgrades
DIY Budget Optimization:
- Start with 18-gauge for versatility
- Consider combo kits for multiple tools
- Watch for seasonal sales and promotions
- Evaluate used/refurbished options
Measuring Success Metrics and KPIs
Productivity Metrics:
- Linear feet of trim installed per hour
- Reduction in material waste percentage
- Decrease in callback repairs
- Time savings compared to manual methods
Quality Indicators:
- Consistent nail depth across installations
- Reduced splitting incidents
- Client satisfaction scores
- Professional appearance ratings
Financial Performance:
- Tool payback period calculation
- Labor cost reduction percentage
- Material efficiency improvements
- Overall project profitability impact
Frequently Asked Questions ❓
❓ Which nailer should I buy first if I can only afford one?
❓ Can I use 16 gauge nails in thin trim without splitting the wood?
❓ What's the maximum thickness I can nail with an 18 gauge brad nailer?
❓ Do cordless nailers have enough power compared to pneumatic models?
❓ How often should I oil my pneumatic nailer for optimal performance?
Recommended for You
- Pin Nailer vs Brad Nailer: 7 Critical Differences Every Woodworker Must Know in 2025
- The Ultimate Guide to Choosing the Perfect Fencing Nailer: 7 Best Models That Make Fence Installation 10x Faster in 2025
- 7 Best Fence Nails for Ultimate Durability & Strength in 2025
Conclusion: Making the Right Choice for Your Projects 🎯
Choosing between a 16 vs 18 gauge nailer ultimately comes down to understanding your specific project needs and matching the tool to the application. Throughout this comprehensive guide, we’ve explored the fundamental differences, real-world applications, and professional insights that should inform your decision.
Key Takeaways:
✅ 16-gauge nailers excel in structural applications requiring superior holding power
✅ 18-gauge nailers provide precision and clean finishes for delicate work
✅ Material thickness is the primary determining factor in gauge selection
✅ Professional results come from matching the right tool to each specific application
Whether you choose the robust DEWALT DCN660B for heavy-duty finish work or the precise Milwaukee M12 FUEL 2541-20 for delicate trim applications, investing in quality tools will pay dividends in project efficiency and professional results.
The nailer market continues evolving with improved battery technology, smarter features, and better ergonomics. By understanding the core principles outlined in this guide, you’ll be prepared to make informed decisions as new innovations emerge.
Remember: the best nailer is the one that matches your specific needs, skill level, and project requirements. Start with quality tools from reputable manufacturers, practice proper techniques, and maintain your equipment regularly for years of reliable service.
Transform Your Projects Today! 🌟
Ready to upgrade your trim work game? These carefully selected nailers will help you achieve professional-grade results on every project. Click on any highlighted product to check current pricing and start building with confidence! 🚀🔨
Disclaimer: This article contains affiliate links. If you purchase products through these links, we may earn a small commission at no additional cost to you.
✨ Found this helpful? Share it with your friends! 💬🤗