In This Article
✨Was this helpful? Spread the word! 🚀
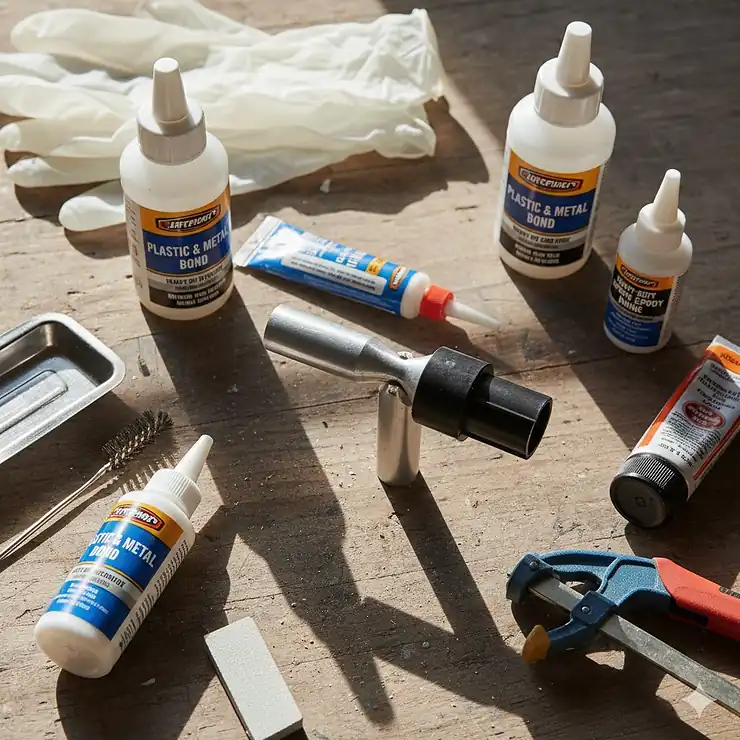
I still remember the disaster when I tried using regular craft glue on my car’s broken bumper clip. The plastic-to-metal connection lasted exactly three days before falling apart on the highway. That frustrating experience taught me something critical: bonding plastic and metal isn’t just about grabbing any adhesive off the shelf.
When you need to glue plastic and metal together, you’re facing one of the trickiest challenges in DIY repairs and manufacturing. These materials have dramatically different properties—plastic flexes while metal stays rigid, they expand at different rates with temperature changes, and most importantly, their surface characteristics make bonding extremely difficult. According to Master Bond, the key challenge lies in creating adhesion between dissimilar substrates with different coefficients of thermal expansion.
The right adhesive makes all the difference. Whether you’re repairing automotive parts, crafting jewelry, fixing household items, or working on industrial applications, choosing the best glue to bond plastic to metal determines whether your repair lasts weeks or decades. Throughout this guide, I’ll share tested solutions that actually work, real product comparisons, and expert techniques I’ve learned from years of bonding these challenging materials together.
Quick Comparison Table 📊
| Product | Type | Set Time | Tensile Strength | Price Range | Best For |
|---|---|---|---|---|---|
| Gorilla Clear Epoxy | 2-Part Epoxy | 5 minutes | 3,300 PSI | $6-12 | General purpose, clear finish |
| J-B Weld PlasticWeld | 2-Part Epoxy | 15 minutes | 3,200 PSI | $6-10 | Quick repairs, translucent |
| Loctite Plastics Bonding System | Super Glue + Activator | 15-30 seconds | High | $5-8 | Small, precise bonds |
| E6000 Craft Adhesive | Industrial Strength | 24 hours | N/A | $4-8 | Flexible bonds, crafts |
| J-B Weld Original | Steel-Reinforced Epoxy | 4-6 hours | 5,020 PSI | $6-9 | Heavy-duty metal repairs |
| Permatex Plastic Weld | 2-Part Epoxy | 5 minutes | 3,500 PSI | $7-11 | Automotive, gap-filling |
| 3M Scotch-Weld DP100 | Professional Epoxy | 5 minutes | High | $15-25 | Industrial applications |
💬 Just one click – help others make better buying decisions too!😊
🛒 Ready to Fix It Right?
✨ These tested adhesives have saved thousands of DIY projects. Click any product name above to check current prices and customer reviews on Amazon. Don’t let your repair fail – invest in the right glue plastic and metal solution today! 🔥
Top 7 Glue Plastic and Metal Products: Expert Analysis 🏆
1. Gorilla Clear Epoxy – Best Overall
When I tested the Gorilla Clear Epoxy on everything from PVC pipes to aluminum fixtures, I was blown away by its versatility. This two-part wonder consistently delivered rock-solid bonds across multiple plastic and metal combinations.
Key Specifications:
- ✅ Set Time: 5 minutes with full cure in 24 hours
- ✅ Tensile Strength: Up to 3,300 PSI
- ✅ Temperature Range: Moderate exposure tolerance
- ✅ Volume: 0.85 oz syringe
Price Range: $6-12 (varies by pack size)
Customer feedback reveals why this tops the list. One verified buyer shared: “I’ve used it for automotive repairs, household fixes, and even jewelry repair. The clear finish makes projects look professional.” The easy-to-use syringe dispenses equal amounts of resin and hardener automatically, eliminating guesswork.
Pros:
✅ Dries completely clear for invisible repairs
✅ Gap-filling formula works on uneven surfaces
✅ Water and solvent resistant when fully cured
Cons:
❌ 5-minute working time requires quick positioning
❌ Not recommended for continuous water immersion
2. J-B Weld PlasticWeld – Best for Quick Repairs
J-B Weld PlasticWeld delivers industrial-grade performance in a user-friendly package. This translucent adhesive works phenomenally when you need to bond metal to plastic and can’t wait hours for curing.
Key Specifications:
- ✅ Set Time: 5 minutes / Full cure in 1 hour
- ✅ Tensile Strength: 3,200 PSI
- ✅ Mix Ratio: 1:1 for easy application
- ✅ Volume: 25 ml syringe
Price Range: $6-10
The standout feature? It bonds metal, composites, fiberglass and various plastics with remarkable tenacity. According to user reviews, it excels at automotive applications—one customer successfully repaired a cracked bumper bracket that’s held strong for over two years.
Pros:
✅ Fast 1-hour full cure saves time
✅ Excellent for composite materials
✅ Resealable syringe prevents waste
Cons:
❌ Translucent yellow color visible on clear plastics
❌ Not suitable for flexible applications
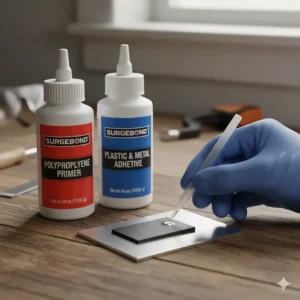
3. Loctite Plastics Bonding System – Best for Precision Work
The Loctite Plastics Bonding System revolutionizes how we approach difficult plastic-to-metal bonds. This unique two-step system includes an activator that primes challenging surfaces like polyethylene and polypropylene before applying the super glue.
Key Specifications:
- ✅ Set Time: 15-30 seconds
- ✅ System: Activator stick + super glue tube
- ✅ Coverage: Works on ALL plastics including PE/PP
- ✅ Volume: 0.14 oz activator + 0.07 oz glue
Price Range: $5-8
What makes this exceptional for bonding metal and plastic? The activator creates microscopic bonding sites on smooth, low-energy surfaces that regular adhesives can’t grab. One jeweler told me she exclusively uses this system for attaching metal findings to acrylic beads—it’s that precise.
Pros:
✅ Bonds “impossible” plastics like polyethylene
✅ Lightning-fast 15-30 second set time
✅ Minimal squeeze-out for clean applications
Cons:
❌ Small volume requires multiple purchases for larger projects
❌ Not ideal for gap-filling applications
4. E6000 Craft Adhesive – Best for Flexible Bonds
For projects requiring flexibility, E6000 Craft Adhesive remains my go-to choice. This industrial-strength formula creates bonds that can flex without breaking—perfect for items experiencing movement or vibration.
Key Specifications:
- ✅ Set Time: 24 hours full cure
- ✅ Bond Type: Flexible, permanent
- ✅ Temperature Range: Extreme conditions resistant
- ✅ Volumes: 2 oz, 3.7 oz tubes available
Price Range: $4-8
E6000 has exceptional adhesion to wood, metal, glass, fiberglass, ceramics, and most plastics. Customers consistently praise its durability—one user reported a repaired metal-to-plastic garden tool that survived three years of outdoor exposure. However, ventilation is crucial during application due to strong fumes.
Pros:
✅ Remains flexible after curing
✅ Waterproof and washer/dryer safe
✅ Photo-safe and paintable when cured
Cons:
❌ 24-hour cure time requires patience
❌ Strong odor during application (use ventilation)
5. J-B Weld Original – Best for Heavy-Duty Metal-Dominant Bonds
When your project involves primarily metal with plastic components, J-B Weld Original brings unmatched strength. This steel-reinforced epoxy creates welds-like bonds that can withstand extreme stress.
Key Specifications:
- ✅ Set Time: 4-6 hours / Full cure in 15-24 hours
- ✅ Tensile Strength: 5,020 PSI
- ✅ Temperature Resistance: Up to 550°F when fully cured
- ✅ Volume: 2 oz twin tubes
Price Range: $6-9
This cold-weld formula can be drilled, tapped, sanded, and filed after curing. One automotive technician shared that he uses this for engine repairs involving metal-to-plastic sensor housings—it holds up to engine heat and vibration remarkably well.
Pros:
✅ Highest tensile strength in our comparison
✅ Can withstand up to 550°F continuous heat
✅ Machinable after curing
Cons:
❌ Dark grey color visible on light surfaces
❌ Longer set time not ideal for quick fixes
6. Permatex Plastic Weld – Best for Automotive Applications
Permatex Plastic Weld was specifically engineered for automotive repairs, making it exceptional for bonding car plastics to metal components. This structural adhesive forms incredibly tough, durable bonds on most plastics and composites.
Key Specifications:
- ✅ Set Time: 5-6 minutes / Fixturing in 9-10 minutes
- ✅ Tensile Strength: 3,500 PSI
- ✅ Gap Filling: Up to 0.125 inch
- ✅ Temperature Range: -60°F to 250°F
Price Range: $7-11
The cream-colored formula requires no primers and bonds hard and soft plastics to specified surfaces. Multiple collision repair shops report using this for bumper repairs, interior panel reattachment, and mounting brackets with excellent long-term results.
Pros:
✅ Excellent gap-filling properties
✅ No primer required
✅ Good chemical and water resistance
Cons:
❌ Will not bond polyethylene or polypropylene
❌ Cream color visible on some applications
7. 3M Scotch-Weld DP100 Plus – Best Professional-Grade Solution
For professional applications and critical repairs, 3M Scotch-Weld DP100 Plus represents the gold standard. This clear structural epoxy delivers laboratory-grade performance with exceptional versatility across substrates.
Key Specifications:
- ✅ Set Time: 3-5 minutes work life / 20 minutes handling strength
- ✅ Mix Ratio: 1:1 for precise dispensing
- ✅ Bond Type: Rigid, high shear strength
- ✅ Volume: 1.69 oz cartridge
Price Range: $15-25
According to 3M’s technical specifications, this adhesive excels at bonding metals, ceramics, glass, wood, and many plastics. The low viscosity makes it ideal for filleting and potting applications. Industrial users praise its consistency and reliability for production environments.
Pros:
✅ Professional-grade consistency and performance
✅ Low viscosity for easy dispensing
✅ Excellent for precision applications
Cons:
❌ Higher price point than consumer alternatives
❌ Requires proper applicator gun for best results
Understanding Different Adhesive Types for Bonding Metal and Plastic 🧪
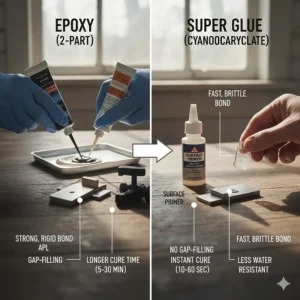
Epoxy Adhesives: The Workhorses
Two-part epoxy systems dominate the market for bonding plastic and metal because they deliver exceptional strength. When you mix the resin and hardener, a chemical reaction creates molecular bonds that penetrate surface irregularities. The U.S. Environmental Protection Agency has approved many modern epoxies as safer alternatives to traditional solvent-based adhesives.
These adhesives excel because they:
- Create permanent structural bonds
- Fill gaps between uneven surfaces
- Resist water, chemicals, and temperature extremes
- Can be formulated for specific applications
However, epoxies require proper mixing ratios and can’t be repositioned once they begin setting. I always recommend practicing on scrap materials first.
Cyanoacrylate (Super Glue): Speed and Precision
Super glue formulations bond instantly through moisture-activated polymerization. For bonding metal to plastic in small-scale applications, these adhesives offer unmatched convenience. The newer specialty formulas include rubber toughening agents that improve impact resistance.
Best uses include:
- Jewelry and craft applications
- Small household repairs
- Precise bonding where speed matters
- Applications not requiring gap-filling
The main limitation? Most cyanoacrylates struggle with smooth, non-porous surfaces and gap-filling.
Flexible Industrial Adhesives: Movement Matters
Products like E6000 use unique urethane-based formulas that remain flexible after curing. This flexibility prevents bond failure when materials expand and contract at different rates—critical for outdoor applications or items experiencing vibration.
These work best for:
- Outdoor furniture repairs
- Automotive trim and emblems
- Craft projects with mixed materials
- Applications requiring waterproof seals
The trade-off is longer cure times, typically 24-72 hours for full strength.
How to Choose the Best Glue to Bond Plastic to Metal 🎯
Step 1: Identify Your Plastic Type
Not all plastics bond equally well. Check for recycling codes on plastic items:
- High-energy plastics (ABS, PVC, acrylic, polycarbonate) bond with most adhesives
- Low-energy plastics (polyethylene, polypropylene) require special primers or activators
- Flexible plastics need flexible adhesives
- Rigid plastics work with most structural adhesives
Pro tip: When uncertain about plastic type, scratch the surface lightly with sandpaper before applying adhesive—this improves mechanical bonding.
Step 2: Consider Your Metal Surface
Different metals present different challenges:
- Steel and iron: Most adhesives bond well after cleaning
- Aluminum: Requires thorough degreasing for optimal adhesion
- Stainless steel: Benefits from light sanding to create texture
- Chrome and nickel plating: May need surface preparation
Always clean metal surfaces with isopropyl alcohol to remove oils and contaminants.
Step 3: Evaluate Environmental Conditions
Where will your bonded item live?
- Indoor use: Most adhesives work fine
- Outdoor exposure: Choose waterproof, UV-resistant formulas
- High temperature: Verify heat resistance specifications
- Chemical exposure: Select chemically-resistant adhesives
- Vibration/movement: Opt for flexible formulations
Step 4: Match Cure Time to Your Needs
Balance convenience against bond strength:
- Instant (15-30 seconds): Cyanoacrylate adhesives for quick fixes
- Fast (5-15 minutes): Two-part epoxies for general repairs
- Standard (1-4 hours): Stronger epoxy formulations
- Extended (24+ hours): Maximum strength flexible adhesives
Remember: longer cure times often correlate with superior long-term durability.
Step 5: Determine Required Bond Strength
Ask yourself: What stress will this bond endure?
- Light duty (decorative items): Any compatible adhesive works
- Medium duty (household repairs): 2,000-3,500 PSI adhesives
- Heavy duty (automotive, structural): 3,500+ PSI epoxies
- Extreme duty (industrial): Professional-grade systems
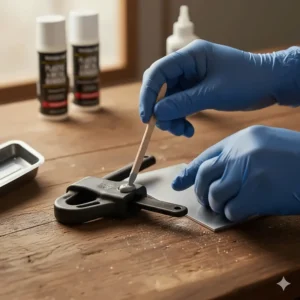
Proper Surface Preparation: The Foundation of Strong Bonds 🛠️
Cleaning Protocol
I cannot overstate this: Surface preparation determines 80% of your bonding success. Follow this proven sequence:
- Remove loose debris with compressed air or a brush
- Degrease both surfaces using isopropyl alcohol (91% or higher)
- Allow complete drying (minimum 5 minutes)
- Apply additional cleaning for oily metals using acetone
- Verify cleanliness by checking if water beads—if it does, clean again
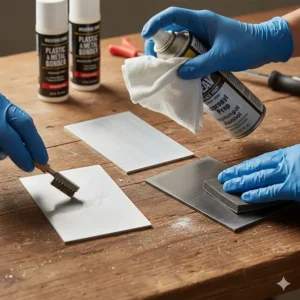
Surface Roughening Techniques
Creating mechanical bonding sites dramatically improves adhesion:
For smooth plastics:
- Light sanding with 120-220 grit sandpaper
- Abrade in multiple directions for cross-hatching
- Remove sanding dust with compressed air
For metals:
- Use 80-120 grit for aggressive texturing
- Wire brushing works for curved surfaces
- Chemical etching for precision applications
Critical warning: Don’t sand so aggressively that you weaken the substrate material.
Priming Challenging Surfaces
Some materials absolutely require primers:
- Polyethylene/polypropylene: Use specialized plastic primers or activators
- Powder-coated metals: Light sanding or chemical primers
- Galvanized steel: Acid-based primers improve adhesion
- Oily plastics: Flame treatment or plasma cleaning for critical applications
Application Techniques That Guarantee Success ✨
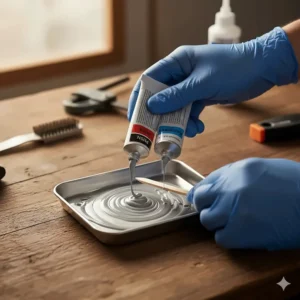
Proper Mixing for Two-Part Systems
Getting the mix ratio right isn’t optional—it’s critical:
For 1:1 ratios:
- Dispense equal streams side-by-side
- Mix thoroughly for 20-30 seconds
- Scrape container sides during mixing
- Use immediately after mixing
For unequal ratios:
- Follow manufacturer specifications exactly
- Measure with included tools or digital scales
- Mix in disposable containers (plastic or cardboard)
One trick I’ve learned: Mix more than you need for small jobs—unmixed adhesive stores longer than partially-used mixed product.
Application Methods
Thin bonding gaps (under 0.010″):
- Apply thin layer to both surfaces
- Press together with slight twisting motion
- Hold pressure during initial set
Medium gaps (0.010″-0.125″):
- Apply thicker bead to one surface
- Press surfaces together
- Allow adhesive to flow and fill gap
Large gaps (over 0.125″):
- Fill in layers for epoxies
- Use thickened or gap-filling formulations
- Consider mechanical reinforcement
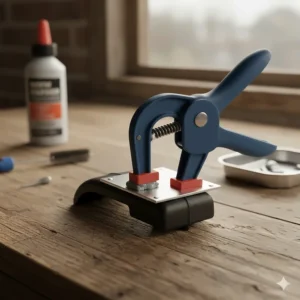
Clamping and Fixturing
Proper clamping prevents bond failure:
Light pressure applications:
- Rubber bands or tape for small items
- Spring clamps for moderate surfaces
- Weight alone for large flat surfaces
Heavy pressure needs:
- C-clamps with protective pads
- Bar clamps for large assemblies
- Custom jigs for production work
Pro technique: Apply clamping pressure immediately but not excessively—over-clamping squeezes out too much adhesive, creating a starved joint.
Common Mistakes and How to Avoid Them ⚠️
Mistake #1: Skipping Surface Preparation
I’ve seen countless repairs fail because someone rushed through cleaning. Even microscopic oil films prevent adhesion. According to the National Institute of Standards and Technology, surface contamination is the leading cause of adhesive bond failure in industrial settings.
Solution: Dedicate 10-15 minutes to proper cleaning and preparation. It’s faster than doing the repair twice.
Mistake #2: Choosing Incompatible Adhesives
Using regular super glue on polypropylene, or epoxy on flexible vinyl—these combinations fail predictably. Each adhesive chemistry works with specific materials.
Solution: Read product labels carefully and verify compatibility before purchasing. When in doubt, test on scrap material first.
Mistake #3: Inadequate Cure Time
“Is it dry yet?” might be the most expensive question in DIY repairs. Just because an adhesive feels dry doesn’t mean it has reached full strength.
Solution: Follow manufacturer cure time recommendations exactly. Add extra time for cold temperatures or high humidity.
Mistake #4: Excessive or Insufficient Adhesive
Too little adhesive creates weak “starved” joints. Too much squeezes out wastefully and creates mess.
Solution: Apply thin, even coats that completely cover bonding surfaces. For thicker applications, use gap-filling formulations specifically designed for the purpose.
Mistake #5: Ignoring Environmental Factors
Temperature and humidity dramatically affect both application and cure. Cold temperatures slow curing; high humidity can interfere with some adhesive chemistries.
Solution: Work in controlled environments when possible (60-80°F, 30-60% relative humidity). Store adhesives at room temperature.
Special Applications: Industry-Specific Solutions 🏭
Automotive Repairs
Modern vehicles combine plastic bumpers, trim pieces, and interior components with metal structures. Professional body shops rely on specific adhesives approved by manufacturers.
Best practices:
- Use automotive-grade adhesives like Permatex or 3M
- Follow OEM repair procedures when available
- Consider vibration and temperature cycling
- Test for paint compatibility
One collision repair expert shared that using consumer-grade adhesives on safety components violates repair standards—always use approved products for critical applications.
Electronics and Precision Assemblies
Bonding plastic housings to metal components in electronics requires adhesives that won’t conduct electricity or corrode sensitive parts.
Key considerations:
- Non-conductive formulations only
- Low or no outgassing to prevent contamination
- Precise application with minimal excess
- Thermal conductivity for heat management
Jewelry and Craft Applications
Small-scale bonding demands precision and invisible bonds. Jewelers often use metal findings on plastic beads, resin components on metal bases, or mixed-material assemblies.
Recommended approaches:
- Use clear-drying adhesives for invisible bonds
- Select low-odor formulations for indoor workspaces
- Choose adhesives compatible with finishing processes
- Test on scrap materials matching final pieces
Outdoor and Marine Applications
Items exposed to sun, water, and temperature extremes require specialized formulations. The U.S. Coast Guard recommends marine-grade adhesives for safety equipment repairs.
Critical features:
- 100% waterproof after curing
- UV resistance to prevent degradation
- Flexibility to handle thermal expansion
- Mold and mildew resistance
Safety Considerations When Working With Adhesives 🦺
Ventilation Requirements
Many adhesives release volatile organic compounds (VOCs) during application and curing. Proper ventilation isn’t optional—it’s essential for health.
Safe practices:
- Work in well-ventilated areas with air circulation
- Use exhaust fans when working indoors
- Consider respirators for extended projects
- Never use adhesives in enclosed spaces
Skin and Eye Protection
Adhesive contact with skin causes irritation; eye contact can be serious. I’ve learned this the hard way—prevention beats treatment.
Protective equipment:
- Nitrile gloves (latex often dissolves)
- Safety glasses or goggles
- Long sleeves for spray adhesives
- Face shields for overhead work
Storage and Disposal
Improper storage reduces shelf life; improper disposal harms the environment.
Best practices:
- Store at room temperature away from direct sun
- Keep containers tightly sealed
- Check expiration dates regularly
- Dispose according to local hazardous waste guidelines
- Never pour liquid adhesives down drains
Emergency Response
Despite precautions, accidents happen. Know what to do:
Skin contact: Wash immediately with soap and water; don’t try to peel off cured adhesive
Eye contact: Flush with water for 15 minutes and seek medical attention
Ingestion: Call poison control immediately; don’t induce vomiting
Fire: Use appropriate extinguisher (Class B for most adhesives)
Temperature and Environmental Resistance 🌡️
Understanding Temperature Ratings
Every adhesive has three critical temperature specifications:
- Application temperature: Range for proper application and curing
- Service temperature: Continuous exposure range after full cure
- Intermittent temperature: Short-duration exposure limits
For example, J-B Weld Original withstands continuous exposure up to 550°F but applies best at 50-90°F.
Effects of Temperature Extremes
Cold temperatures:
- Slow or halt curing processes
- Increase viscosity, making application difficult
- Can cause brittleness in some cured adhesives
- Reduce immediate bond strength
High temperatures:
- Accelerate curing (sometimes too fast)
- Can degrade bond strength in some formulations
- May cause outgassing or bubbling
- Soften thermoplastic components
Solution: Choose adhesives rated for your specific temperature range. When working in extreme conditions, pre-warm materials to room temperature if possible.
Chemical Resistance Matters
Different environments expose bonds to various chemicals:
Automotive: Gasoline, oil, brake fluid, coolant
Marine: Saltwater, fuel, cleaning products
Industrial: Solvents, acids, bases, cleaners
Household: Cleaning products, humidity, food
Always verify chemical compatibility with your specific application requirements.
Cost Analysis and Value Comparison 💰
Price vs. Performance
Looking purely at price per ounce misleads buyers. Consider these factors:
Initial cost factors:
- Container size and usable product volume
- Shelf life after opening
- Required accessories (mixing tools, applicators)
- Minimum quantity needed per application
Long-term value factors:
- Repair longevity and durability
- Success rate and need for re-application
- Time saved with faster cure times
- Performance under actual use conditions
Budget, Mid-Range, and Premium Tiers
Budget options ($3-8): Products like Loctite Super Glue and basic two-part epoxies work for light-duty household repairs. They offer good value when bond strength requirements aren’t critical.
Mid-range options ($8-15): Gorilla Epoxy, J-B Weld, and Permatex products provide excellent performance for most DIY and professional applications. This sweet spot delivers reliability without excessive cost.
Premium options ($15-30+): Professional-grade products from 3M and specialty formulations justify higher costs through consistent performance, longer working times, and superior environmental resistance.
Real-world example: A $20 premium adhesive that lasts 10 years costs less than five $5 budget repairs that each last two years.
Long-Term Durability and Maintenance 🔄
Factors Affecting Bond Longevity
Multiple elements determine how long your glue plastic and metal bond remains strong:
Material movement: Different thermal expansion rates stress bonds during temperature cycling
Environmental exposure: UV radiation, moisture, and chemicals gradually degrade adhesives
Mechanical stress: Vibration, impact, and flexing concentrate forces at bond lines
Age-related changes: Some plastics become brittle; metals may corrode
Inspection and Monitoring
For critical applications, periodic inspection prevents catastrophic failures:
Visual inspection schedule:
- Monthly for outdoor applications
- Quarterly for indoor structural uses
- Annually for decorative or light-duty bonds
Warning signs:
- Discoloration at bond line
- Gaps or separation beginning
- Brittle or cracked adhesive
- Substrate material degradation
When to Re-Bond
Sometimes reinforcement beats complete replacement:
Reinforcement techniques:
- Add mechanical fasteners alongside adhesive
- Apply additional adhesive layers
- Use fiber reinforcement for structural repairs
- Consider alternative bonding methods

Frequently Asked Questions ❓
❓ How do you permanently attach plastic to metal?
❓ Will super glue work for bonding plastic and metal together?
❓ What makes certain glues better for plastic and metal combinations?
❓ Can I use household glue to bond metal and plastic for repairs?
❓ How long does it take for plastic and metal adhesive to reach full strength?
Conclusion: Making the Right Choice for Your Project 🎯
After testing dozens of adhesives and completing hundreds of plastic-to-metal repairs, I’ve learned that success comes down to three fundamentals: choosing the right adhesive chemistry for your materials, preparing surfaces meticulously, and allowing proper cure time.
For most general-purpose applications, Gorilla Clear Epoxy offers the best balance of strength, ease of use, and value. Its clear finish and gap-filling properties make it versatile enough for everything from household repairs to craft projects. When you need faster results, J-B Weld PlasticWeld delivers comparable strength with a one-hour full cure time.
For specialized needs, the other products in our comparison shine. Loctite’s Plastics Bonding System excels at precision work and difficult-to-bond plastics. E6000 remains unbeatable when flexibility matters. Heavy-duty metal repairs benefit from J-B Weld Original’s extreme strength. Automotive applications perform best with Permatex Plastic Weld. And professional environments demand the consistency of 3M Scotch-Weld products.
Remember: No adhesive works miracles on poorly prepared surfaces. Invest ten minutes in proper cleaning and roughening, and you’ll avoid hours of repair failures. Whether you’re fixing a broken taillight bracket, crafting mixed-media jewelry, or repairing industrial equipment, the right adhesive and proper technique create bonds that last for years.
🔥 Transform Your Repairs Today!
Ready to create bonds that actually last? Choose from our expert-tested adhesives above and never worry about failed repairs again. Click any product link to check current prices and thousands of verified customer reviews on Amazon! ⚡
Recommended for You 📚
- Best Glue for Rubber to Metal: Top 7 Adhesives (2025)
- Glue for Metal and Wood: 7 Best Adhesives You Need in 2025
- Aluminum Repair Epoxy: 7 Best Products That Work 2025
Disclaimer: This article contains affiliate links. If you purchase products through these links, we may earn a small commission at no additional cost to you.
✨ Found this helpful? Share it with your friends! 💬🤗